68
Installation Considerations
Energy recovery cassettes are incorporated
within the design of packaged units,
packaged air handlers and energy recovery
ventilators. In each case, it is recommended
that the following considerations be
addressed:
Accessibility
The cassette and all its operative parts; i.e.:
motor, belt, pulley, bearings, seals and
energy transfer segments must be accessible
for service and maintenance. This design
requires that adequate clearance be provided
outside the enclosure. Where cassettes are
permanently installed in a cabinet, access to
both sides of the cassette must be provided.
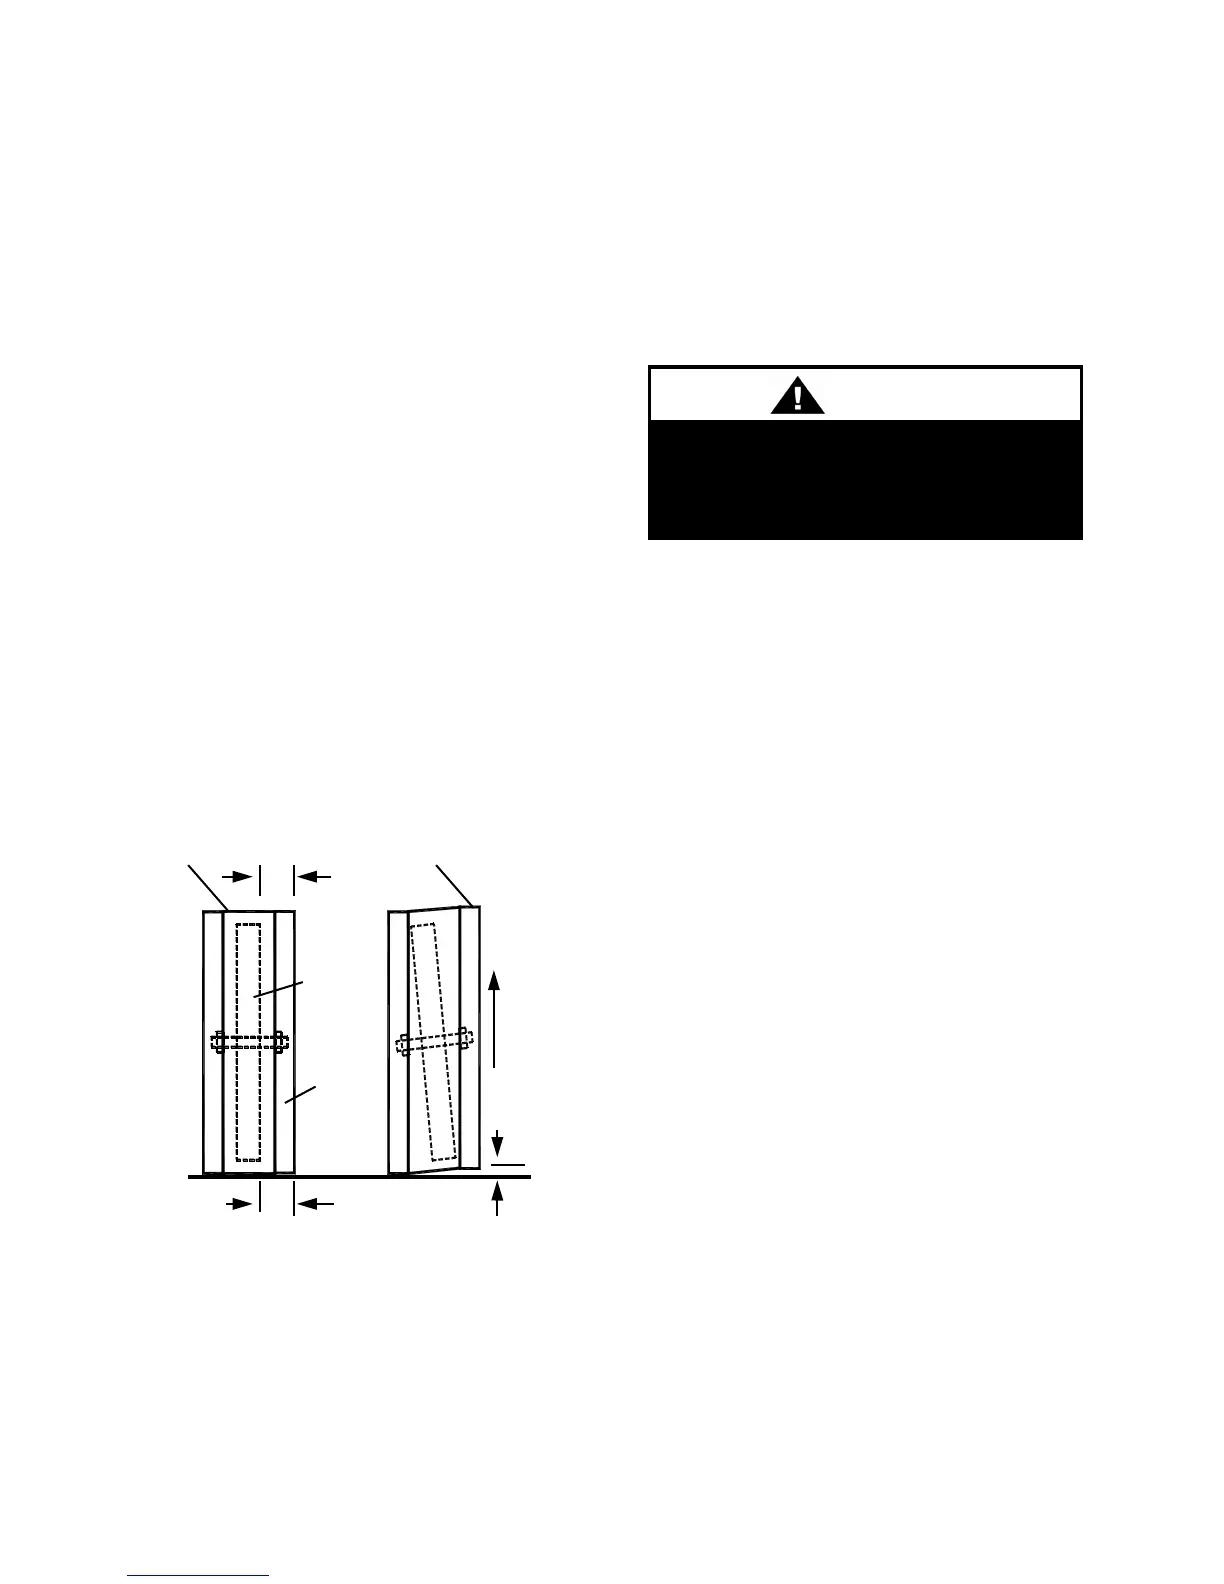
Orientation & Support
The Energy Recovery Cassette may be
mounted in any orientation. However, Care
must be taken to make certain that the
cassette frame remains flat and the bearing
beams are not racked.
Avoid Racking of Cassette Frame
To verify, make certain that the distance
between wheel rim and bearing beam is the
same at each end of the bearing beam, to
within 1/4 of an inch (dimension A & B).
This amount of racking can be compensated
for by adjusting the diameter seals.
If greater than 1/4 inch (dimension C),
racking must be corrected to ensure that
drive belt will not disengage from wheel.
Operation
Startup Procedure
1. By hand, turn wheel clockwise (as viewed
from the pulley side), to verify wheel turns
freely through 360º rotation.
2. Before applying power to drive motor,
confirm wheel segments are fully engaged in
wheel frame and segment retainers are
completely fastened. (See Segment
Installation Diagram).
3. With hands and objects away from
moving parts, activate unit and confirm
wheel rotation. Wheel rotates clockwise (as
viewed from the pulley side).
4. If wheel has difficulty starting, turn power
off and inspect for excessive interference
between the wheel surface and each of the
four (4) diameter seals. To correct, loosen
diameter seal adjusting screws and back
adjustable diameter seals away from surface
of wheel, apply power to confirm wheel is
free to rotate, then re-adjust and tighten hub
and diameter seals, as shown in hub seal
adjustment diagram.
5. Start and stop wheel several times to
confirm seal adjustment and to confirm belt
is tracking properly on wheel rim
(approximately 1/4” from outer edge of
rim).
Keep hands away from rotating
wheel! Contact with
can cause physical injury.
Bearing beams shown
racked
Frame
Bearing
beams
(2)

 Loading...