76
Step 4: Remove the fan blades and replace
the pitch pins
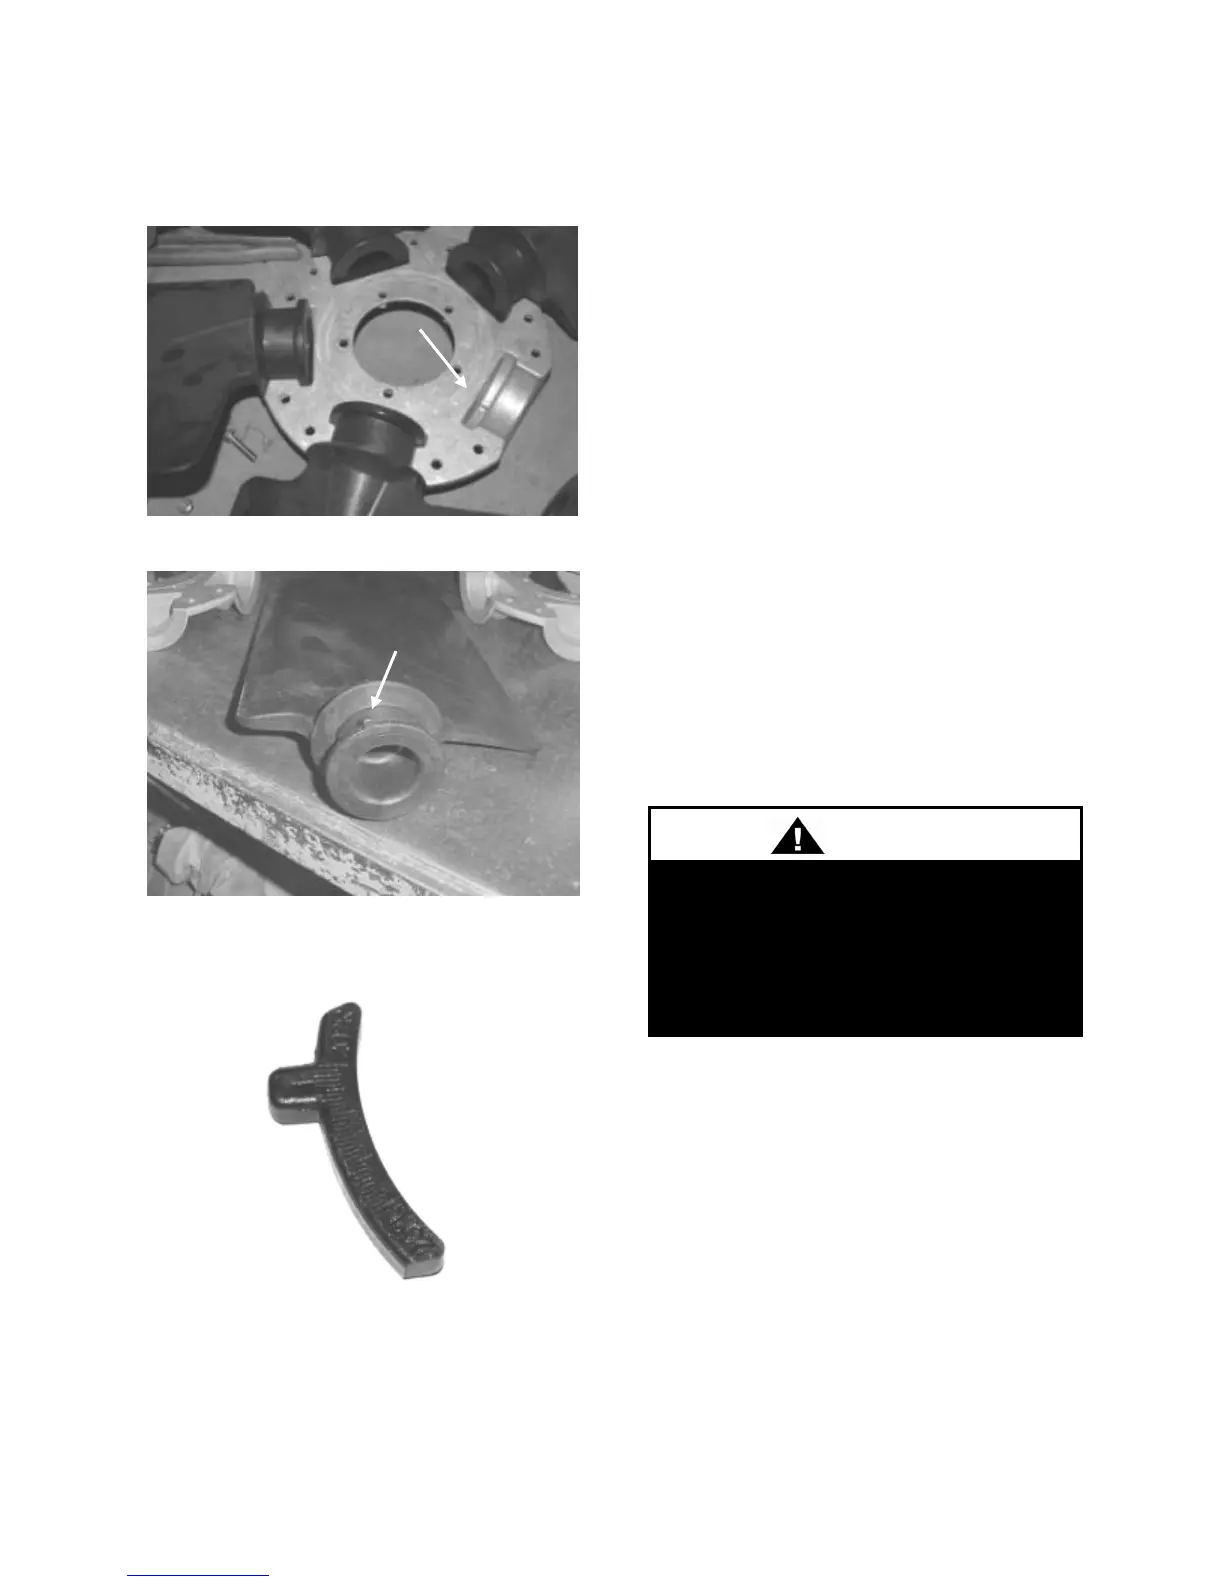
Figure 40 - Pin Groove Location
Figure 41 - Pitch Pin Location
Figure 42 - Example Pitch Pin
Step 5: Replace the fan blades with the pitch
pin of the blade in the same groove and
reassemble the fan.
Replace the blades and assemble the fan
making sure to place the blades in their
previous blade sockets, to match up the
previous orientation of hub plate casings and
to replace any balancing weights in their
previous locations. Tighten bolts in a cross
pattern to 6.7 ft-lbs. of torque.
Step 6: Install the fan in the unit.
After placing the fan on the shaft, place the
key in the shaft, make sure the screw on the
bushing is aligned over the key and then
tighten the screw to 9 ft-lbs torque.
Filters
Do not operate the unit without filters in
place. Unit should be checked for correct
filter placement during startup. Operation of
the equipment without filters will result in a
clogged evaporator coil.
Adjusting Refrigerant Charge
Adjusting the charge of a system in the field
must be based on determination of liquid
sub-cooling and evaporator superheat. On a
system with a TXV liquid sub-cooling is
more representative of the charge than
evaporator superheat but both measurements
must be taken.
Before completing startup and
leaving the unit a complete operating
cycle should be observed to verify
that all components are functioning
properly.

 Loading...