necessary, clean this surface with lens fluid applied with a coton Q-
tip. Install the lens into the camera video port. Connect the control
unit cable to the camera body through the Amph9 connector.
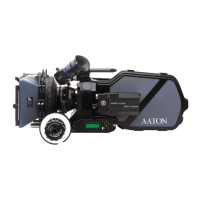
Connect a BNC cable to the monitor and power the AATON 35-
III. Turn on the toggle switch of the CCD Unit, the yellow diode
should light. Set the video assist iris wide open, and while looking at
the monitor, move the whole control unit until the viewing screen
image is in focus and square to the monitor. Rotating the unit
controls the image horizon, pulling or pushing it controls the image
focus. Tighten the Allen set screw to lock the control unit in posi-
tion. If the camera lens mount has been shifted from 35 to super 35,
loosen the video tap retaining the screw and refocus.
2.11.3 Menu Operation
The CD56 unit contains six operator buttons: up, down, left, right
arrows, menu and exit keys.
Press MENU to have the menu displayed.
Use arrows to access to the desired parameter.
Press MENU to indicate that you want to modify this parameter.
Use arrows to adjust this parameter.
Press MENU to validate
Press EXIT to memorize the new configuration.
• Std
Choose the video image frequency you need between 24 and 25
frames per second. Keep in mind that choosing 24 fps, provides a
non standard video signal, that you won’t be able to record.
• Color Temp
Depending on the kind of film you’re using (a film for inside or a
film for outside) the colors it will register will not be the sames. To
have the video colors closer to the film colors, you can choose bet-
ween 3200K (tungstein) and 5600K (daylight).
• Date
Date allows you to choose the position of the current date insertion
41
THE CAMERA BODY