bdiRDI
JTAG interface for RDI Debuggers, BDI1000 User Manual 37
© Copyright 1999-2003 by ABATRON AG V 1.10
Observe precautions for handling (Electrostatic sensitive device)
Unplug the cables before opening the cover.
Use exact fuse replacement (Microfuse MSF 1.6 AF).
4
5
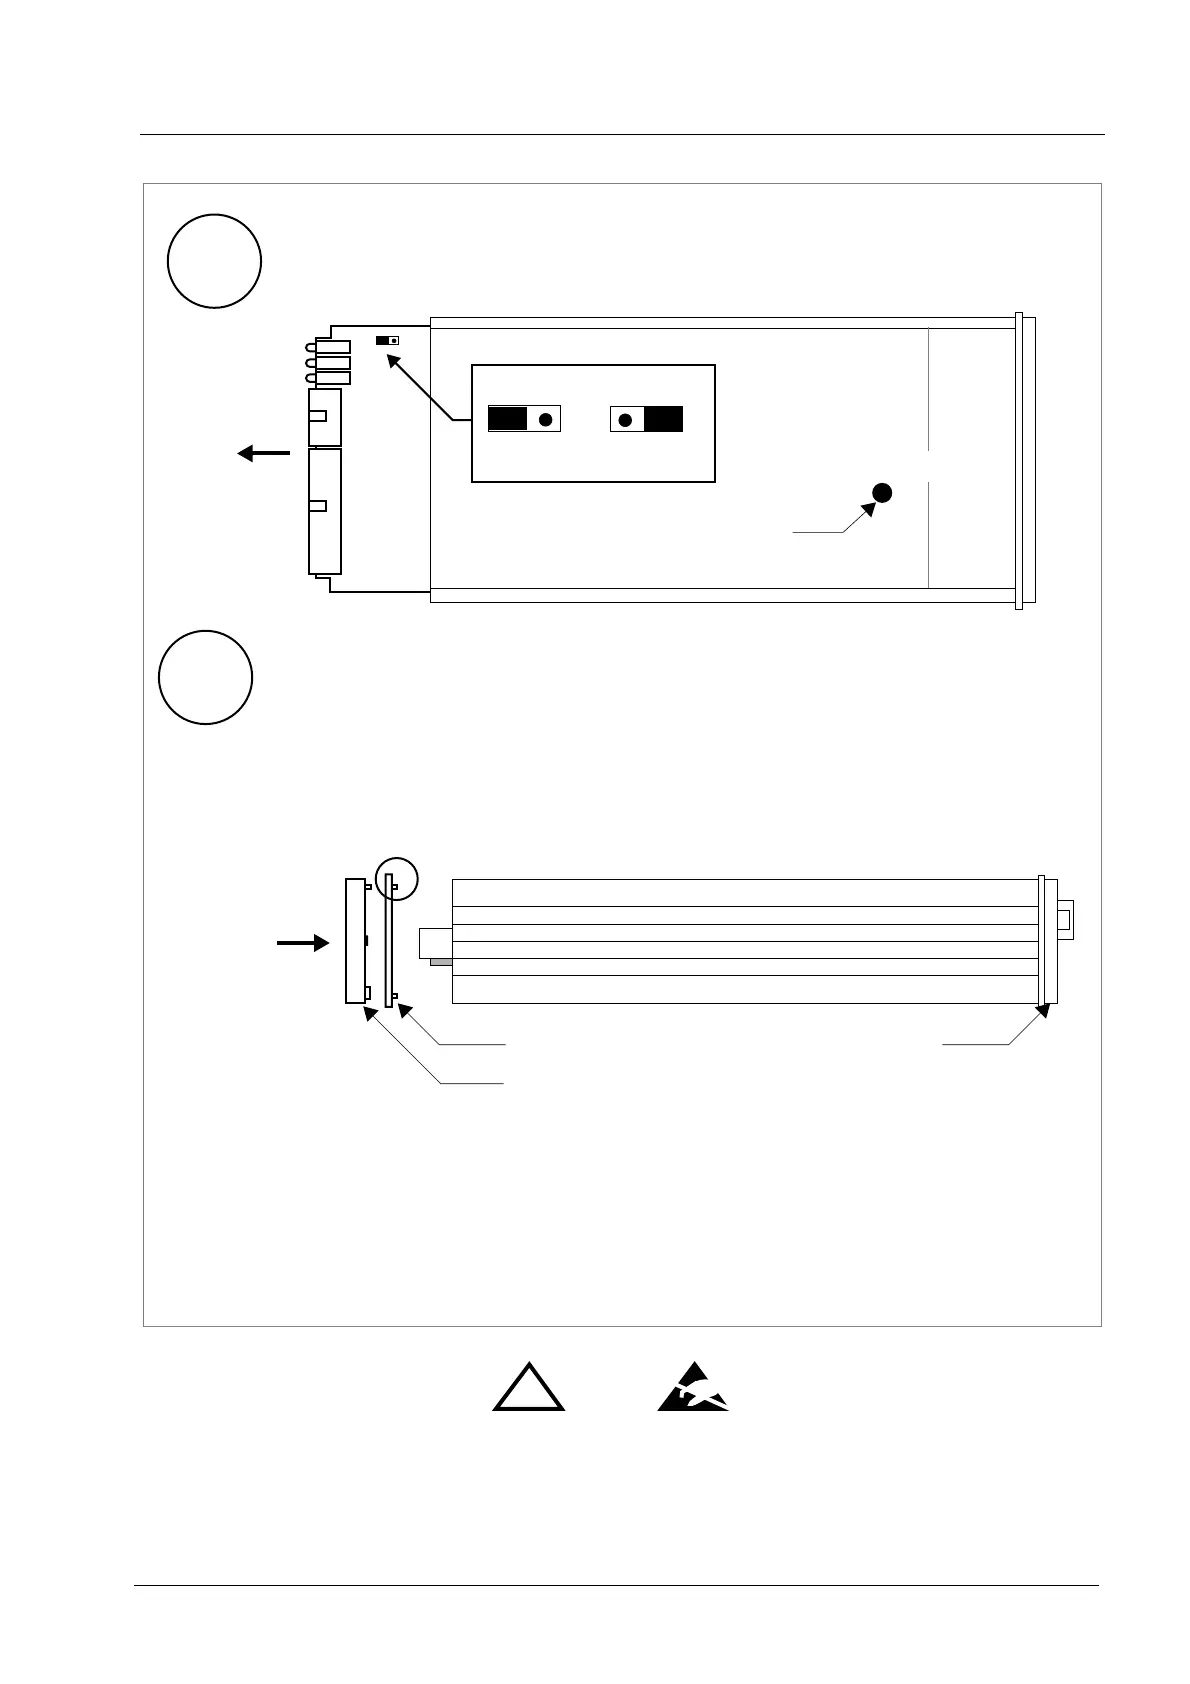
4.1 While holding the casing, slide carefully the print in position as shown in
5.1 Slide back carefully the print. Control that the LEDs align with the holes in the
front panel
elastic sealing
Reinstallation
back panel.
5.2 Push carefully the front panel and the blue elastig sealing on the casing.
Check that the LEDs align with the holes in the front panel and that the
5.3 Mount the screws (do not overtighten it)
5.4 Mount the two plastic caps that cover the screws
5.5 Plug the cables
position of the sealing is as shown in the figure below.
casing
figure below
Pull-out carefully the fuse and replace it
Type: Microfuse MSF 1.6AF
Manufacturer: Schurter
back panel
Fuse Position
Jumper settings
DEFAULT
INIT MODE
!