34
1MRS 751108-MUM
3URWHFWLRQ5HOD\
Technical Reference Manual, General
5(;
$GGLWLRQDOIHDWXUHVRIWKHGLVSOD\
• Contrast adjustment with temperature compensation
• Backlight control
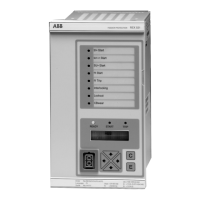
,QGLFDWLRQ/('V
The relay is provided with three indication LEDs (green, yellow and red). With
latching/non-latching, steady/blinking light the LEDs indicate different states and
operations of the relay. For more information, refer to
2SHUDWRU¶V0DQXDO.
$ODUP/('V
The relay is provided with eight alarm LED indicators (red). With latching/non-
latching or steady/blinking light the alarm LEDs indicate different states and
operations of the relay. The user can freely enable and disable the predefined alarms.
By default, all the alarms are disabled. To enable alarms, do the following:
1. Select a mode (Control\ALARM#\Control setting\Object mode)
for function blocks MMIALAR1-8 (these are uninitialized by default). The
mode you selected affects the behaviour of the alarms coming to a certain LED.
MMIALAR1 affects LED1, MMIALAR2 affects LED2, and so on. Three alarm
modes are supported regarding latching: non-latched, latched with steady LED,
and latched with blinking LED. For more information about MMIALAR
function blocks, refer to
7HFKQLFDO5HIHUHQFH0DQXDO6WDQGDUG&RQILJXUDWLRQV
(see “References” on page 51).
2. Enable the alarms by setting the bitmask for the LED
(Configuration\Alarm LEDs\LED1, LED2...)
The alarms can be acknowledged (cleared) from the main view by pressing the [C]
button for 2 s. This acknowledges all the alarms.
For a certain MMIALAR function block, the alarms can also be acknowledged by
selecting “Acknowledge” for parameter Alarm ack
(
Control\ALARM#\Control setting\Alarm ack). This acknowledges
alarm(s) only for the corresponding LEDs. After the acknowledgement, the status of
a certain LED (off/steady/blinking) depends on the selected mode and whether the
alarm is still active or not.
After an auxiliary supply break, the state of the alarm LEDs is
restored to the same state as before the break. This means that
alarms will be seen even if the alarm went off during the break and
regardless of the mode. The alarms can be acknowledged (cleared)
only from the main view by pressing the [C] button for 2 seconds.
6SHFLDOIHDWXUHVRIDODUP/('V
It is also possible to activate alarm LEDs by writing to parameter Alarm LED
states from HMI, or by using serial communication. This works even if the
alarms are not enabled (enabling alarms, see “Alarm LEDs” on page 34). The value
written to that parameter is then logically combined together (by an OR function)
with alarms enabled as described in the previous section.
!