9Initial Setup
Initial Setup
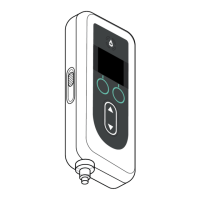
2. Initial Setup
2.1 Initial Setup
Before the pump can be used by the patient, a PIN (only for healthcare
professional access) and base continuous infusion rate must be entered
and conrmed. During this initial setup, it is also possible to set high
and low continuous infusion rates as well as extra dose and loading
dose values. The default value for the base continuous infusion rate is
0.15 mL/h. The default values for the high and low rates are the same as
the conrmed base rate and will not be available unless values different
to the base are set. The default values for extra dose and loading dose
are 0.0 mL and will not be available unless values other than 0.0 mL are
set.
2.2 Inspect Components and Install Battery
1. Remove the pump and one battery from the pump kit (carton).
a. Inspect the pump and battery to ensure there is no damage.
2. Ensure you are using the Model RRC1120-PM battery provided
with the VYAFUSER pump.
3. Set up the charging system.
a. Remove AC/Mains adapter, charging station cable, and battery
charger from the pump kit.
b. Connect the charging station cable to both the AC/Mains adapter
and battery charger.
c. Plug AC/Mains adapter into a wall outlet.
d. Ensure red indicator is lit.
e. When the red indicator is lit, the battery charger is ready to charge
the battery.
Please refer to your AC/Mains Adapter
and Battery Charger Instructions for
Use.
AC/Mains Adapter
and Battery Charger