EasyManua.ls Logo

Abit BH6 User Manual

Abit BH6
98 pages
To Next Page IconTo Next Page
Page #1 background imageLoading...
Page #1 background image
Copyright and Warranty Notice
The information in this document is subject to change without notice and does
not represent a commitment on part of the vendor, who assumes no liability or
responsibility for any errors that may appear in this manual.
No warranty or representation, either expressed or implied, is made with
respect to the quality, accuracy or fitness for any particular part of this
document. In no event shall the manufacturer be liable for direct, indirect,
special, incidental or consequential damages arising from any defect or error
in this manual or product.
Product names appearing in this manual are for identification purpose only
and trademarks and product names or brand names appearing in this
document are property of their respective owners.
This document contains materials protected under International Copyright
Laws. All rights reserved. No part of this manual may be reproduced,
transmitted or transcribed without the expressed written permission of the
manufacturer and authors of this manual.
If you do not properly set the motherboard settings causing the motherboard
to malfunction or fail, we cannot guarantee any responsibility.
Question and Answer IconNeed help?

Do you have a question about the Abit BH6 and is the answer not in the manual?

Abit BH6 Specifications

General IconGeneral
Form FactorATX
CPU SocketSocket 370
ChipsetIntel 440BX
Memory TypeSDRAM
Memory Slots3
Max Memory768 MB
Storage Interfaces2 x IDE
Supported ProcessorsIntel Pentium III, Celeron
AGP Slots1
PCI Slots4
ISA Slots1
USB Ports2 x USB 1.1
AudioOptional

Summary

Chapter 2 Installing the Motherboard

Installing the Motherboard to the Casing

Step-by-step guide for physically mounting the motherboard into the computer chassis.

Standard External Connectors

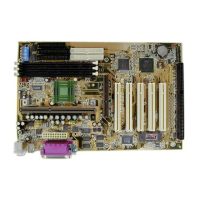
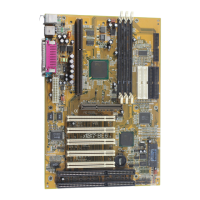
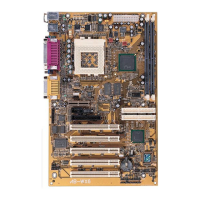
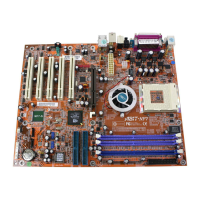
Describes connectors for external peripherals like keyboard, mouse, and ports.

Installation of the Pentium® II/III, Celeron™ CPU

Instructions for installing the CPU onto the motherboard.

Installing System Memory

Guide for installing RAM modules into the motherboard's DIMM slots.

Chapter 3 Introduction of BIOS

CPU Setup <CPU SOFT MENU II>

Configuration settings for the CPU, including speed and multiplier.

Standard CMOS Setup Menu

Basic system settings like date, time, and IDE configuration.

BIOS Features Setup Menu

Advanced BIOS settings for system behavior and performance.

Chipset Features Setup Menu

Configuration options related to the motherboard's chipset.

Power Management Setup Menu

Settings for managing system power consumption and energy saving.

PNP/PCI Configuration

Configuration for Plug and Play (PNP) and Peripheral Component Interconnect (PCI) devices.

Integrated Peripherals

Configuration of onboard peripherals like IDE, FDD, Serial, and Parallel ports.

Appendix A Quick Installation

Installing the CPU

Simplified guide for installing the CPU.

Adjusting CPU speed

Setting CPU speed via BIOS setup.

Installing DRAM

Guide for installing system memory (DRAM).

Appendix B General Discussion About HDD Installation

Appendix C BIOS Flashing User Instructions

Award Flash Memory Writer V7.05 Start Screen

Overview of the BIOS flashing utility interface.

Award Flash Memory Writer V7.05 Complete Screen

Confirmation screen after successful BIOS flashing.

Flash Commands Screen

Lists available commands for the BIOS flashing utility.

BIOS file description

Important notes on selecting the correct BIOS file for flashing.

BIOS updating with commands

Examples of commands for updating BIOS and managing settings.

Appendix D How to install the IDE Bus Master driver

Appendix E How to install the PCI bridge driver for the 440BX chipset

Appendix F Install HighPoint XStore Pro Utility

Related product manuals