46 Chapter 5
Installing the Front I/O Board
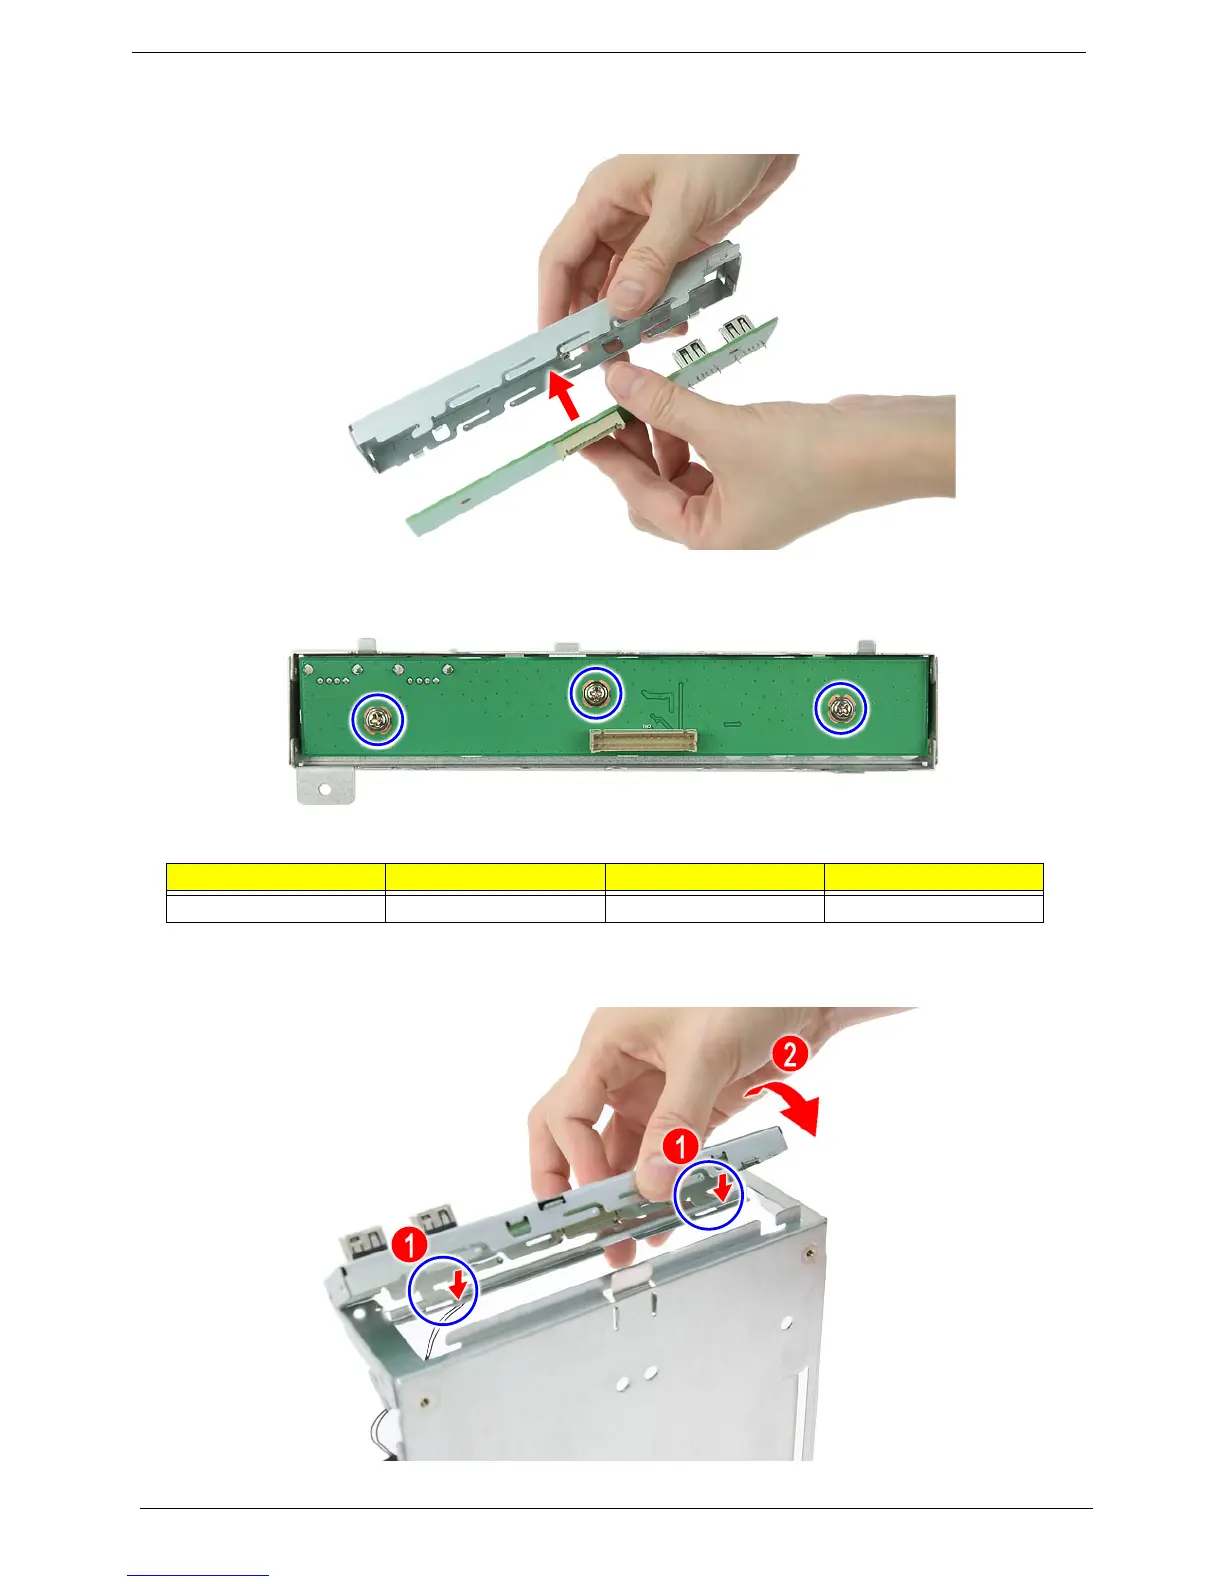
1. Insert the front I/O board into the bracket.
2. Use three screws to secure the front I/O board to the bracket.
3. Make sure the tabs on the front I/O board bracket are inserted into the mainboard tray notches (1). Press
down (2) to install the front I/O board bracket to the mainboard tray.
Screw (Quantity) Color Torque Part No.
M3 x L4 (3) Chrome 5.1 to 6.9 kgf-cm 86.19534.4R0