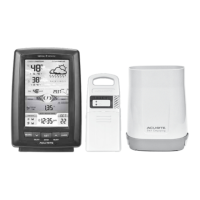
20
Calibration
Calibrate Temperature, Humidity & Barometric Pressure
The outdoor temperature and humidity readings, and barometric pressure can be
calibrated on the display to improve accuracy. Calibration can improve accuracy
when sensor placement or environmental factors impact the data accuracy.
1. To access calibration mode, press AND HOLD the “
SELECT
”, “
ENTER
SET
”, and “
SELECT
”
buttons simultaneously for at least 5 seconds.
2. To adjust the currently selected (ashing) item, press and release the “
SELECT
“ or
“
SELECT
“ buttons to calibrate the data value higher or lower from the actual reading.
3. To save your adjustments, press and release the “
ENTER
SET
” button to adjust the next
preference. The “
” icon will remain illuminated next to calibrated values.
The preference set order is as follows:
OUTDOOR TEMPERATURE
OUTDOOR HUMIDITY
BAROMETRIC PRESSURE (must be set to MANUAL mode to calibrate)*
*To change from auto to manual pressure mode and vice versa, press AND HOLD
the “
ENTER
SET
” button for 8-10 seconds. The display indicates the current pressure mode
selected, “auto” or “manual”.
After 5-10 seconds of inactivity, the display will save the adjustments and exit
calibration mode.
NOTE: Calibrations will be erased if the display is reset or if batteries are removed
and the power adapter is unplugged.
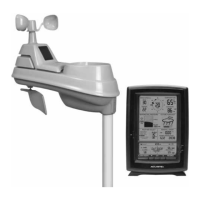
Calibrate the Rain Gauge
The rain gauge can be calibrated to improve accuracy.
Items Needed: rain gauge, display, plastic cup, pin, screw driver
1. First, place the rain gauge on a level surface.
2. Place the display close by so you can monitor it during calibration.
3. Make a pin hole in the bottom of a plastic cup. Hold the cup over the rain
gauge and ll it with exactly 1 cup (8 oz.) of water, allowing the water to
slowly drip into the rain gauge. You should hear the internal cups tipping and
see the water drain through the rain gauge.
4. A few seconds after each cup tip, the display will display rainfall in
approximately 0.01”
(0.2 mm)
or more increments.
5. The cup of water should take a few minutes to empty; a quicker period will result
in an inaccurate calibration. Try to simulate a normal steady rainfall. When the
cup is empty of water, the display should register 1.68”
(42.67 mm).