9
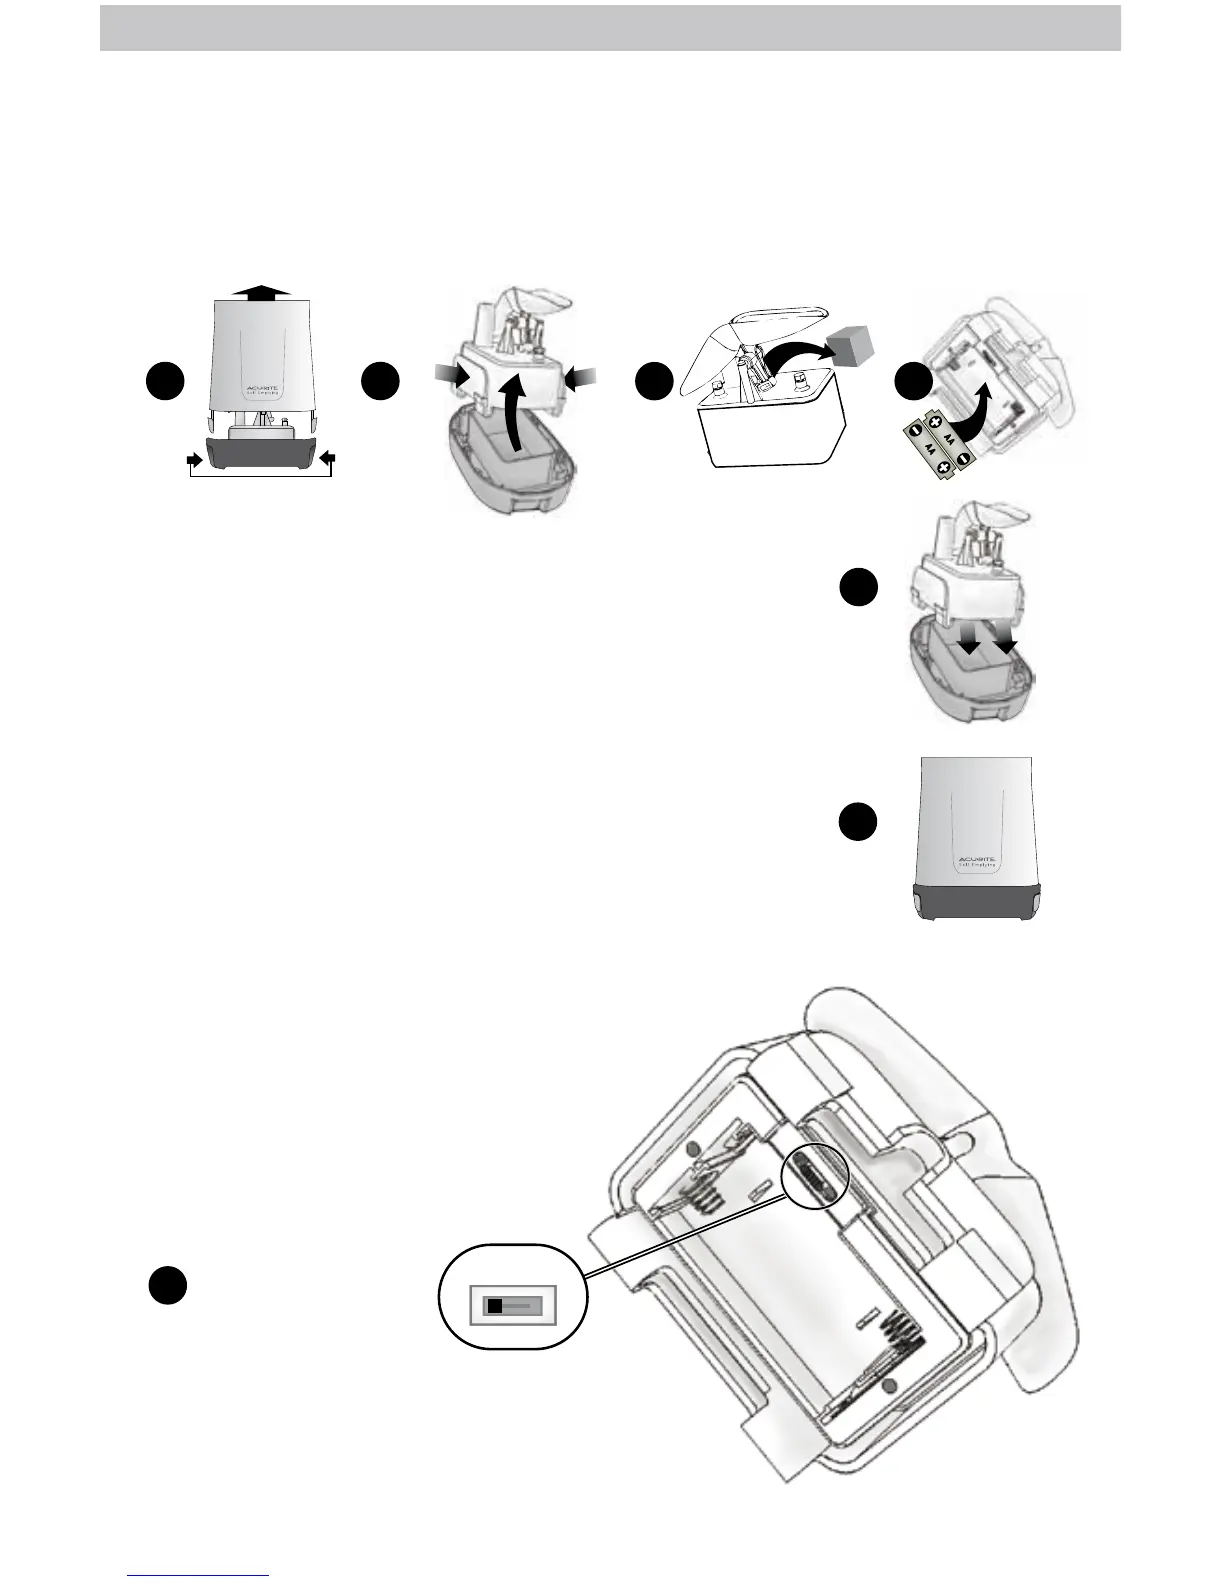
Install or Replace Batteries
AcuRite recommends high quality alkaline batteries for the best product
performance. Heavy duty or rechargeable batteries are not recommended.
1. Separate rain gauge cover from the base by gently
squeezing tabs and pulling the cover upwards.
2. Remove battery box by squeezing the two tabs on each
end together (take note of battery box orientation, for
re-installation).
3. Remove and discard cardboard rain gauge stabilizer.
4. Insert 2 x AA batteries into the battery compartment as
shown. Follow the polarity (+/-) diagram in the
battery compartment.
5. Securely place the battery box back into the rain
gauge base.
6. Securely re-attach the rain gauge cover onto rain
gauge base.
1
5
6
3
2
SQUEEZE
SQUEEZE TABS TO OPEN
SQUEEZE
LARGE
TAB
SQUEEZE
LARGE
TAB
4
Rain Gauge Setup
A B C
1
A-B-C Switch
Set to match display
and lightning sensor.
Set the A-B-C Switch
Locate the A-B-C switch inside the
battery compartment. Set the A-B-C
switch to A, B or C. You must select the
same letter choices for the rain gauge,
display and lightning sensor in order
for the units to synchronize.