ALPHA® Solar™ Sign
Installation: Electrical connection 23
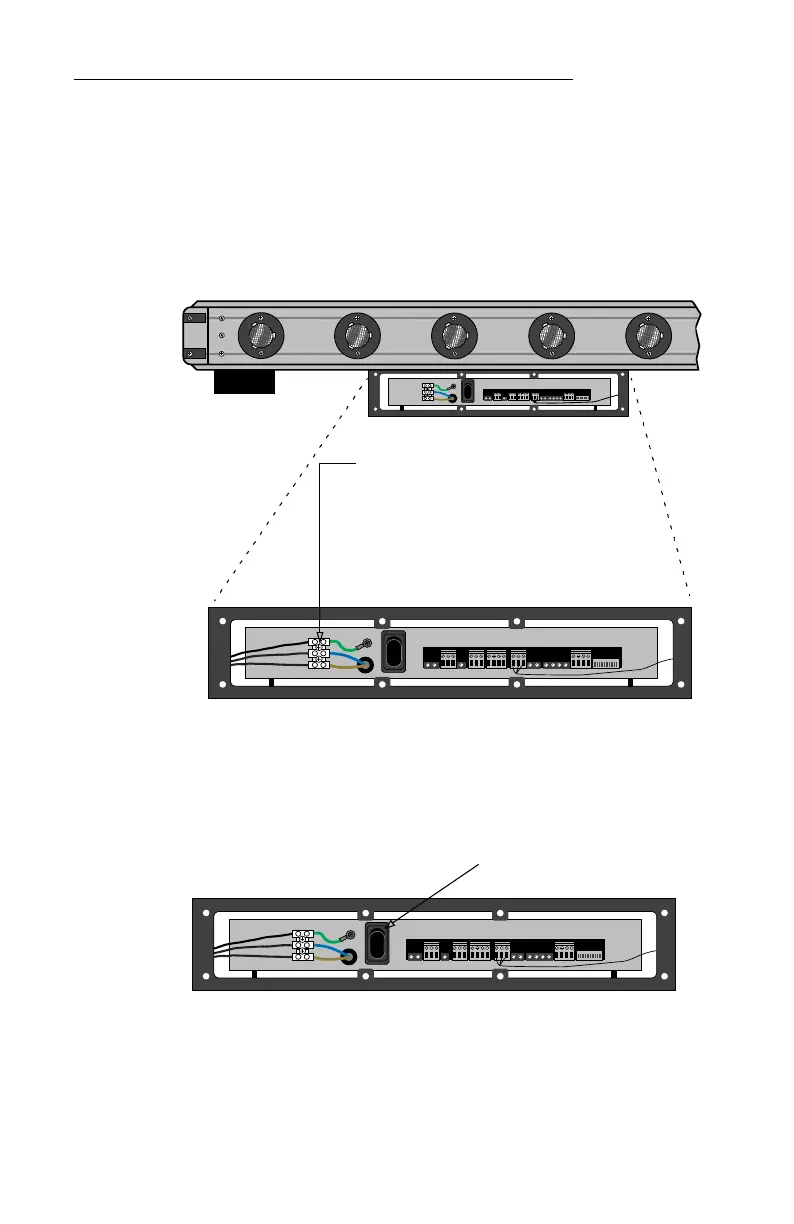
Power supply wiring
6. Connect the wires from the power conduit to the appropriate
power supply wires:
Do NOT connect the other ends of the wires in the power conduit
to a power source yet!
7. If you need to assign a serial address to this sign, see “Appendix
B: Using DIP switches to set the serial address” on page 25.
8. Press I on the internal power switch:
9. Using the eight screws you previously removed, replace the
power supply access cover.
10. Connect the wires from the power conduit to a switched, fused
power source.
11. The sign is now ready for use.
1
0
12345678910
Figure 7: Alpha® Solar™ (bottom view) — Power supply connection
1
0
12345678910
Power Supply Terminal Block
Brown wire: HOT (on older signs) or LINE 1 (on
newer signs)
Blue wire: NEUTRAL (on older signs) or LINE 2 OR
NEUTRAL [on newer signs)
Green wire: GROUND — must be properly
connected to ensure safe operation and to
prevent damage to the sign.
1
0
12345678910
Press I on the internal power switch.