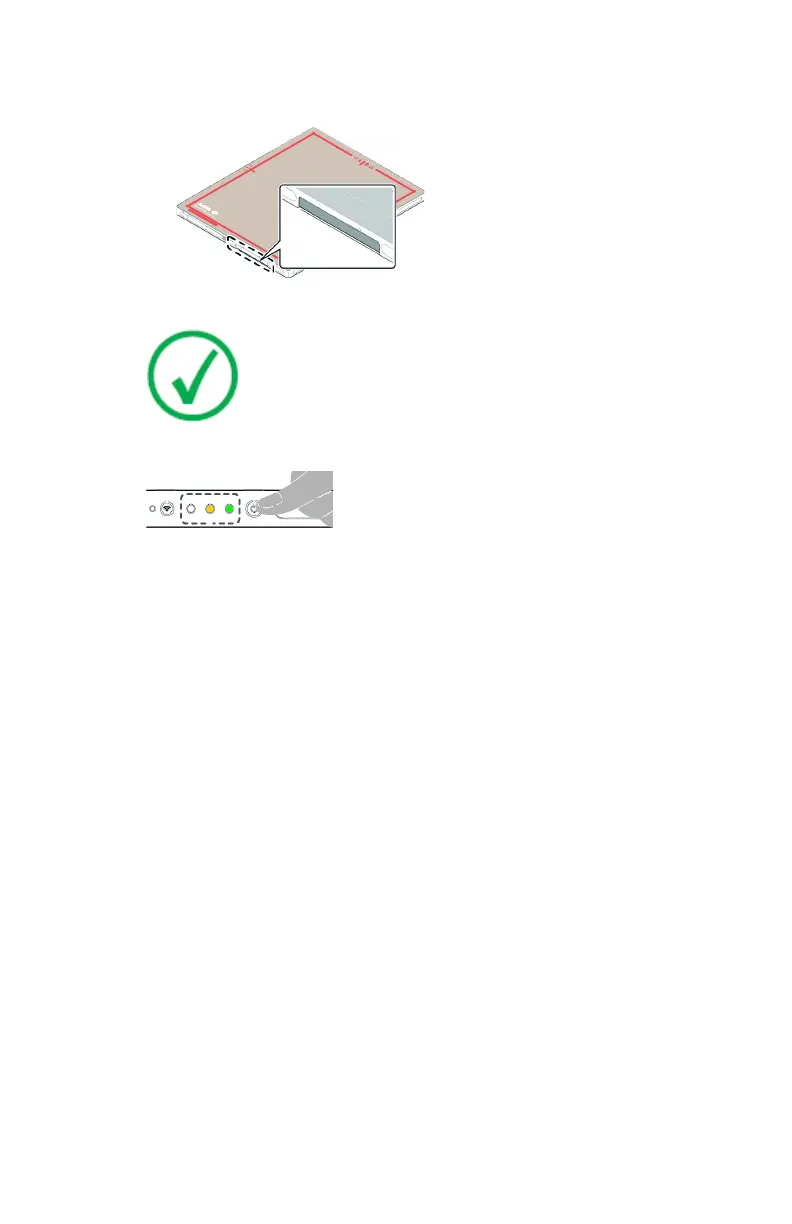
c) Push the lock lever to the right to lock the battery in place.
d) Close the cover of the battery slot.
4. Turn on the detector.
Note: Before operating the detector, start up the NX
workstation.
Press and hold the power button for 1 second.
Figure 13: Power button
After startup the power indicator is green and the status indicator is
orange.
5. Turn on the System Control Unit using the power switch.
The status indicator is green.
Depending on the configuration, the System Control Unit may not be part
of the system.
6. Check the DR Detector Status icon on the DR Detector Switch.
If the displayed status is error, register the DR Detector to the NX
workstation.
If the DR Detector communicates via the internal wireless adapter of the
workstation, switch the NX Workstation to the wireless network of the DR
Detector.
The DR Detector is ready.
Before exposure make sure to check the equipment daily and confirm that it
works properly.
Related Links
Detector Status Indicators on page 90
Registering the DR Detector on another NX Workstation on page 94
Using the Windows wifi settings to switch between the wireless DR detector and
the wireless hospital network on page 96
74
| DX-D 45C, DX-D 45G | Getting started
0292B EN 20190401 1627