- 13 -
Scientific Instruments Manufacturer GmbH
D-46149 Oberhausen • +49-208-94 10 78-0 • www.sim-gmbh.de
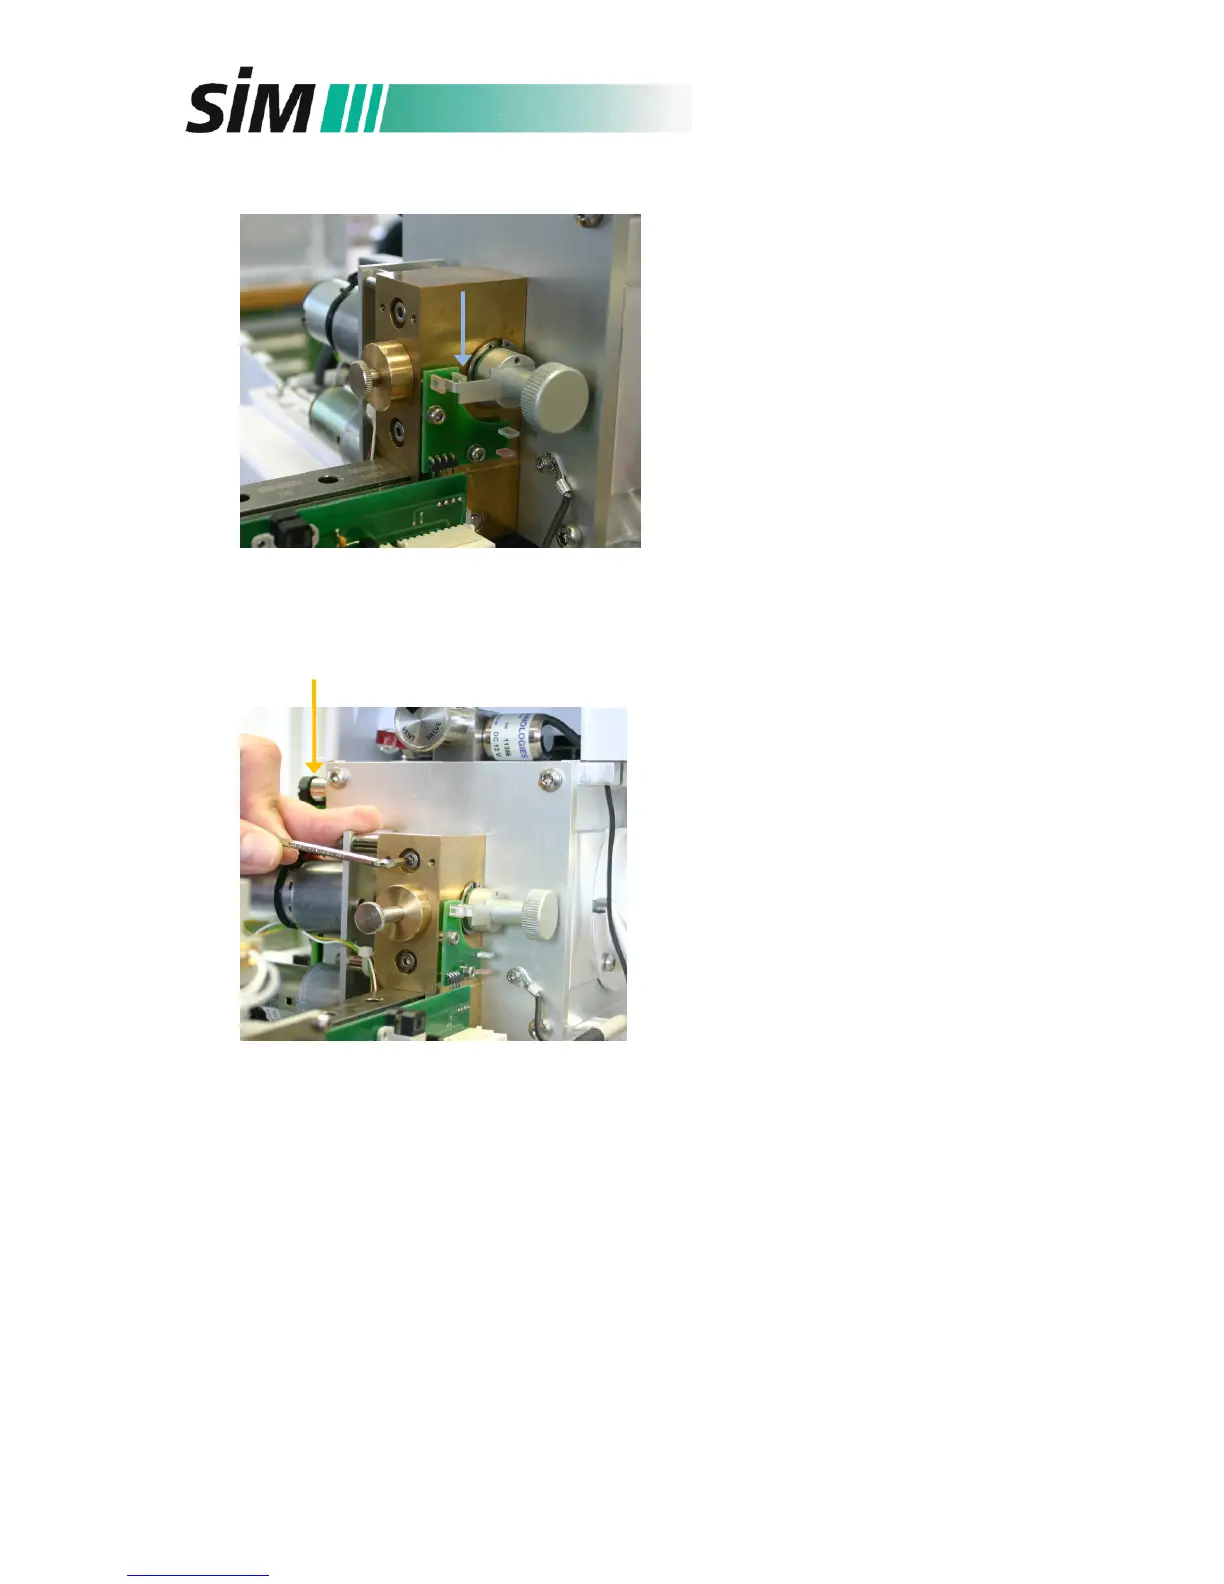
8. Press the arrow keys to open the
valve (control it by watching the
marker of the valve plug which is
directed forwards to the observer
when the valve is open, see blue
arrow in figure on the left).
9. Take the dummy push rod for the
alignment procedure. While the
original push rod is already in the
vertical position, insert the dummy
into the valve as far as possible. If
this is consistent with the position
in the figure left, positioning of the
push rod in the ion source is correct
and you can skip the steps 11 - 12.
.
10. Otherwise please loose the screws
of the brass block slightly. Now you
can cautiously move the valve block
until you are able to insert the push
rod completely.
11. Fix the screws to adjust the correct
position of the push rod.
12. Remove the dummy and exchange the brass disc with the Teflon disc.
13. Click the push rod down while the valve is still open (marker forwards).
14. Mount the push rod cover and the front panel onto the MSD again and press the arrow
“right” three times so that the valve is closed (!) and initializing of the DIP is started.
15. Check the exact position of the push rod by using the service mode “Auto”.
16. Loose the transportation safety screw (see figure above). Now you can pump down the
MS and then start running the DIP.
transportation safety screw

 Loading...


