5
3 – Installation
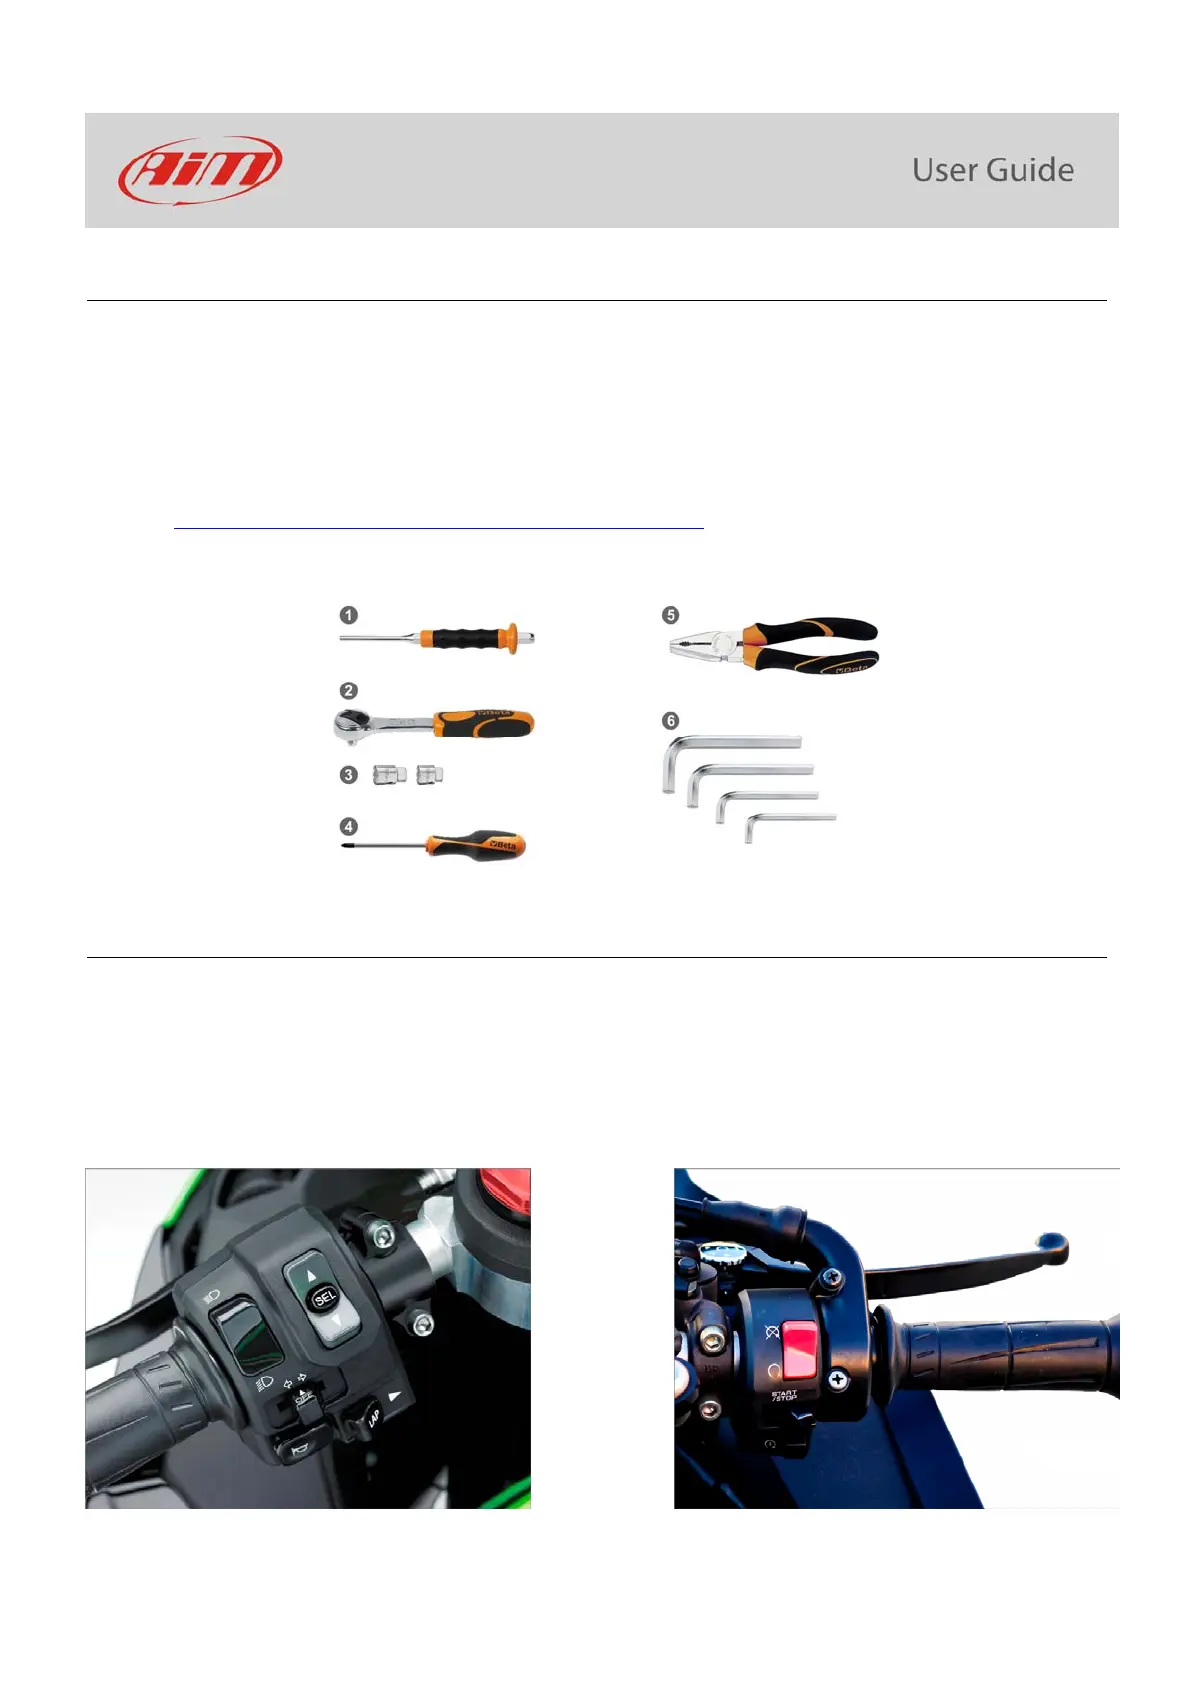
MXK10 installation is extremely simple. You only need the tools shown here below:
pin punch (1)
ratchet (2)
10 and 13 Wrench (3)
screwdriver (4)
universal pliers (5)
3, 4, 5 and 6 Allen keys (6)
At this link https://www.youtube.com/watch?v=TmP4SQzS2n8&feature=youtu.be a tutorial video that shows how to remove Kawasaki
Ninja stock dash and install MXK10 dash-logger is available.
4 – MXK10 Main features
First of all, we have to say that MXK10 has two different working modes: Road Mode and Track Mode. You may swap between the two
modes entering “Display” option of “Preferences” Menu (paragraph 5.2.1).
Track Mode is intended to be used when you are riding on a track. The GPS Module is enabled, in order to automatically get Lap Times;
data are automatically recorded, TFT page is swapped in Track Mode and Lap pushbutton may be disabled in order to avoid confusion
between the GPS Signal and the pushbutton one.
In Road Mode TFT page is swapped in Road Mode, the data are by default not recorded, GPS Module is disabled and Lap Pushbutton is
enabled.
The dash offers different pages, freely selectable through the bike keyboard entering “Preferences” menu.