Page 69DD8
plus
Version 2.20 - September 1998
TIMECODE OFFSETS
New pages have been added which allow an offset to be set on the timecode generator and/or
receiver. These options were previously available when the DD8 was controlled from the DL1500,
but were not available from the DD8’s front panel.
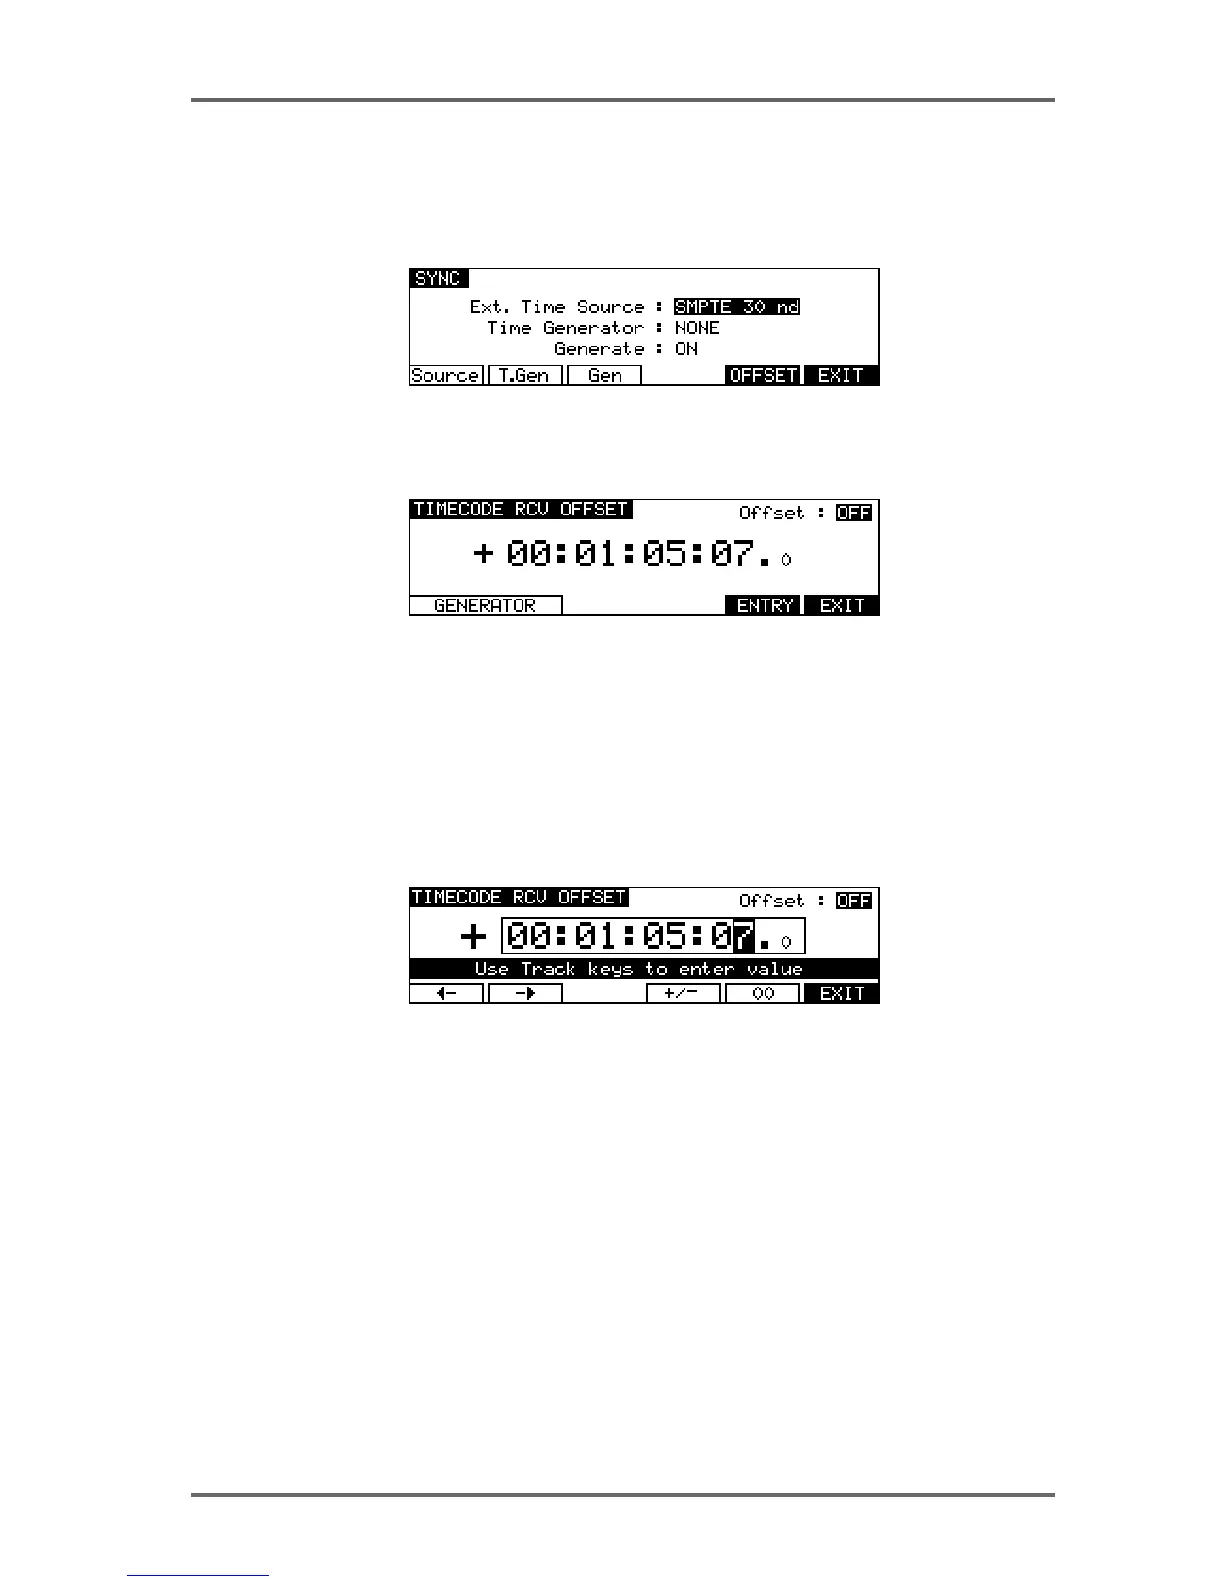
On the SYSTEM ‘SYNC’ page, press the OFFSET key (F5) to go to the timecode receive offset
page:
When the TIMECODE RCV OFFSET is set to ON, the offset value shown will be added to/
subtracted from the incoming timecode to produce the time value that the DD8 will lock to.
When the TIMEODE RCV OFFSET is set to OFF, the offset will not be added/subtracted to the
incoming timecode.
To enter a specific TIMECODE RCV OFFSET, press the ENTRY key (F5). The screen will change
to allow you to enter the required offset time:
Soft keys F1 and F2 can be used to move the cursor to the sub-frame field, or any of the other
fields. The offset time is then entered using the track keys as a numeric keypad or the current
digit can be nudged using the DATA +/- keys.
The offset sign (plus or minus) can be toggled by pressing the +/- key (F4).
For example, if the project starts at 00:00:00:00.0 but the incoming timecode starts at 1 hour,
you should set a TIMECODE RCV OFFSET of -01:00:00:00.0. This will subtract 1 hour from the
incoming timecode, effectively providing the DD8 with timecode starting at 00:00:00:00.0. Con-
versely, if the project starts at 10 hours but the incoming timecode starts at 1 hour, you would
need to set a TIMECODE RCV OFFSET of +09:00:00:00.0 which would add 9 hours to the
incoming timecode so that it starts from 10 hours.
Press EXIT (F6) to return to the TIMECODE RCV OFFSET page.
SYSTEM - 8