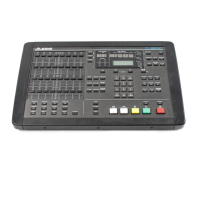
76
To create a tempo map:
1. Press the TEMPO MAP button;
The display will show:
Bar
X
XXX
bb/nn xxx.x bpm
…where XXXX (range: 0001 through 9999) is the bar at which the
following time signature and tempo should start, bb/nn is the time
signature (bb is the number of beats per measure ranging from 1 to 64,
and nn is the type of note that equals a beat with valid values of 2, 4, 8
and 16), and xxx.x is the tempo (range: 40.0 through 240.0 beats per
minute).
2. Use the Numeric Keypad to enter the location at which you wish
to make entry;
There are 100 possible entries for time signature/tempo changes with
at least one entry always present at bar one. The default values are
bar 01, 04/04 and 120 bpm.
3. Use the Cursor buttons to move the cursor to the time signature
or tempo display. These can be changed with the Numeric Keypad
or UP/DOWN buttons;
4. To create additional time/tempo changes, use the Cursor buttons
to move the cursor beneath the bar number field, then repeat steps
2 through 5 for each change you wish to create.
While in play or record and using a complex tempo map (one with
multiple changes), the advance rate of the bars and beats shown in
the Tape Position Counter (using BARS Display Type) will change
according to the current tempo and time signature for each position
of the song. So while in play mode, the NORMAL and SMPTE
Display Types will show their position advancing at a constant rate
(since the tape is moving at a consistent speed), but the BARS Display
Type will fluctuate when necessary to reflect the changes in the
tempo map (faster or slower tempo, more or fewer beats per bar, etc.).
The figure below illustrates how tempo and time signature changes
can effect the relationship in tape position between NORMAL,
SMPTE and BARS Display Types. It reflects a tempo map with the
following changes: Bar 1 = 4/4 at 96.0 bpm; Bar 9 = 3/4 at 150.0 bpm;
Bar 21 = 5/4 at 86.0 bpm; Song Start = 00:00:00; SMPTE Start Offset =
00:00:30:00. Notice that beginning at 00:15:00 (Normal time), the bars