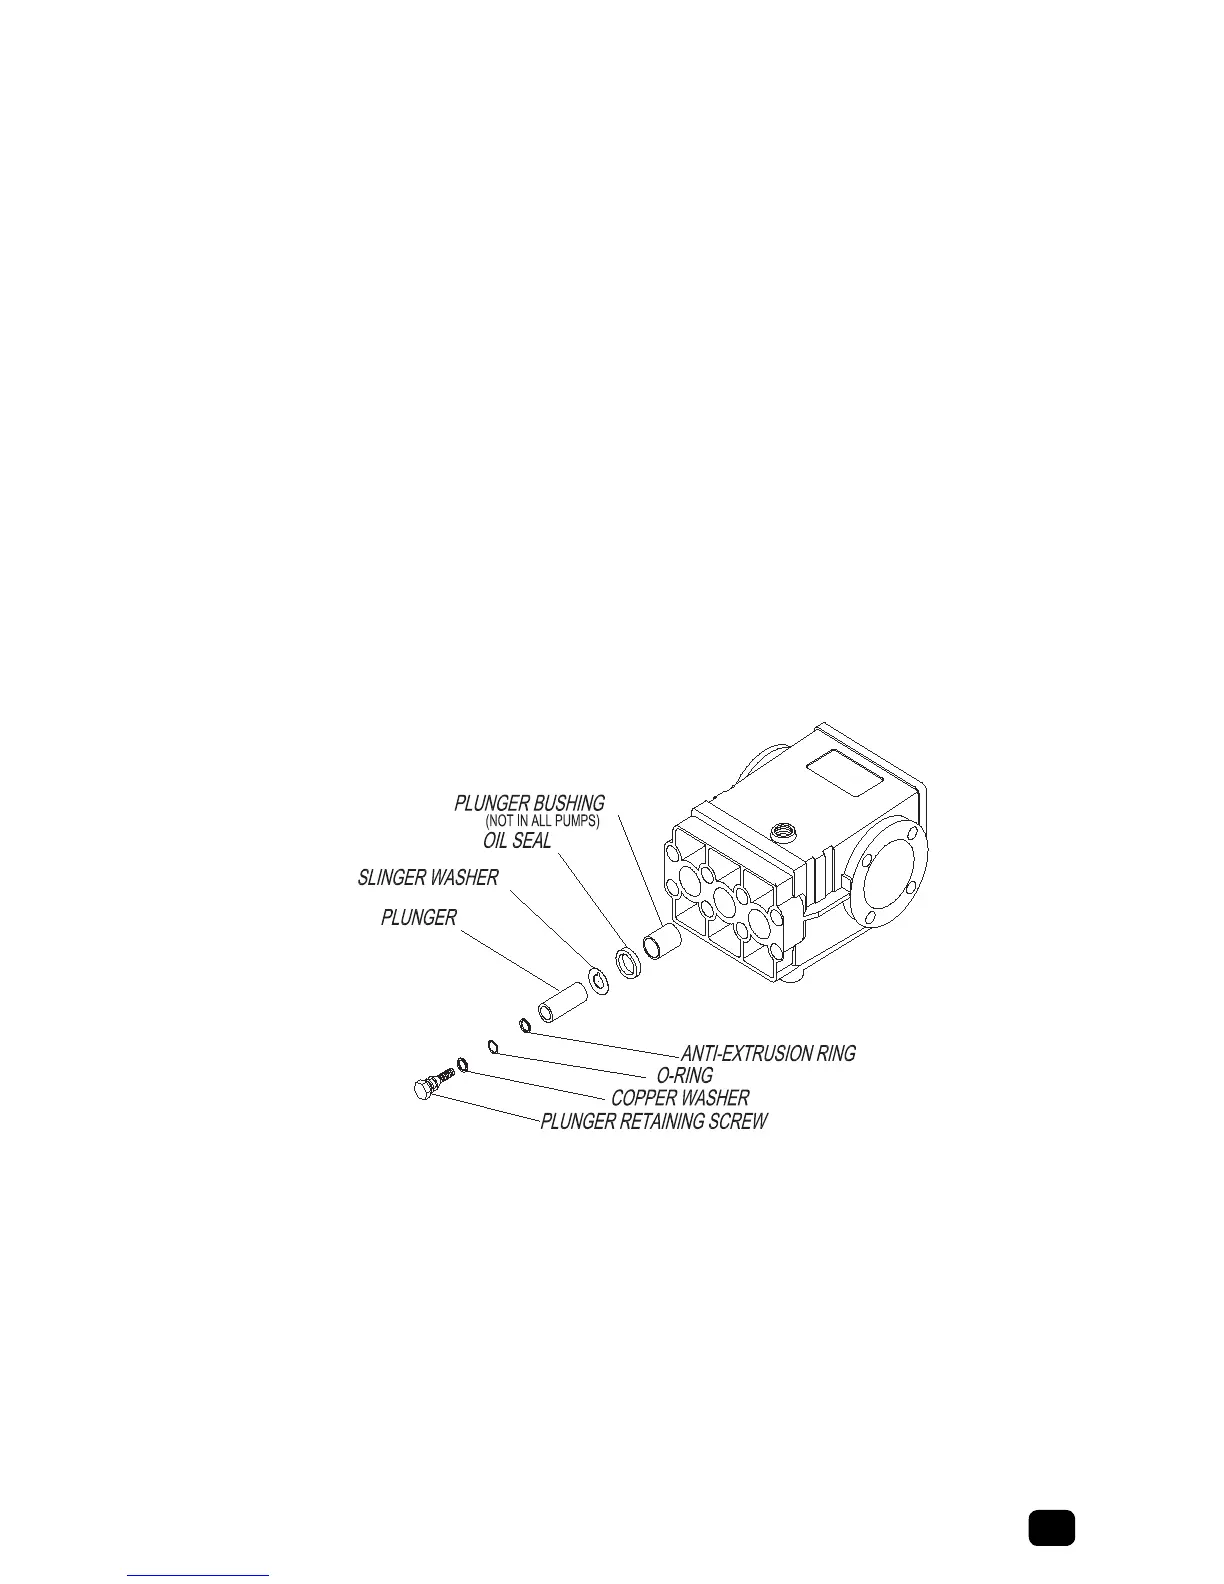
Plunger Service
1. Remove pump head per HEAD REMOVAL.
2. Remove any packings and retainers left on the plungers by pulling them straight off.
3. Examine each plunger, looking for a smooth surface free of any scoring, cracks, or pitting. Any
defective plungers should be removed per PLUNGER REMOVAL.
4. Discard and replace any defective plungers.
5. Reinstall the plunger per PLUNGER INSTALLATION.
6. Reinstall head per HEAD INSTALLATION.
Plunger Removal
NOTE: When the plunger screw is removed, it is important to install new o-ring, anti-extrusion, and copper
washers.
1. When the plunger screw is removed, it is important to install a new o-ring, anti-extrusion, and
copper washers.
2. Remove the plunger retaining screw by turning counterclockwise. Remove and replace copper
washer.
3. Remove and discard o-ring and anti-extrusion ring from retainer screw.
4. Remove the plunger from the cross head and examine it for cracks, scoring, or pitting.
5. Remove and discard copper inger washer, clean with solvent and allow to dry.
Plunger Installation
1. Install the copper inger washer onto the cross head.
2. Slide the plunger onto the crosshead.
3. Lubricate an o-ring with crankcase oil and install into the groove on the plunger screw. Install the
anti-extrusion ring into the groove next to the o-ring. NOTE: The o-ring should be nearest the
screw head and the anti-extrusion ring nearest the threads.
4. Apply a drop of thread sealant to the threads of the retainer screw.
5. Thread the plunger retainer screw into the cross head making sure the copper at washer is
installed onto the screw.
6. Torque the plunger retainer screw to the value indicated in the torque section of the pump
specications.
Plunger Service, Removal, Installation