NeXGen Wayne Direct - Gilbarco / Installation and Start Up Guide
Copyright 2019 by Allied Electronics, Inc.
December 31, 2019 Page
3-7
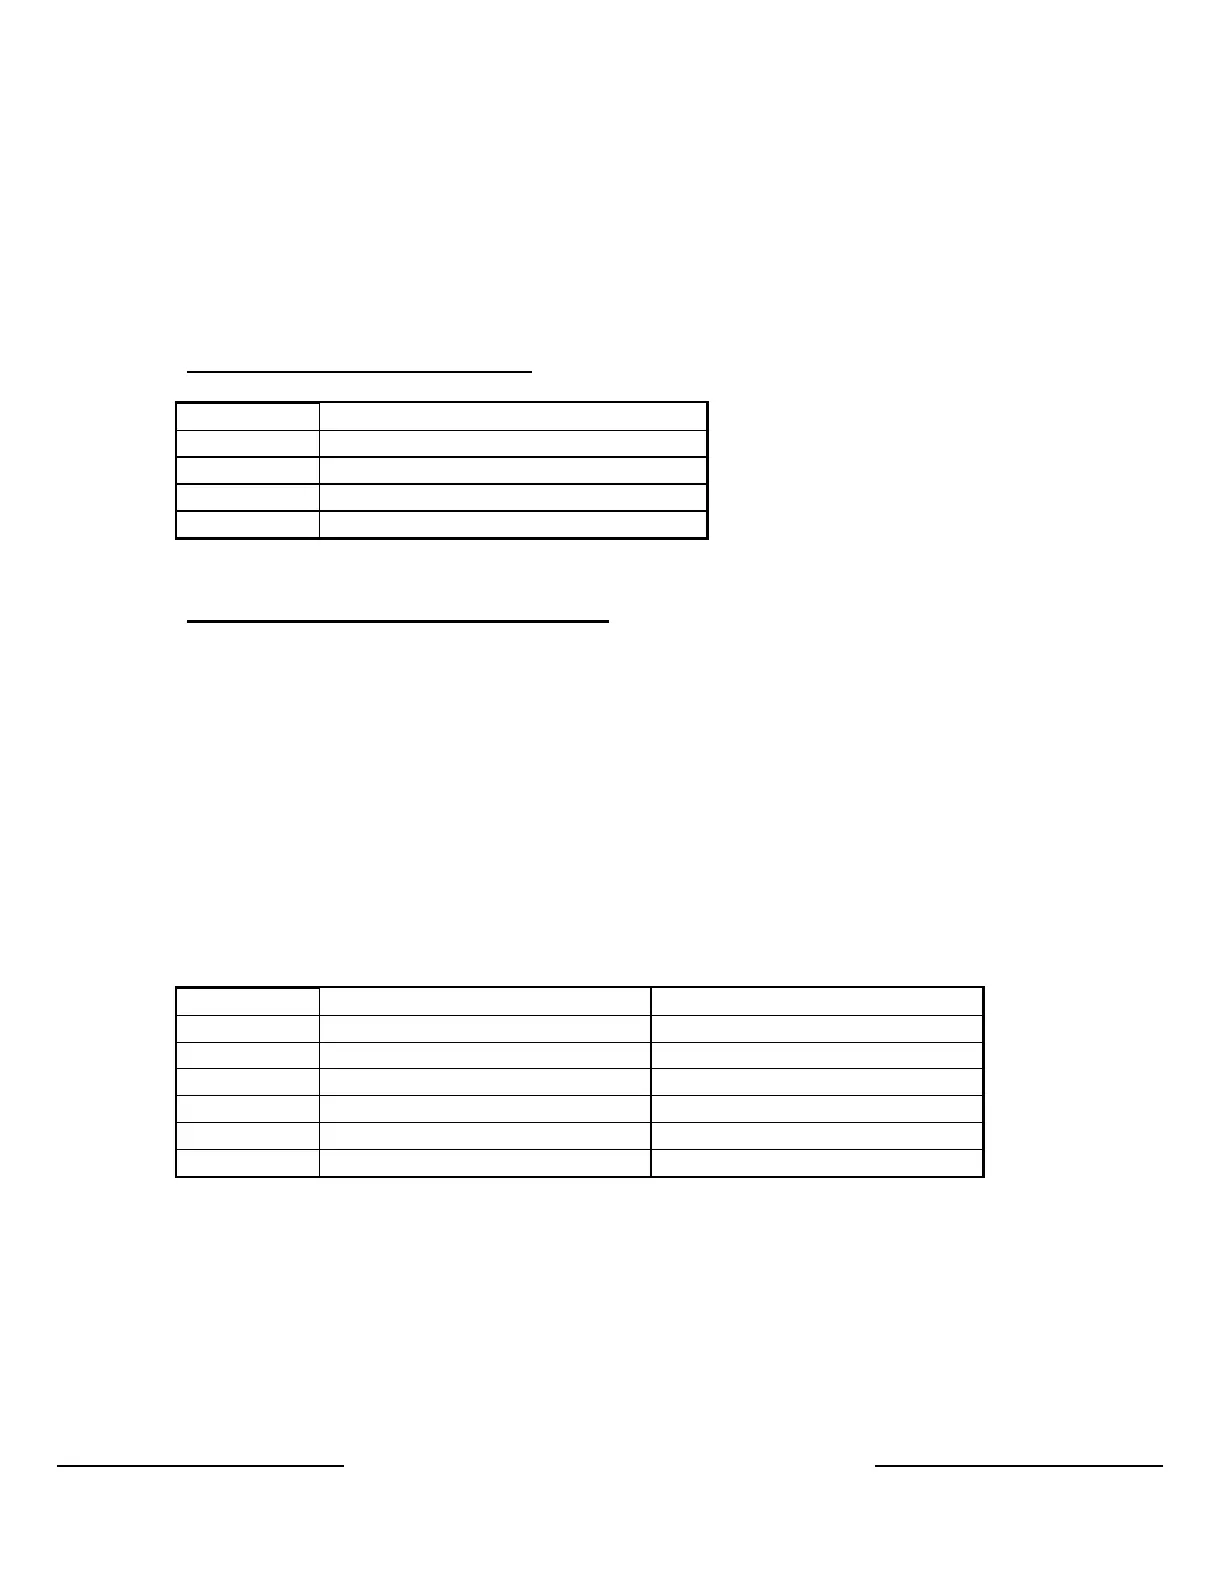
3.1.5 Gilbarco Distribution Box Jumper Settings
The NeXGen controller can utilize the Gilbarco distribution box as the distribution box
instead of the Wayne isolation box for Wayne dispensers.
The following is a list of the jumper settings for the Gilbarco distribution box for
dispenser communications.
Two wire configuration (45ma)
Jumper setting for Boards 1 and 2
JP10 Horizontal
JP12 Horizontal
JP9 Horizontal (Pumps/CRINDs/IPTs)
JP14 Installed
Single and dual board configurations (There are three options:)
1 board, 1 input
o 8 loops for dispensers or CRINDS on board 1
2 boards, 1 input
o 16 loops for dispensers or CRINDs on boards 1 & 2
2 boards, 2 inputs
o 8 loops for dispensers on board 1 and 8 loops for CRINDs on board 2
OR
o 8 loops for dispensers on board 1 and 8 loops for dispensers on board 2.
Jumper setting for Board 1
Jumper setting for Board 2
1 JP11, set to “B” N/A
1 JP13, set to “B” N/A
2 JP11, set to “B” JP11, set to “A”
2 JP13, set to “A” JP13, set to “B”
3 JP11, set to “B” JP11, set to “B”
3 JP13, set to “B” JP13, set to “B”
 Loading...