7.2.2 Accurate Debugging
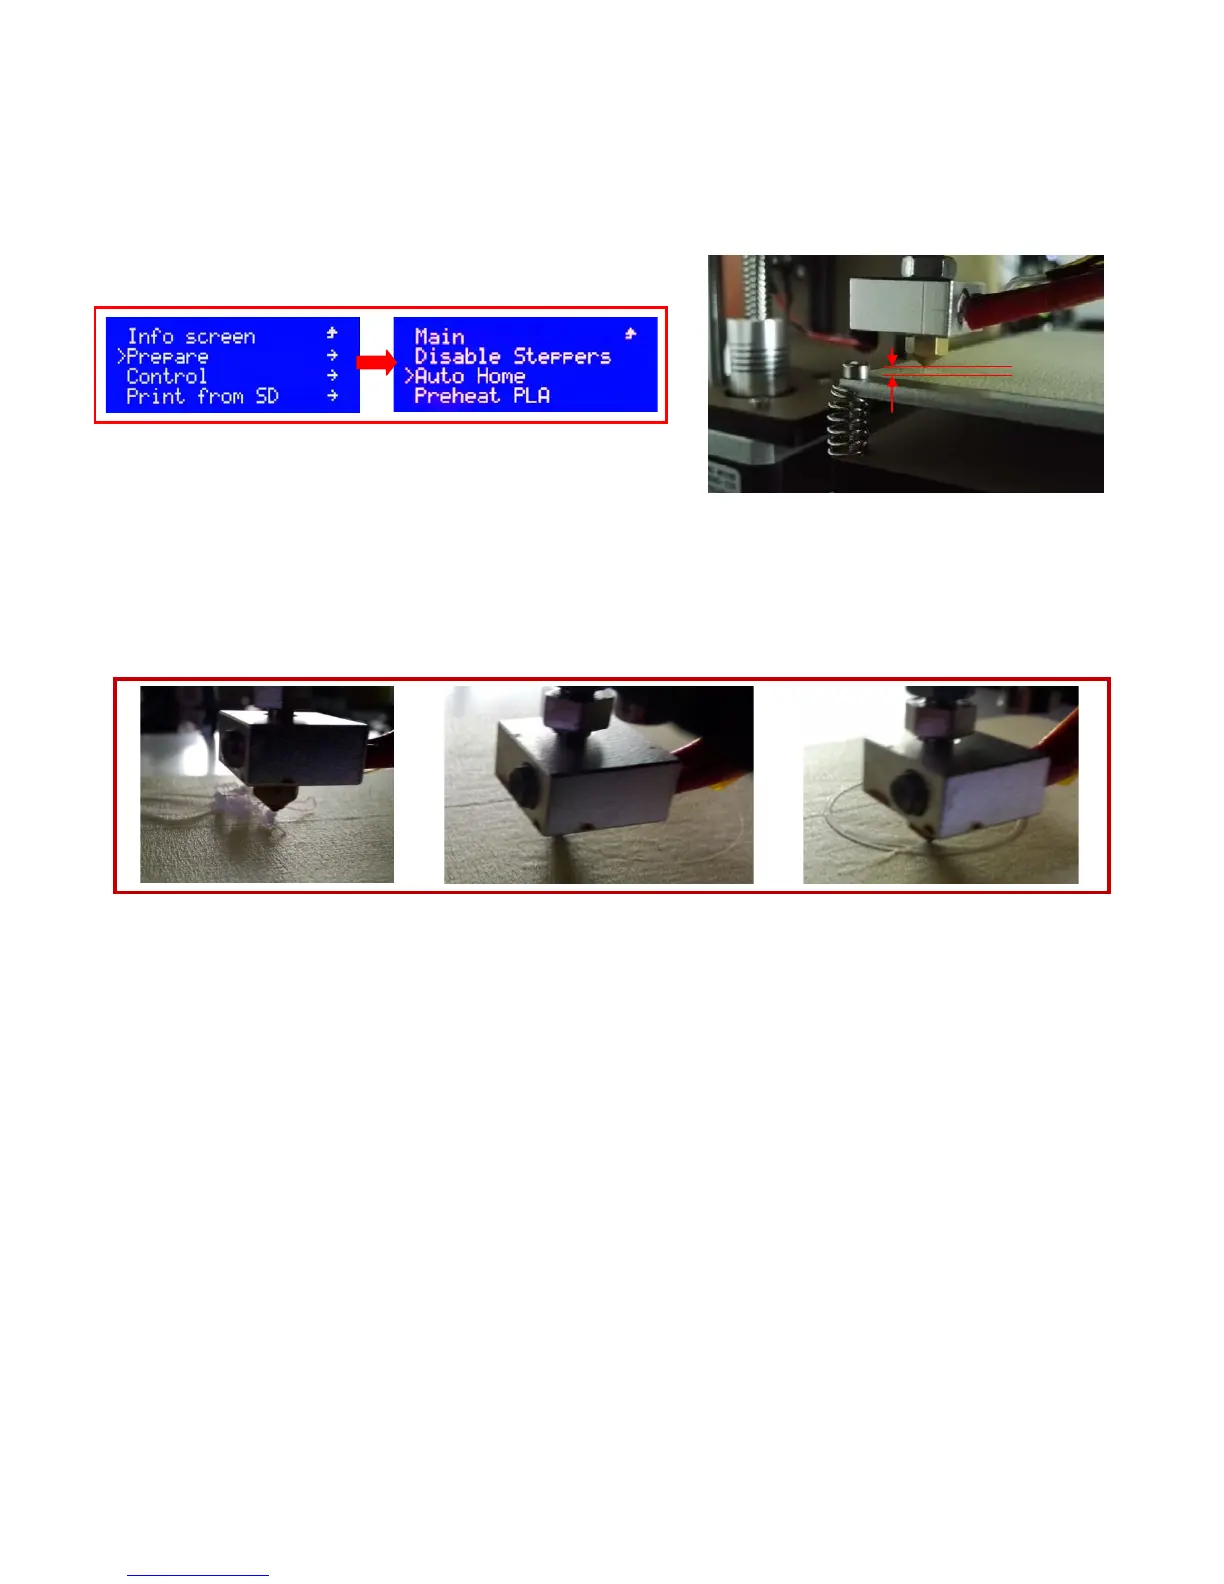
7.2.2.1 Auto home and make the XYZ axis back to origin (Picture 7.6);
7.2.2.2 Screw the screws at 4 angle of hotbed to make the nozzle above 1mm to the hotbed (Picture 7.7)
(PS: After Auto home, please click “Disable Steppers” or turn off the power, otherwise, you will can’t move
the XYZ axis by hand)
7.2.3 Fine Debugging when printing
Please check the printing status of first layer when you first printing by your printer. If you need, you can
screw the screws at 4 angle of hotbed to the best position (as shown on picture 7.10)
The different printing effect depends on the different distance between nozzle and hotbed
7.3 Change the Filament
Watch the video “Manually Change Filament “and get the operation way of this special feature of this printer
(SD-Card: \Installation Instruction\Video\ Manually Change Filament.MP4)
7.3.1 Change the Filament when not printing
Pull out the filament: Firstly preheat the nozzle to the exact temperature(PLA:200~220℃,ABS:240~260℃)
Once the temperature is up to the same as setting, press the upper aluminum piece on the extruder motor with
left hand, meanwhile push down to extrude part of filament and then pull out it rapidly with right hand.(PS:Don't
pause in the process to avoid the jam lead by the cooling midway. Picture 7.11, 7.12)
(SD-Card: \Installation Instruction\Video\ Change Filament When Printing.MP4)
Insert the Filament
Press the upper aluminum piece on the extruder motor and meanwhile insert the filament
into the throat (You can cut the filament into oblique angle with scissor to plug in smoothly. Picture 7.13), push
down to extrude part of filament (Picture7.12), then let the aluminum piece go, finally clear up the filament
extruded.
Picture 7.4 Picture 7.5
Picture 7.6
0.1mm
Picture 7.7
Picture 7.8 Picture 7.9
Picture 7.10
The distance between nozzle and
The distance between nozzle
and hotbed is proper
The nozzle is too close to hotbed