Foreword
Thanks in advance for choosing our M508 3D Printer! With the Quick Start Guide (hereinafter as “Guide”),
you could enjoy accomplishing the assembly, Test and Printing step by step. Meanwhile, you will also learn the
structure principle and its special FDM printing technology deeply, and then you will get great progress on not
only the theoretical knowledge but also the manipulative ability.
To give play to the bigger effect of the printer and ensure the worry-free buying, smooth and enjoyable using,
we spare no effect to consider the problem and difficulty you will meet with from when you order the printer and
make detail videos and pictures to show the exact settle way. We write this “Guide” elaborately in great detail
and we will always accompany with your using 3D printer. The kits would come to you with high-class parts and
need you to put them together. So please read the “Guide” carefully before you assembly and use the
printer .Please use the printer in strict accordance with the “Guide” to avoid any defective or invalid use caused
by improper operation. So please keep the “Guide” for your easy reference.
Special Tips:
With our objective of constant update for our printer, we would not make future notice to you if some
specifications and models updated. And we apologize for the inconvenience would lead to you.
We will do our best to help and solve the problem with our products. Your positive review and feedback are
so appreciated!
Wish you a nice day!
1. Machine parameters
Printing technology
FDM
Nozzle diameter
0.3(default),0.4,0.5mm
Print size
200*200*180mm
Printing precision
0.1-0.3mm
Filament
PLA /ABS /HIPS/WOOD
Printing speed
40-100mm/s (proposal)
Filament diameter
¢1.75mm
Working condition
10-40℃
Number of extruder
1
Humidity
20-50%
2. Flow Diagram for Quick Use Manual
3. Important Notice and Attentions
3.1 Keep the assembling operation platform level.
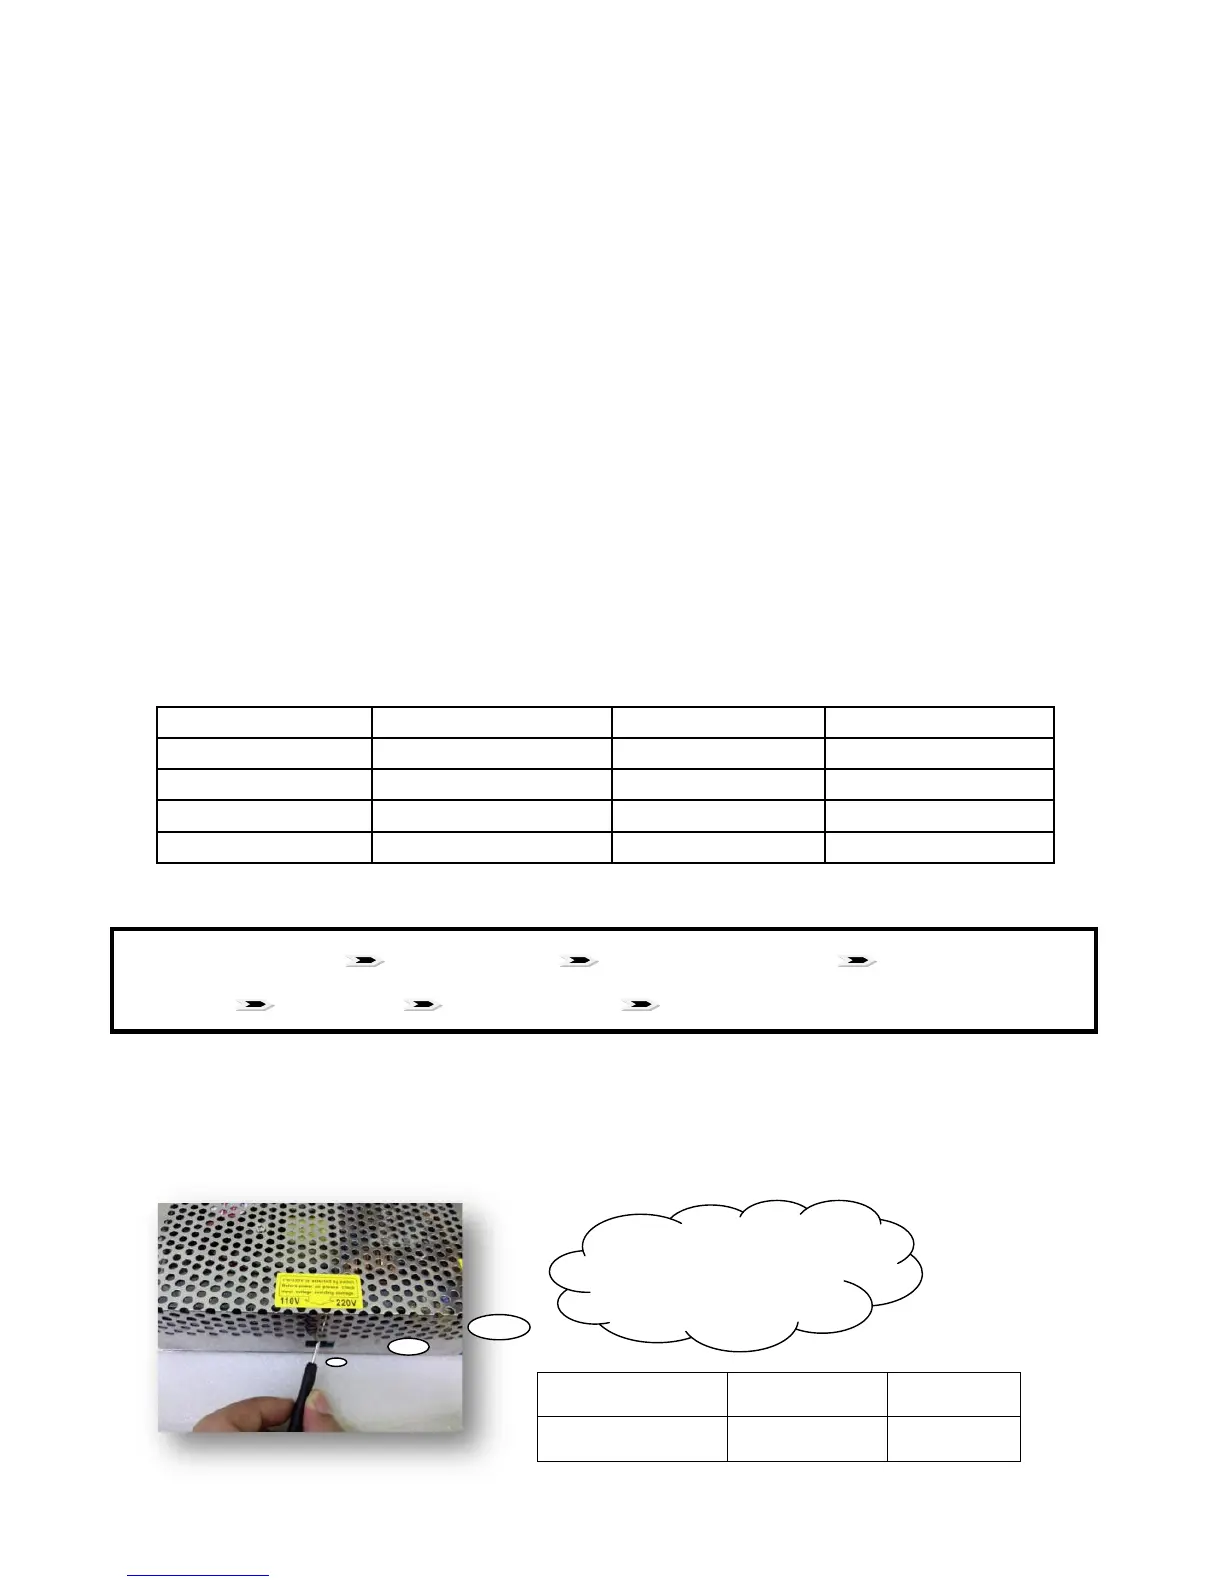
3.2 Please ensure that you move to the right tap position for input voltage (110V or 220V) of the power
supply (as shown in the picture).
Input Voltage 100~160V 200~260V
Position choice 110V 220V
Matters and Attentions Preparatory Work Preinstallation Checklist Assembly and
Calibration Printing Test Senior Instruction Frequently Asked Questions and Settle Way