7.4.8 Parameter adjustment when printing (Control)
7.4.9 Print from SD
8. Printing Test
After all the above-mentioned test and you make sure the printer works well. Now you can get start a
printing test. Please insert the SD Card into the card slot on the left back of the screen and then choose the
“test-*.g code” file and start printing with rotating the spin button. (SD-Card: \Installation Instruction\Video\Test
Print.mp4)
Congratulations! You’ve already accomplish the whole assembly for the M508. Please feel free to
contact our customer service if you have any problem on technology or other. We will spare no effect to
settle your problems accordingly. As you complete the printing test, you would be pride of yourself by
creating the first 3D printer work. And welcome to share your amazing and successful DIY experience to
our page online (www.alunar.net)
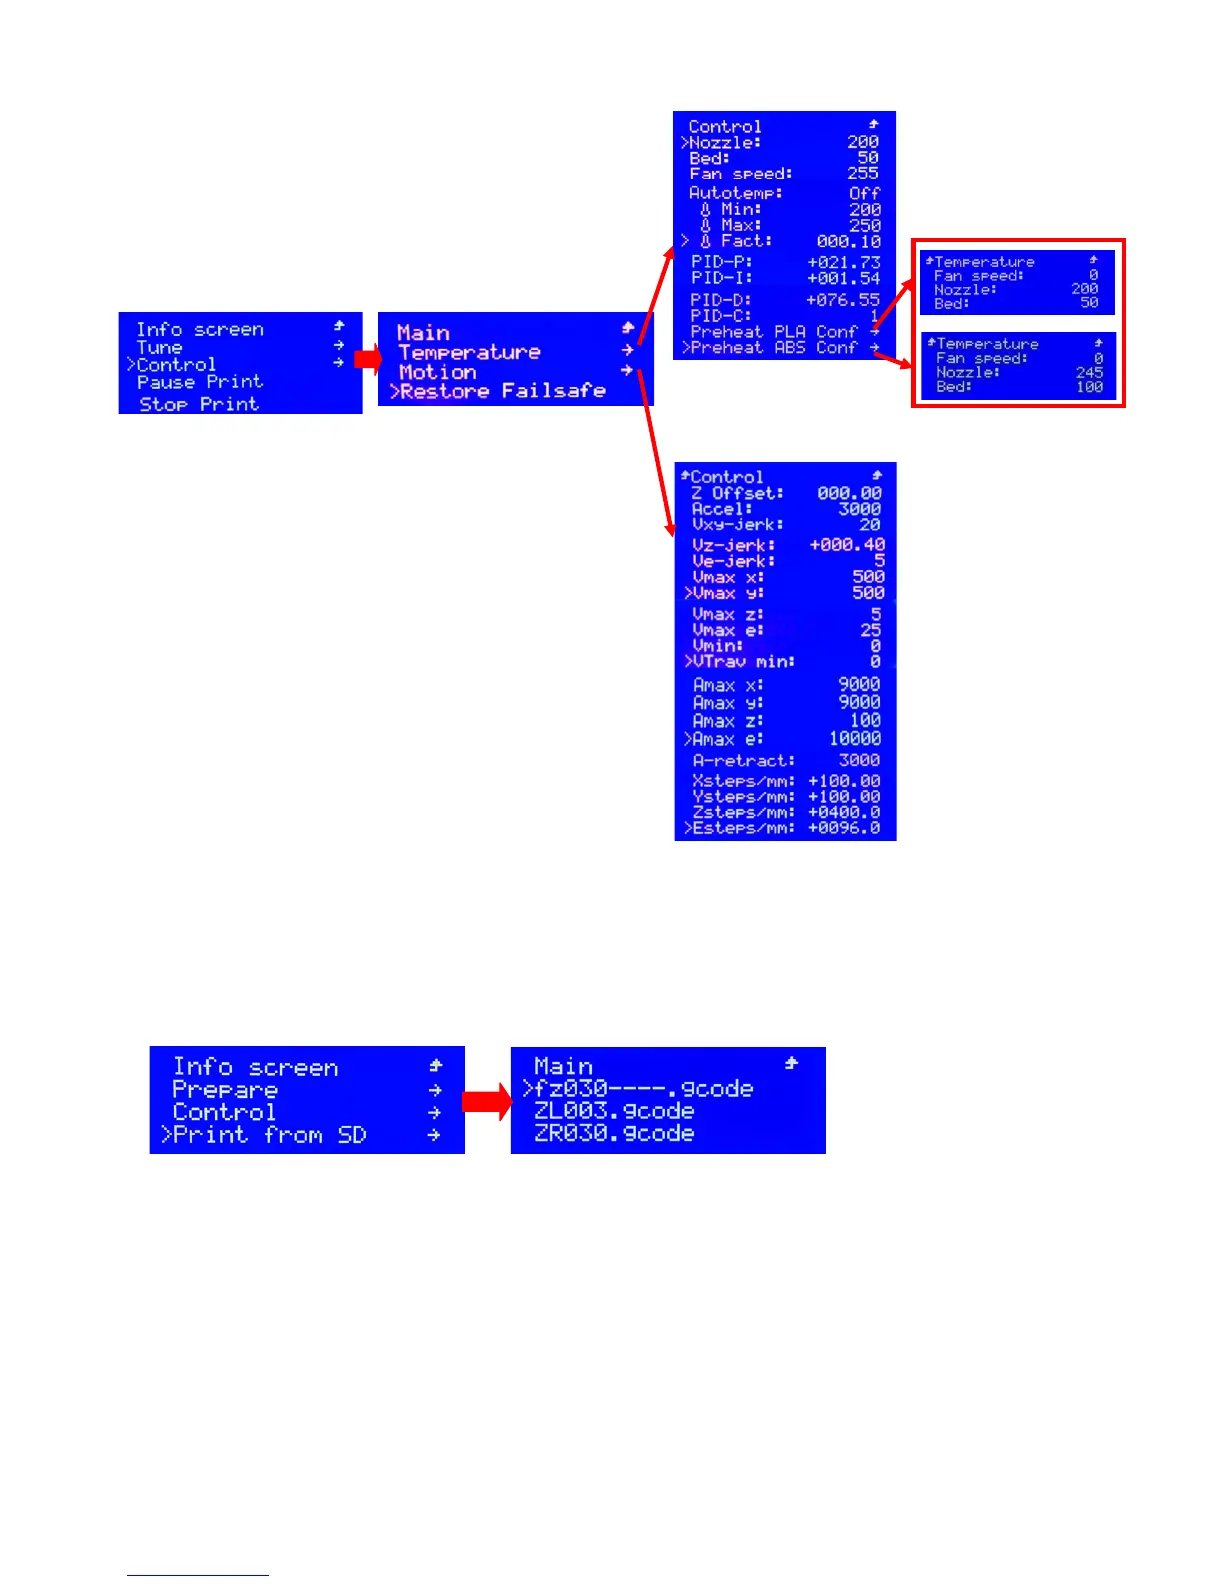
When 3D printer printing, the secondary memo interface
would be shown as(Picture 18), click the “Control” to access
to the 3
rd
(Picture 7.27) 4
th
(Picture 7.28,7.29), ,5
th
(Picture
7.30)memo interface
Picture 7.33
Picture 7.34
Picture 7.36
Pict2ure 7.37
You needn’t to adjust it since all the setting on Picture 7.35,
7.36 & 7.37 is almost the same as the one on Picture 7.28,
Ve-jerk: The speed variation of Extruder
with no need acceleration
Picture 7.38 Picture 7.39
When 3D printer is not printing, click “print from SD” and access to 3
rd
page of memo interface (Picture
7.39) then start printing by choosing the “.g code” file