EasyManuals Logo

Ambient Weather WS-1900A User Manual

Ambient Weather WS-1900A
34 pages
To Next Page IconTo Next Page
To Previous Page IconTo Previous Page
Page #5 background imageLoading...
Page #5 background image
Version 1.2 ©Copyright 2020, Ambient LLC. All Rights Reserved. Page 5
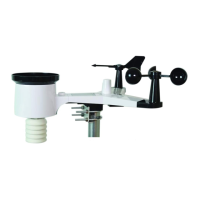
5.3 Sensor Array Set Up
(a)
Figure 1
No
Description
No
Description
1
Wind Vane (measures wind direction)
7
Solar panel
2
Wind Speed Sensor (measures wind speed)
8
U-Bolt
3
UV sensor/ Light sensor
9
Battery compartment
4
Thermometer-hygrometer sensor (measures temperature and humidity)
10
Reset button
5
Rain collector
11
LED transmitter Indicator
6
Bubble level
5.3.1 Install Wind Vane
Reference Figure 2. (a) Locate and align the flat key on the wind vane shaft to the flat key on the wind vane and push
the vane on to the shaft. (b) tighten the set screw with a precision screw driver and make sure the wind vane spins
freely.
Note: You may need to back out the set screw first before sliding the vane onto the shaft.
Note: The wind vane shaft does not spin as freely as the wind cups. This is by design. The dampening prevents
the wind vane from spinning with the slightest breeze, which will result in variable wind all of the time. The added
resistance allows the wind vane to change direction with 2 3 mph, providing a much better wind direction tracking.
(a)
(b)
Figure 2

Table of Contents

Questions and Answers:

Question and Answer IconNeed help?

Do you have a question about the Ambient Weather WS-1900A and is the answer not in the manual?

Ambient Weather WS-1900A Specifications

General IconGeneral
BrandAmbient Weather
ModelWS-1900A
CategoryWeather Station
LanguageEnglish

Related product manuals