Version 1.2 ©Copyright 2020, Ambient LLC. All Rights Reserved. Page 8
5.3.6 Install Batteries
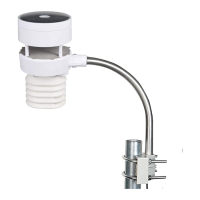
Reference Figure 6. Insert 2 x AA non-rechargeable batteries (not included) into the battery compartment. The
LED indicator on the back of the transmitter will turn on for four seconds, and then flash once every 16 seconds (the
sensor transmission update period).
Figure 6
Note: If the LED does not light up, or stays on permanently, make sure the battery polarity is correct, or the
batteries are fresh. Do not install the batteries backwards. You can permanently damage the thermo-hygrometer.
Note: We recommend lithium batteries for cold weather climates, but alkaline batteries are sufficient for most
climates. We do not recommend rechargeable batteries. They have lower voltages, do not operate well at wide
temperature ranges, and do not last as long, resulting in poorer reception.
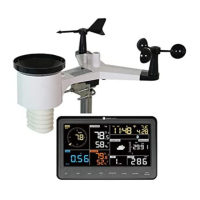
5.3.7 Install Mounting Pole
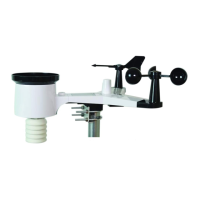
Reference Figure 7. The mounting assembly includes two U-Bolts and a bracket that tightens around a 1 to 2”
diameter pole (not included) using the four U-Bolt nuts.
Figure 7
Use the bubble level next to the rain sensor to make sure the sensor array is completely level. If the sensor array is
not level, the rain gauge, UV and solar radiation sensors will not measure properly.
 Loading...