Version 0A 25
600-watt rated Power/SWR meter, antenna, or antenna matching device. Good
quality Mini-8 or RG-8X cables are acceptable for anything but RTTY use,
although larger RG-8 style cables are normally preferred. The antenna matching
system, or antenna tuner, must connect to this port.
ɀ Connect the RF IN connector to your transceiver. Do not install any active
antenna matching devices on this port. In general, the shortest and most direct
cable connection is best, although high quality cables can be very long without
adverse effect on performance. RG-58/U or Mini-8 (RG-8X) style cables are
acceptable. You should never use a tuner of any type on the amplifier input, nor
should you drive this amplifier with over 100 watts peak envelope power. Never
use a non-FCC accepted device with this amplifier.
ɀ The ALC line is often not required, but ALC is a useful last resort safety measure.
The ALC system monitors the ALS-606 RF output power and reflected power,
and reduces exciter power if power exceeds front panel ALC control limits.
ɀ Operate the bandswitch manually during initial testing. Do not connect band
decoders, band data lines, or computer interfaces until initial tests are completed
and the amplifier is functioning normally.
Initial Operation
For personal and equipment safety, double-check all wiring and connections () before
turning power on. After verifying all power supply and amplifier connections, follow the
procedures below:
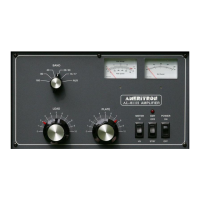
Place the MULTIMETER switch (Figure 3, #6) in the HV position. The multimeter is the
right-side scale on the panel meter (Figure 3, #1), and reads on the 0-70 right scale
bottom. Find 50 on the scale. HV reading should be approximately 50 volts whenever
the amplifier is ON. Any voltage above the Forward (KW) arc crossing is unsafe.
Place the ALC SET control (Figure 3, #4) full clockwise (10 on knob scale). This sets
ALC to engage at maximum possible power, which effectively will disable the ALC for
initial testing.
With the STANDBY/OPERATE switch (Figure 3, #7) on STANDBY, turn the power
switch (ref 8) ON.
There might be a slightly delayed “click” from the power supply. HV (Figure 3, #1)
should immediately rise to near full scale. The meter and the appropriate BAND LED
(Figure 3, #3) should illuminate.
The multimeter’s HV scale (fig.2, ref 1, lower right scale arc) should indicate
approximately 50 volts. Any voltage above the Forward (KW) arc crossing is unsafe.
Rotate the BAND switch (Figure 3, #2 and 3) through all positions. The appropriate
BAND LED will illuminate, band-filter relays will audibly switch when moving between
160 and 80 meters, 80 and 40 meters, 40 and 30 meters, 20 and 17meters, 15 and 12
meters, and between 10 and 6 meter selector positions. There should be no filter
 Loading...