User Manual - CTC-1402
32
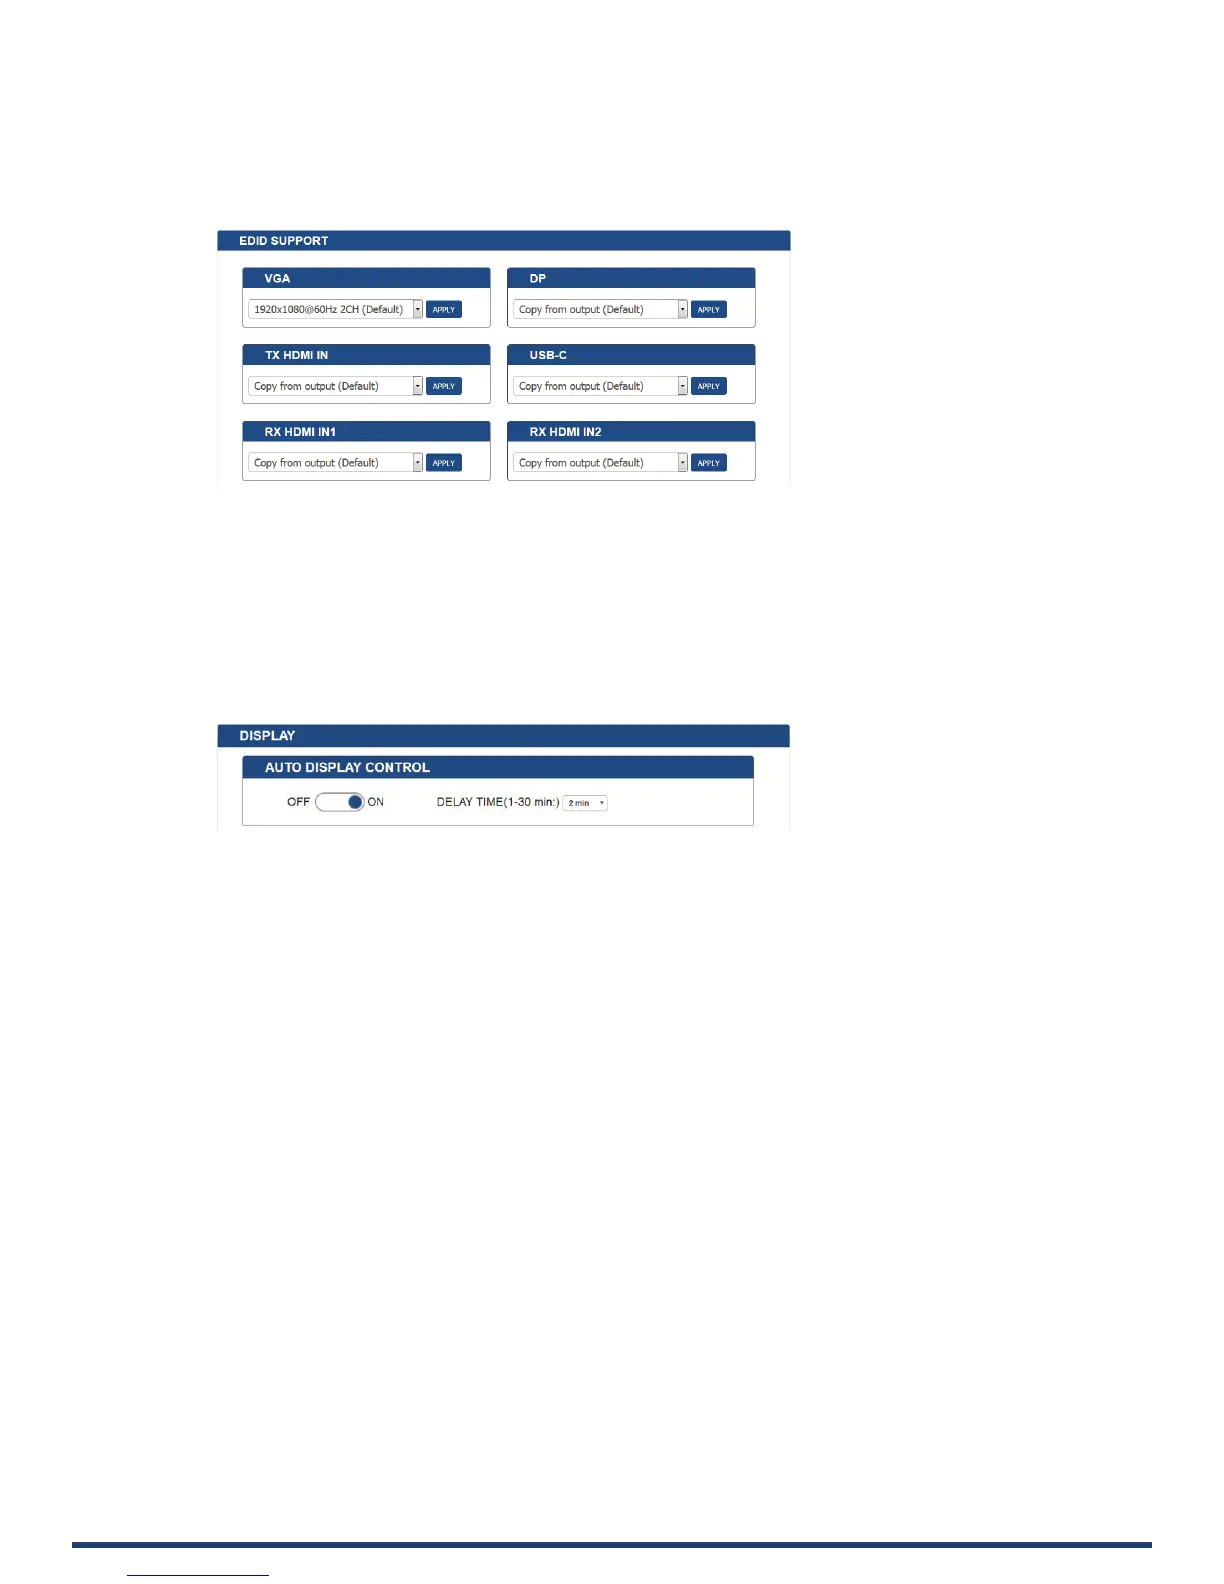
EDID
In this column, the input EDID can be set to system requirements. Click the drop-down menu to select resolution, click Apply to
take eect.
Display
In this column, control of the displays is available.
Auto Display Control
ON: Click to enable Auto Display Control.
DELAY TIME (1~30 min): Click the down arrow to set the time for the display to power o automatically when no signal is present.
Example: With the time set to 2 minutes, the output display will be powered o automatically when there is no signal input for 2 minutes.
OFF: Click to disable the Auto Display Control. (Default setting)
RS232 Setting
In this column, users can select the RS232 control mode.
• CONTROL: Slide the button to select RS232 control mode.
Local (default): Local sending of commands to control the projector.
Netlinx: Sending commands via NetLinx studio to control the projector.
• DEVICE: When “Netlinx” is selected, click the down arrow to select TX or RX for RS232 setting.
• BAUD RATE: Click the down arrow to select the baud rate.
• PARTY BITS: Click the down arrow to select the parity bits.
• DATA BITS: Click the down arrow to select the data bits.
• STOPS BITS: Click the down arrow to select the stop bits.
• END FLAG: Select the ending ag after each RS232 command.
• POWER ON: Enter the RS232 command to turn on the projector and screen, then click the “SAVE” button to take eect.
• POWER OFF: Enter the RS232 command to turn o the projector and screen, then click the “SAVE” button to take eect.
• APPLY: Click “APPLY” to take eect.