5.6. SCALER
Connecting the handpiece and insert.
Refer to the specific instructions provided with the handpiece.
• Before attempting to connect the handpiece, make sure the contacts are perfectly dry. Blow air from the syringe, if necessary, to
dry.
• Make sure the threaded sections of the insert and handpiece are perfectly clean.
Use.
Operating times: see operating instructions supplied with the handpiece.
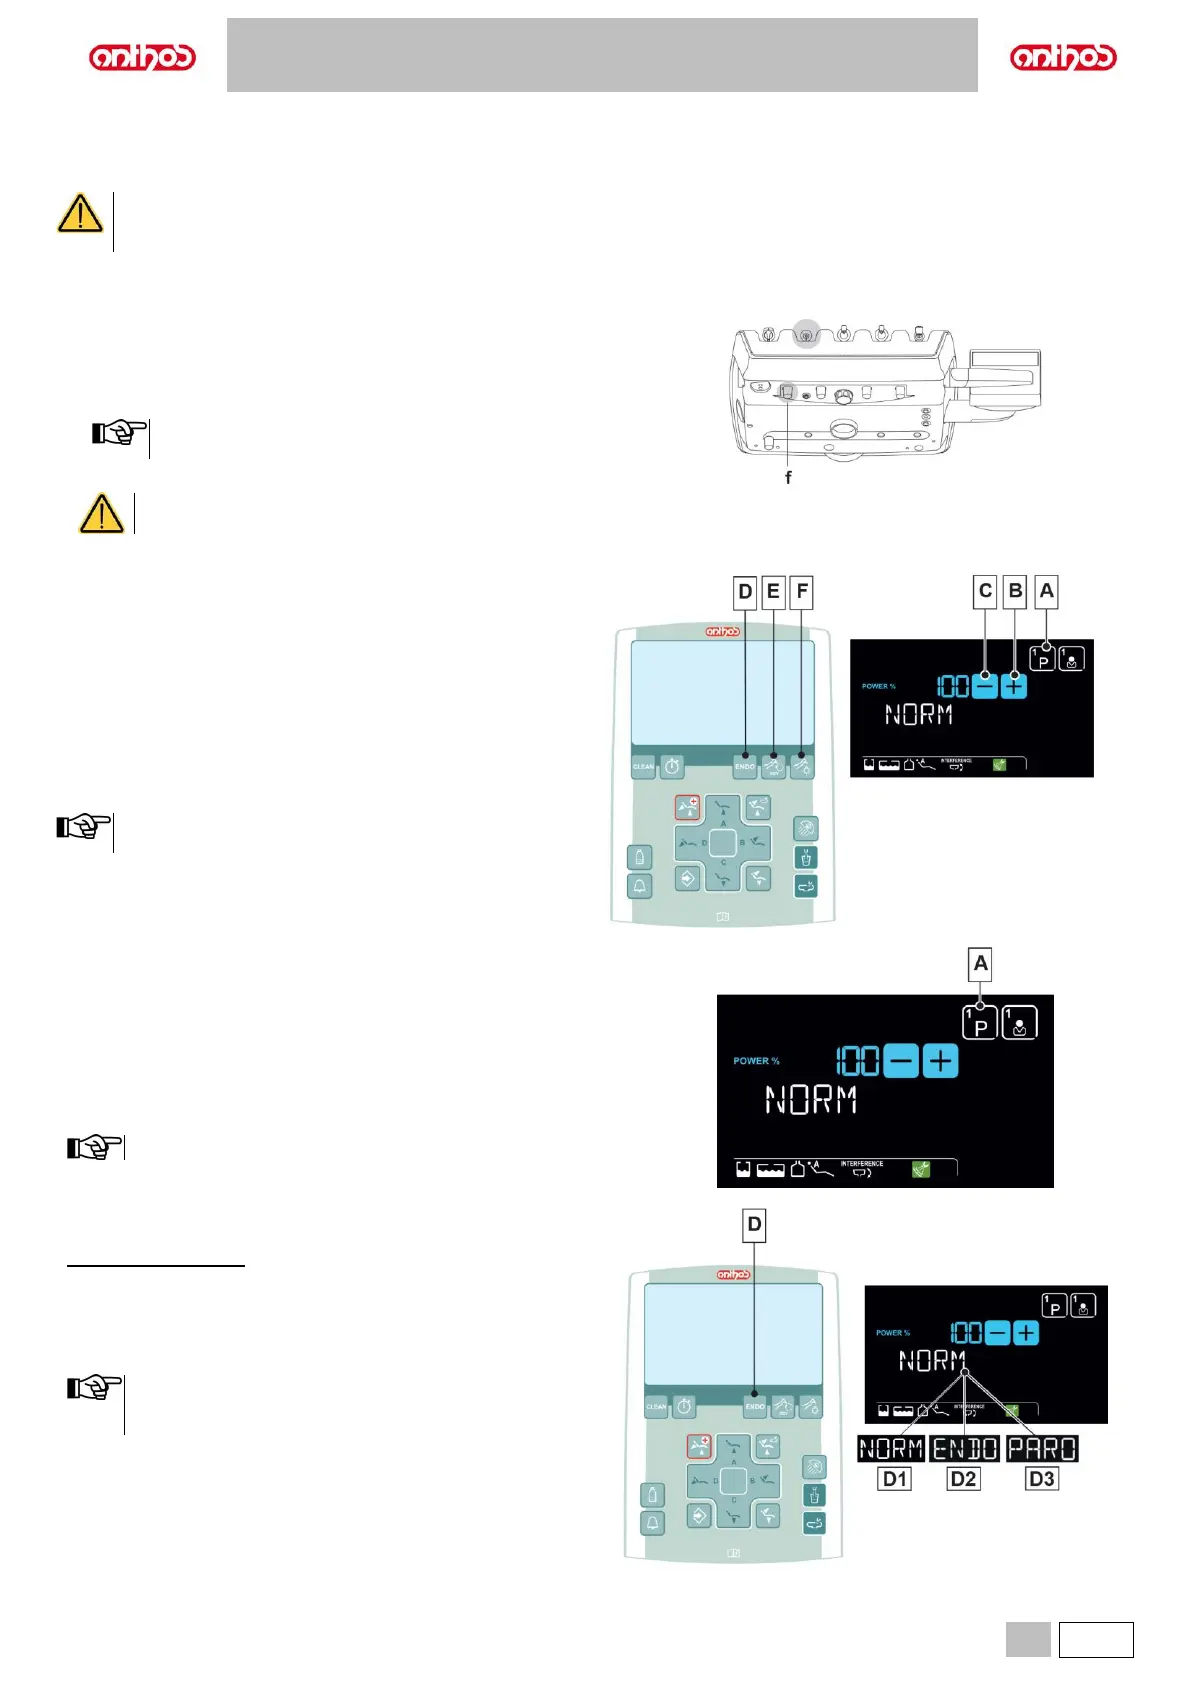
f Cock that regulates the amount of cooling water
(at the instrument).
• Place the instrument in its work position.
Instrument activation is highlighted by the relevant managing
screen appearing on the DISPLAY.
• Use the foot control lever to start the instrument (see paragraph 5.2.).
The instrument is supplied NON-sterile.
Description of the buttons:
Scaler working programme selection.
(for LCD Touch DISPLAY only).
Increase the scaler’s power output.
Decrease the scaler’s power output.
Scaler operating mode selection.
(NORMAL, ENDO or PARO, LCD Touch DISPLAY only).
Turning on the fiber optics.
Press the button to turn Fiber Optics on/off (F).
The Fiber Optics switch off when the turbine is not used for 30
seconds (rheostat lever disabled).
Scaler working programme selection
(for LCD Touch DISPLAY only).
The scaler has 3 different working programmes, identified with P1, P2 and
P3, that can be selected cyclically.
Each working programme saves the following data:
- maximum power,
- fiber optic on/off,
- type of delivered spray.
Touch the button (A) repeatedly to select the desired programme.
The variation is cyclical.
Scaler operating mode selection
(for LCD Touch DISPLAY only).
With instrument removed
• Select the scaler operating mode by touching the button (D) repeatedly,
the following operating modes will be selected in sequence:
D1 NORM (normal).
D2 ENDO (50% reduced power).
D3 PARO (40% reduced power).
• With the foot control lever activated, you cannot edit operating
mode.
• The data set are automatically saved.