User Manual
48
Shift setup should be done in two steps: First, setup necessary timetables. Second,
setup shifts. One or more timetables can be included in one shift.
Timetable is the time period between On-duty and Off-duty required in the company rule.
For instance, the company rule requires the working hours be 08:00-12:00 and
13:00-17:00; so 08:00-12:00 and 13:00-17:00 are two timetables. If such a shift needs
to be setup, these two timetables should be setup first. Here, we use time table
―morning‖ to indicate ―08:00-12:00‖ and time table ―afternoon‖ to indicate ―13:00-17:00‖;
so two timetables have been setup. (Please refer to the following chapter for details of
how to add time tables) and then we can add a shift such as ―Normal shift‖ in which ―shift
cycle‖ and ―cycle unit‖ will be setup. Then we should add two timetables - ―morning‖ and
―afternoon‖ so that a shift setup is completed. Brief introduction is mentioned here for
you to get a general picture of the relationship between timetable and shift. The details
of shift setup will be found in the next two sections.
Timetable maintenance:
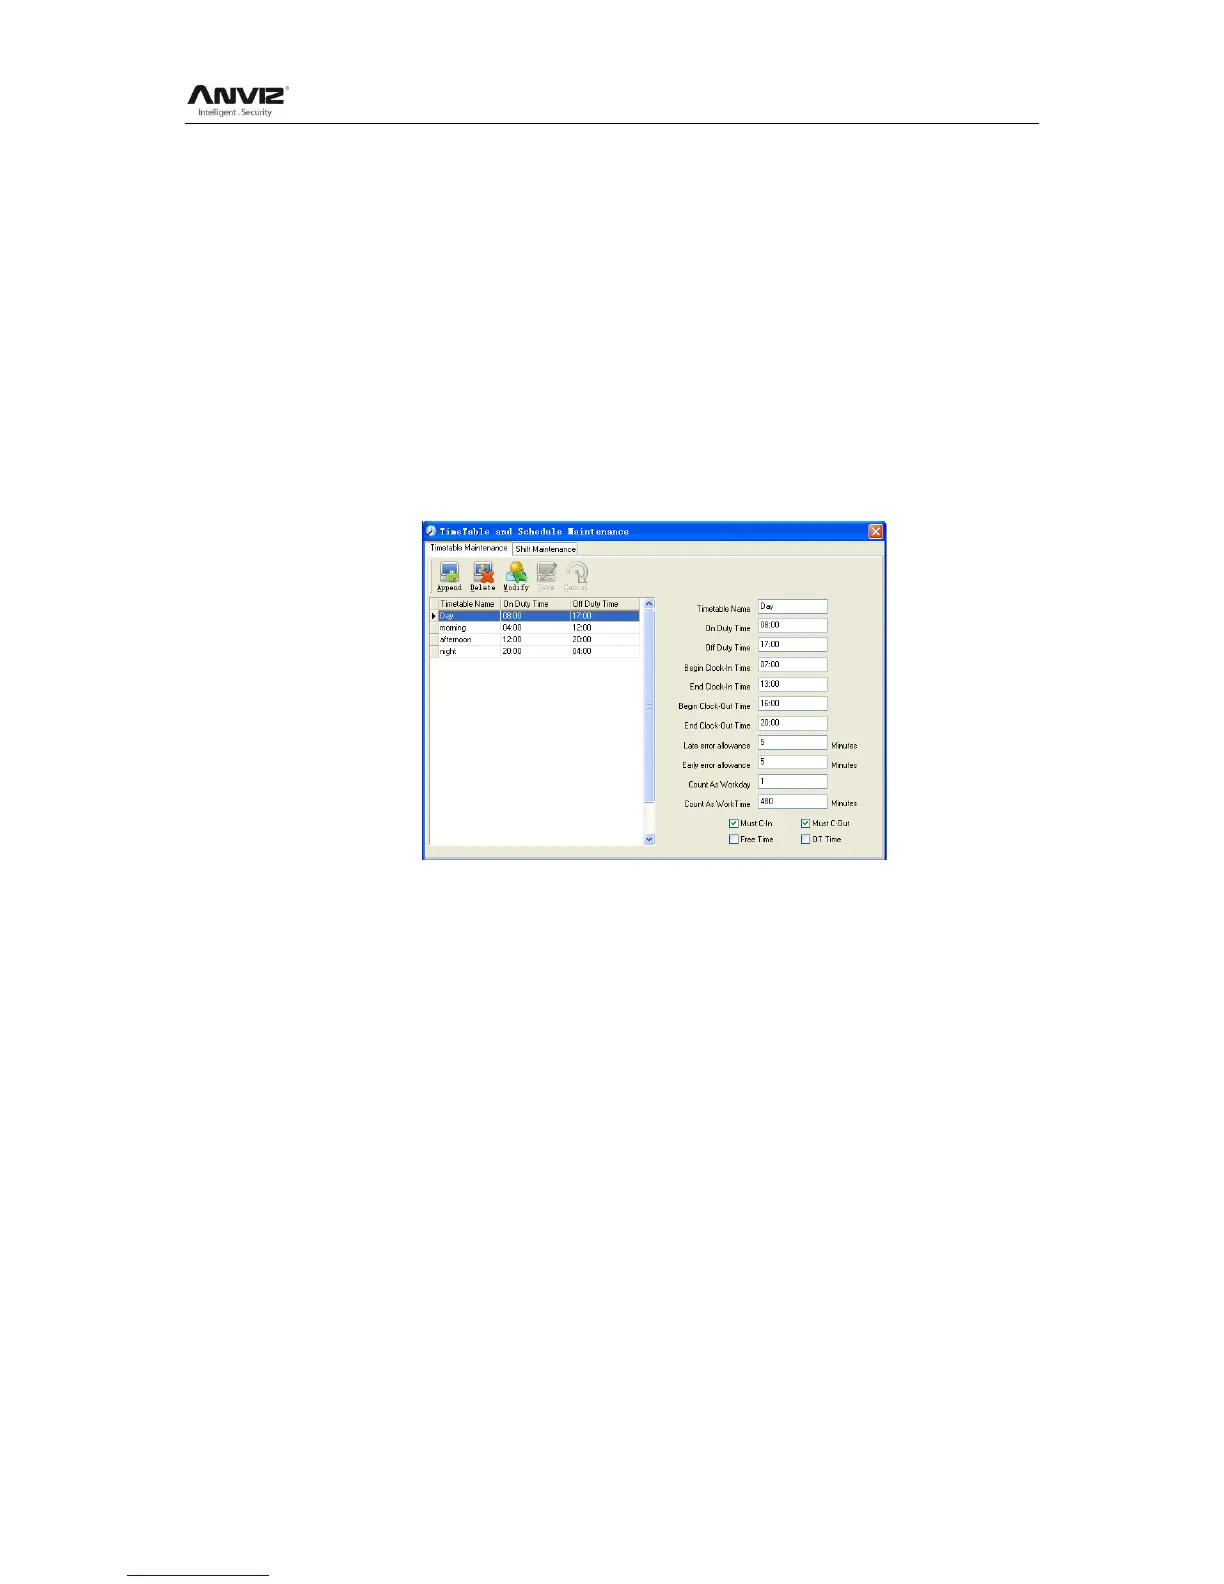
Click [Timetable and Shift] in [Attendance] menu. The following window appears.
Add a new timetable:
Click [Append] and enter the corresponding information:
[Timetable Name] For instance: Day Shift
[On duty Time] (08:00) [Off duty Time] (17:00)
[Begin Clock-in Time] (07:00) [End Clock-in Time] (13:00)
[Begin Clock-out Time] (16:00) [End Clock-out Time] (20:00),
[Late error allowance] (5) [Early error allowance] (5)
[Count as work day] (1)
[Count as work time XXX minutes] (480).
Tick [Must C-In] and [Must C-out],
Finally click [Save] to confirm.
Note: Every item should be setup in timetables with no blank left.
[Begin Clock-in Time] and [End Clock-in Time] setup the valid time period for clock-in.
Records out of this time range will be treated as invalid ones. For instance [Begin
Clock-in Time] is 07:00 and [End Clock-in Time] is 13:00. If clock-in record is 07:01 or
12:59, they are valid records but if clock-in record is 06:59, it is invalid. Besides, [Begin
Clock-in Time] and [End Clock-in Time] can be more than one day (meaning [End
Clock-in Time] can be before [Begin Clock-in Time]) but it can‘t be longer than 24 hours.
 Loading...