46
Apogee Ensemble Thunderbolt | User’s Guide
Channel Section
This portion of the Primary Window displays Channels for Analog input, Digital input, and Playback from audio
software�
1. Channel Top Label - Indicates the channel’s source� Can be renamed by clicking the label and typing a user-customized
label� To restore to the default text, delete the text and press “Return” on your keyboard�
*These labels are transmitted to your DAW.
2. Channel View Button - Show the Channel View pop-up to view/hide various
channels�
* Channels are disabled when hidden so audio signal will not pass.
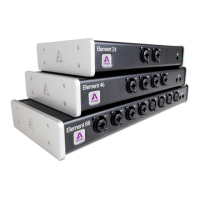
• Analog Input Channels - Corresponds to the physical analog input
connections on your Element interface�
• Optical Input Channels - Corresponds to the physical optical input
connections on your Element interface�
• Playback Channels - Corresponds to the virtual signal path from your
Mac’s software outputs�
3. Input Channel Level Meter - Shows the post-converter digital signal level coming into the channel�
4. Input Icon - Shows the input type selected from the Analog Level drop-down�
5. Analog Level - Use this drop down menu to choose the analog level for each A/D conversion channel�
• Choose Mic when connecting microphones, direct boxes, or any devices that needs to run through a microphone
preamplier. -XLR Input only.
• Choose Inst when connecting a guitar, keyboard, or any high impedance (Hi-Z) instrument to the 1/4” input (balanced
TRS or unbalanced TS)� The signal is sent through a Hi-Z to Low-Z conversion circuit before being sent through the
microphone preamplier circuit.
• Choose +4dBu when connecting to “pro” gear, such as an external mic pre, compressor, or EQ, with outputs at a
+4dBu nominal level�
• Choose -10dBV when connecting to “semi-pro”, hi-, or musical instrument gear with outputs at a -10 dBV nominal
level�
6. Input Gain Control - Use to adjust the gain of the microphone preamp� Not available when the input is set to +4dBu or -10dBV�
7. Input Settings - Provides options for the various inputs:
• Phantom Power: Use this button to enable 48 volt phantom power on the corresponding Analog In channel�
Condenser mics without their own power supply require 48 volt phantom power to operate�
• Group: The input gain controls of adjacent odd-even channels are adjusted simultaneously. Any level osets
that exist before inputs are grouped will be preserved after a group is chosen�