7
Opto valve installation - Concealed shower valve
!
In addition to the guide below it is essential that the written instructions overleaf are read and understood and that
you have all the necessary components (shown below) before commencing installation. Failure to install the product in
accordance with these instructions may adversely affect the warranty terms and conditions. Do not undertake any
part of this installation unless you are competent to do so. Prior to starting, ensure that you are familiar with the
necessary plumbing regulations required to install the product correctly and safely.
Opto shower valves are supplied with universal fittings.
1
If installing the product built in to a solid wall, chase out a suitable recess in the wall to receive the valve and pipe work.
If installing the valve in a concealed panel mounted situation, in most cases it will be necessary to first install a suitable
sound fixing in the cavity area before fixing the valve. A hole of Ø130mm is required to install the valve and gain access to
inlet and outlet connectors.
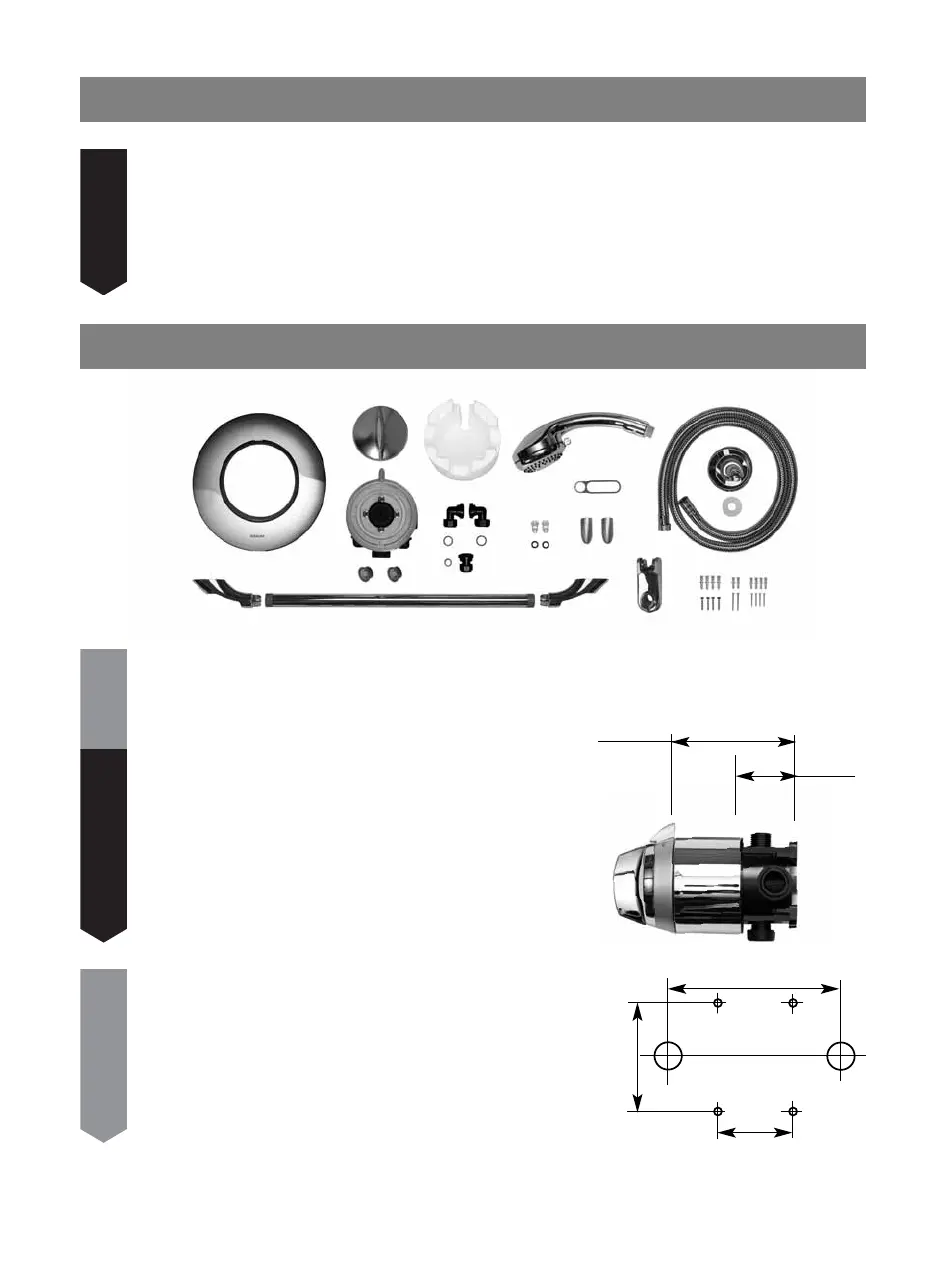
Minimum mounting depth 60mm, maximum depth 100mm,
measured from mounting surface to finished/tiled wall surface.
Components
2
Mark the position for the four fixing points as indicated.
!
65mm
150mm
Supply pipes hot on
left, cold on right
65mm
60mm min.
from back
face of
valve to
finished/
tiled wall
surface
(10mm
allowance
for tiles)
100mm max.
to finished/
tiled wall
surface