10
21
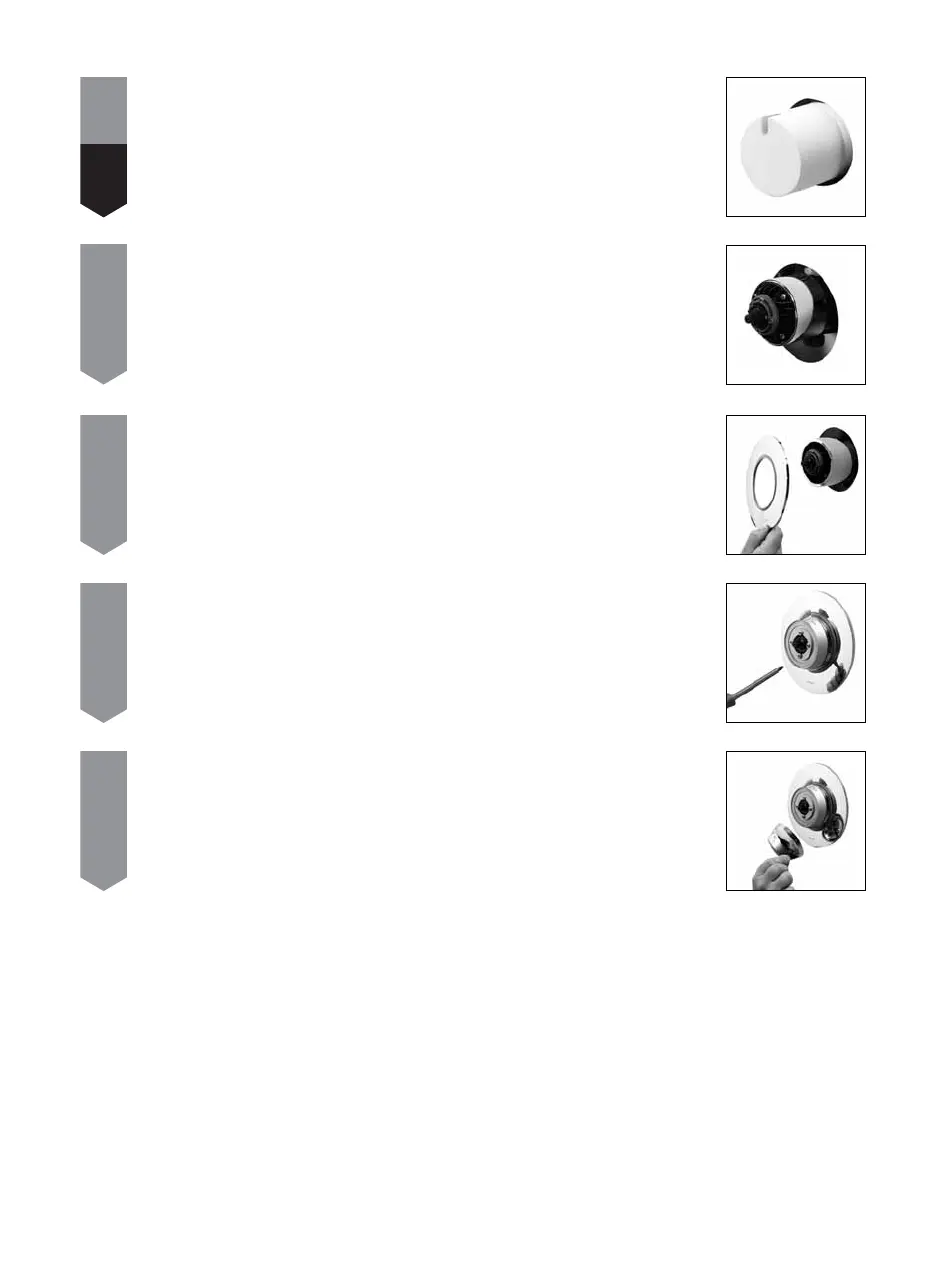
Using a silicone based lubricant or liquid soap, lubricate the wall plate seal. Apply a thin bead
of silicone mastic into the groove on the rear of the wall plate and carefully push the wall plate
into position flush with the finished wall surface, ensuring the Aqualisa logo is positioned at the
bottom of the wall plate.
22
Place the lever onto the valve assembly in the mid-blend (12 o’clock) position. Using the four M4
screws provided secure the temperature lever to the valve hand tight only.
23
The on/off knob and cartridge shaft are manufactured with a flat face to ensure correct
orientation when fitting the knob to the valve. Ensuring the on/off graphics are positioned at the
top of the knob and the flat faces on the knob and cartridge shaft are correctly aligned, push
the knob onto the valve fully home.
20
Replace the shroud, ensuring the shroud seal is in position.
19
If the product is built in to a wall of solid construction, place the mortar guard around the valve
and fill in the chase. Once the in-filling material has set, carefully remove the mortar guard to
expose the valve body.
!
THE MORTAR GUARD MUST BE USED.