E-16
FM
Connecting an aerial
A suitable FM aerial
must be connected to
the AVR400 before FM
radio can be received.
In strong signal areas,
the wire FM aerial
supplied can be used with
reasonable results.
When installed and
receiving FM radio, check the signal
strength by pressing the front panel or
remote control’s
INFO button until the
signal indicator is displayed.
In weak signal areas, or for optimal
FM radio reception, a roof- or lo-
mounted aerial is advised as this
will give superior reception.
In some areas, cable radio may be available or, in an
apartment building, a distributed aerial system may
be installed. In either of these cases you should have
sockets in your home marked
FM or VHF (do not use
those marked TV); these should be connected to the FM
coaxial connector on the rear of the AVR400.
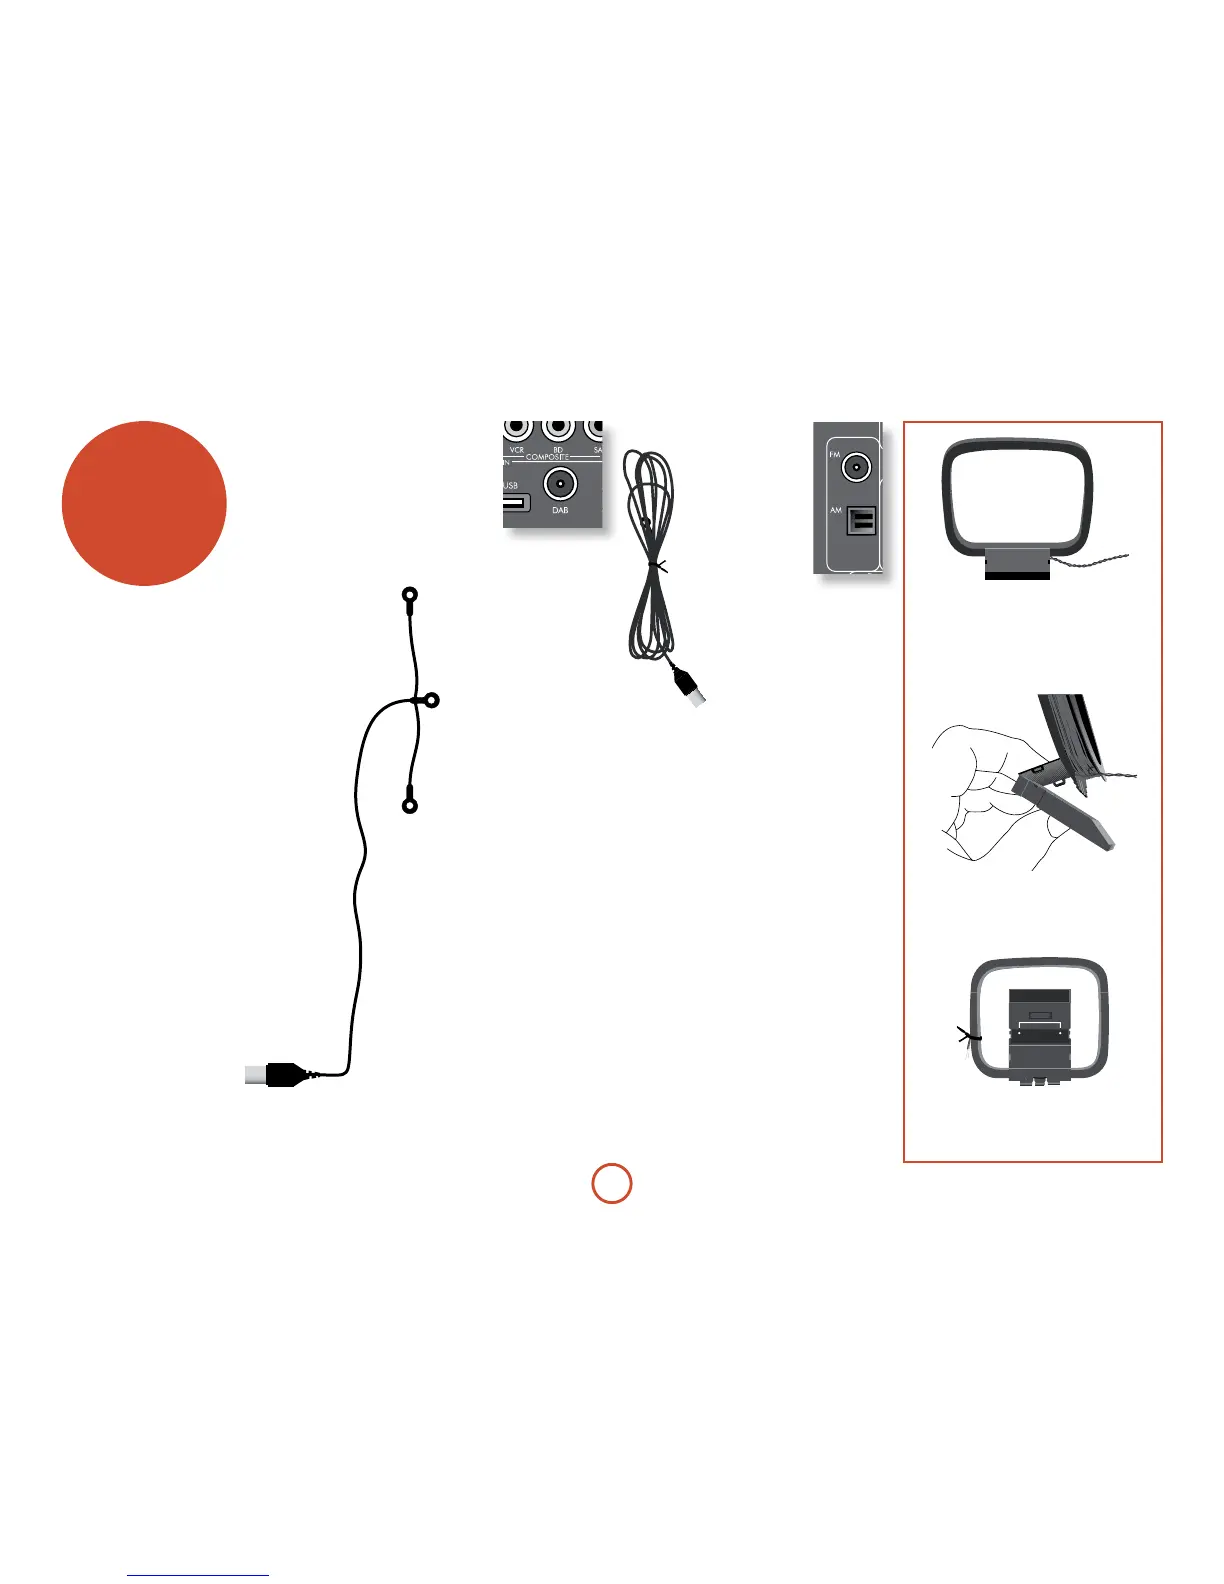
AM
Connecting an aerial
An AM aerial is required to receive AM/medium wave
radio signals, so a simple loop aerial is supplied with
the AVR400. Follow the assembly instructions in the
diagram below.
Make sure that the aerial is positioned well away from
the AVR400 itself, TVs, computers and other sources
of RF ‘interference’. Rotate the aerial to discover which
position gives the best reception.
DAB
(where tted)
In strong signal areas,
the DAB ‘T’ wire aerial
supplied can be used
with reasonable results.
Mount the aerial as high
up as possible on a wall.
In the UK the
‘T’-elements need to be positioned vertically for
DAB reception since broadcasts are
vertically polarised. In other localities,
check with your Arcam dealer or try
both horizontal and vertical positions
for best reception.
Try each usable wall of the room
to see which gives best reception
and use tacks or adhesive tape
to secure the aerial in a ‘T’
shape, but note that no tacks
should come into contact with the
internal wire of the aerial.
When installed and receiving DAB,
check the signal strength by pressing
the front panel or remote control’s
INFO button until the signal quality
indicator is displayed.
In weak signal areas, a high-gain, externally-
mounted or roof-mounted aerial is desirable in
order to receive the highest number of services.
In Band III transmission areas (such as the UK),
use a multi-element Yagi aerial with the elements
mounted vertically, as the transmissions are
vertically polarised. If you are close to more
than one transmitter, use an omnidirectional or
folded dipole aerial.
If the DAB services in your area are transmitted
on L-band, then ask your dealer for advice for
the best aerial to use.
radio
connectors
Aerial connectors
e AVR400 is tted with an AM/FM receiver module
and a DAB receiver, depending on the region where it
was sold. e type of aerial you need depends on your
listening preferences and the local conditions.
Your AVR400 is capable of superb radio reception, but
only if it is receiving a good quality transmission signal.
Try the aerials supplied with your unit. If you are in a
medium to strong signal area, these should be adequate
for good reception. In areas with poor signal strength,
you may require a roof or lo mounted aerial.
Contact your local Arcam dealer or aerial installation
experts for advice about local reception conditions.
 Loading...