6
EN
HEATING MODE
AUTOMATIC OPERATION
When starting the unit the fan may stop until the indoor
heat exchanger coil has warmed up sufficiently. This
is because the COLD DRAFT PREVENTION SYSTEM
is operating. During this period, the OPERATION lamp
remains lit (red led).
DEFROSTING OF OUTDOOR UNIT HEAT
EXCHANGER
When the outdoor temperature is low, frost or ice may
appear on the heat exchanger coil, reducing the heating
performance. When this happens, an appropriate
defrosting cycle of the exchanger is activated. During this
function operation, the fan of the indoor unit stops. Heating
operation restarts after several minutes. (This interval
will vary slightly depending on the room and outdoor
temperature).
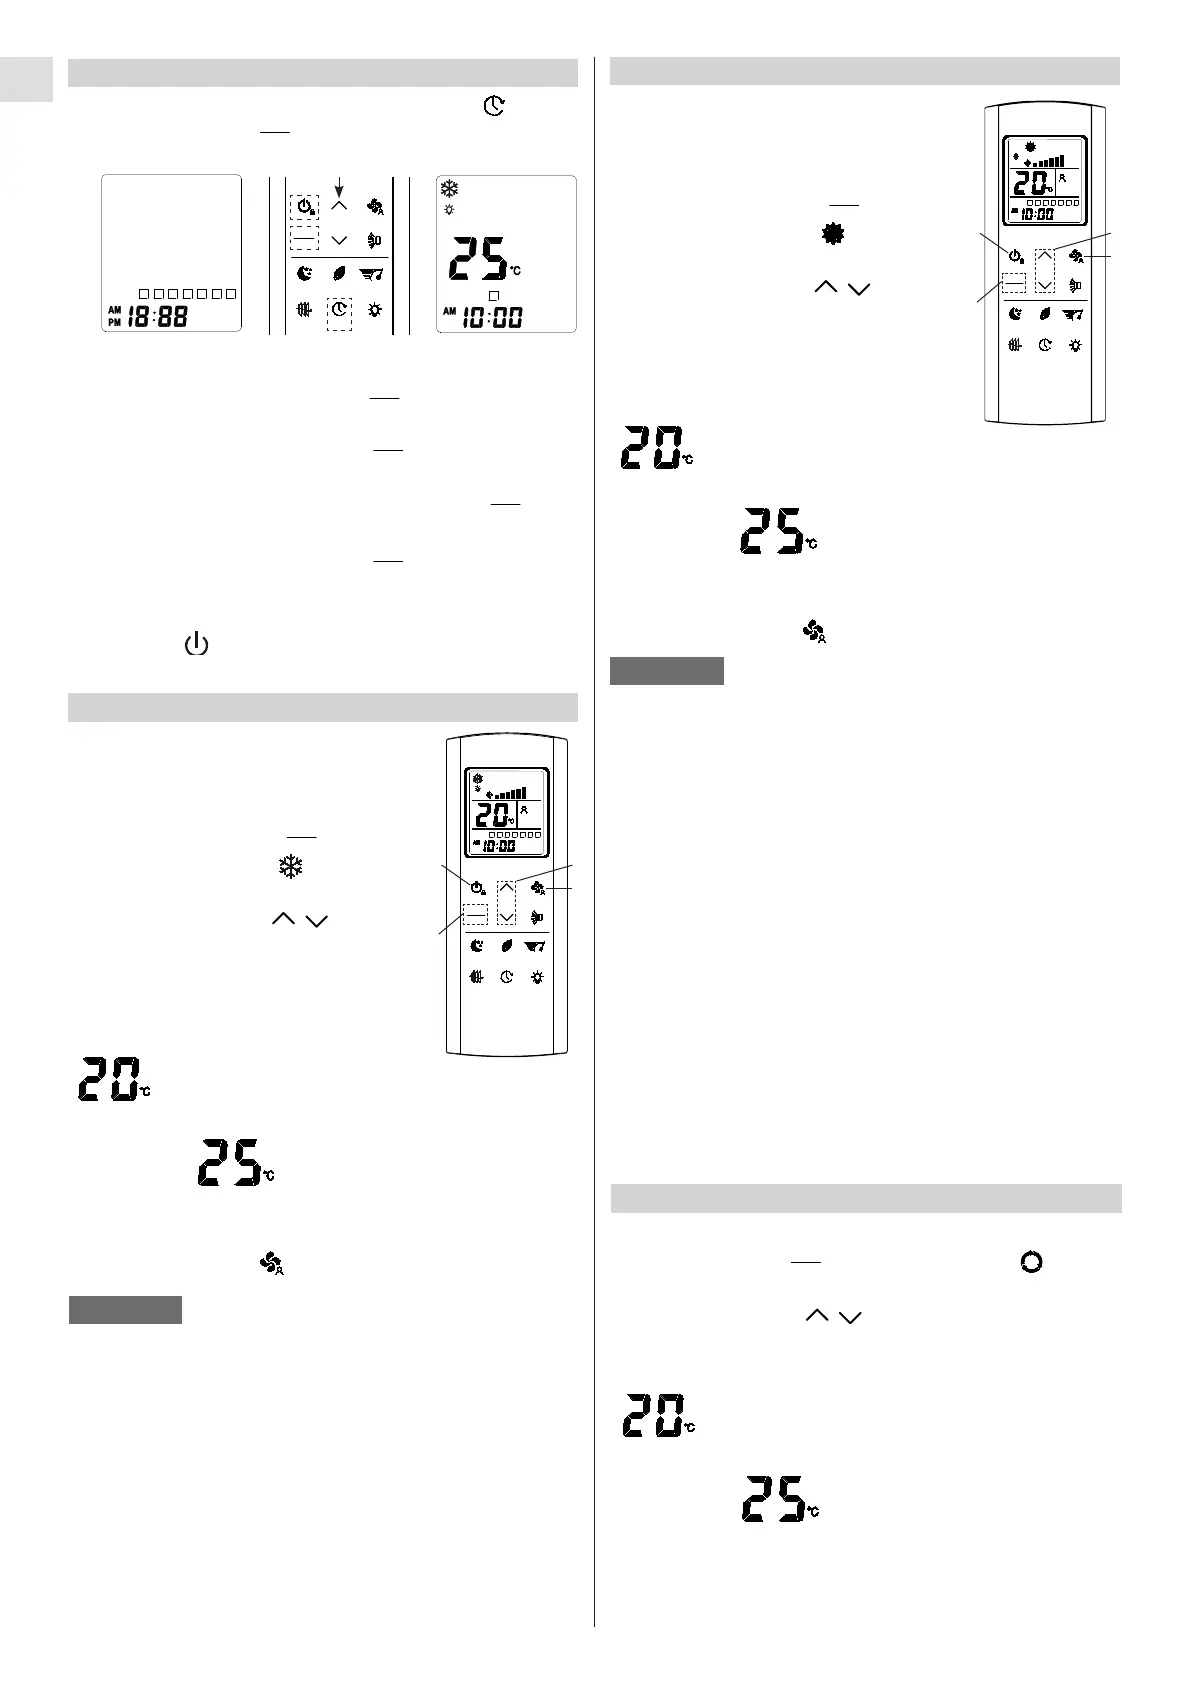
HOW TO SET THE CLOCK
1. Turn on the unit with the ON / OFF
button.
2. Press the button until the
COOLING symbol appears on
the display.
3. Press the buttons to set the
desired temperature (
the temperature
range is between 10 °C and 32 °C
).
COOLING MODE
NOTES
SET
THE DISPLAY SHOWS THE
SELECTED TEMPERATURE
AND THE WORD “SET”.
AFTER 5 SECONDS FROM THE
REQUIRED TEMPERATURE
SETTING THE DISPLAY
WILL SHOW THE ROOM
TEMPERATURE AGAIN.
4. Press the button to select the fan speed.
1
• If the fan is set in automatic mode and the unit stops
because setpoint is reached, also the fan will stop.
• If the fan is set in one of the six manual speeds, it will
go on operating at the selected speed, even if the unit
stops due to reaching the setpoint.
• When the external or internal temperature is too low,
the unit could limit the speed of the compressor or
switch it off for a certain period of time to avoid the
formation of ice on the internal heat exchanger.
35*+
9+:
35*+
9+:
:[XHU
+IU
4OMNZ
,ORZKX
:OSKX
2OMNZ
S
M
W
T
T
F
S
AUTO
WEEK
SET
3
4
2. AM or PM starts flashing: use the arrows to choose
AM or PM, then confirm with
The hour indication starts flashing: set the hour with
the arrows, then confirm with
The minutes indication starts flashing: set the
minutes with the arrows, then confirm with
WEEK starts flashing: set the day of the week with
the arrows, then confirm with
3. At this point the procedure is finished: press the
button to exit the clock menu.
1. Press for a few seconds the Timer button .
Press the button .
:OSKX
35*+
9+:
35*+
9+:
35*+
9+:
S
M
W
T
T
F
S
WEEK
SET
35*+
9+:
:[XHU
+IU
4OMNZ
,ORZKX
:OSKX
2OMNZ
35*+
9+:
35*+
9+:
S
M
W
T
T
F
S
WEEK
ARROWS
2
1. Turn on the unit with the ON / OFF
button.
2. Press the button until the
HEATING symbol appears on
the display.
3. Press the buttons to set the
desired temperature (
the temperature
range is between 10 °C and 32 °C
).
SET
THE DISPLAY SHOWS THE
SELECTED TEMPERATURE
AND THE WORD “SET”.
AFTER 5 SECONDS FROM THE
REQUIRED TEMPERATURE
SETTING THE DISPLAY
WILL SHOW THE ROOM
TEMPERATURE AGAIN.
4. Press the button to select the fan speed.
1
35*+
9+:
35*+
9+:
:[XHU
+IU
4OMNZ
,ORZKX
:OSKX
2OMNZ
S
M
W
T
T
F
S
AUTO
WEEK
SET
3
4
2
NOTE
• If the unit stops because setpoint is reached, also the
fan will stop.
COLD DRAFT PREVENTION
1. Turn on the unit with the ON / OFF button.
2. Press the button until the AUTO symbol appears
on the display.
3. Press the buttons to set the desired temperature
(
the temperature range is between 10 °C and 32 °C
).
35*+
9+:
A
SET
THE DISPLAY SHOWS THE
SELECTED TEMPERATURE
AND THE WORD “SET”.
AFTER 5 SECONDS FROM THE
REQUIRED TEMPERATURE
SETTING THE DISPLAY
WILL SHOW THE ROOM
TEMPERATURE AGAIN.

 Loading...