Setup
Synergy
RF™
System Service Guide
DFU-0276-4r0_fmt_en-US Page 27 of 50
1. Reorient or relocate the receiving device.
2. Increase the separation between devices.
3. Connect the device to an outlet on a different circuit than the other
device(s) are connected.
4. Consult the manufacturer or field service technician for receiving devices
for guidance.
5. Power off any other RF devices not being used in the procedure.
6. Eliminate any points where the RF cords contact or cross cords of the
receiving device e.g., arthroscopic imaging system.
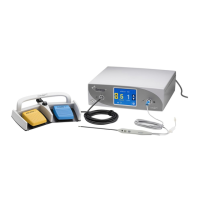
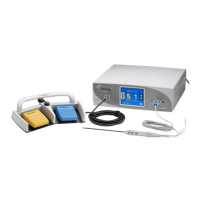
4.5 Basic Setup Procedure for the AR-9800 Console
NOTE: Section 5.0, Operation, of the User’s Manual, explains how to use the
console.
Inspect all cords for cracks, nicks and breaks. Inspect all connectors for damaged
or missing parts.
1. Place the AR-9800 on a flat, dry surface, such as the AR-6481 Arthrex
Arthroscopy cart.
2. Connect the receiver end of the power cord for the AR-9800 into the AC
socket and the plug end to the facility AC mains supply.
3. Power ON console.
4. Allow to fully initialize.
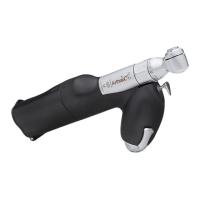
5. Attach a single use, disposable Arthrex Apollo
RF
Device (Probe).
Note: For Probes with suction, attach the suction adapter to the standard
hospital suction system or pump equipment. Sterile suction tubing is
required for use with Apollo
RF
aspirating probes. Please review the Probe
DFU (DFU-0242-XX) for the appropriate suction ranges and other operational
parameters.
6. Attach a footswitch, if applicable.
WARNING!
DO NOT stack or place equipment adjacent to the AR-9800 console if possible. If
such a configuration is necessary, carefully observe the configuration in question
to ensure that electromagnetic interference does not degrade performance.
Do not attach handpieces or footswitches during the Self Test or the
Programming Modes.
 Loading...