ASPION G-Log Manager – PC software / Operating the sensor
User manual – Version 3.2/11-19 Copyright © ASPION GmbH Page 20
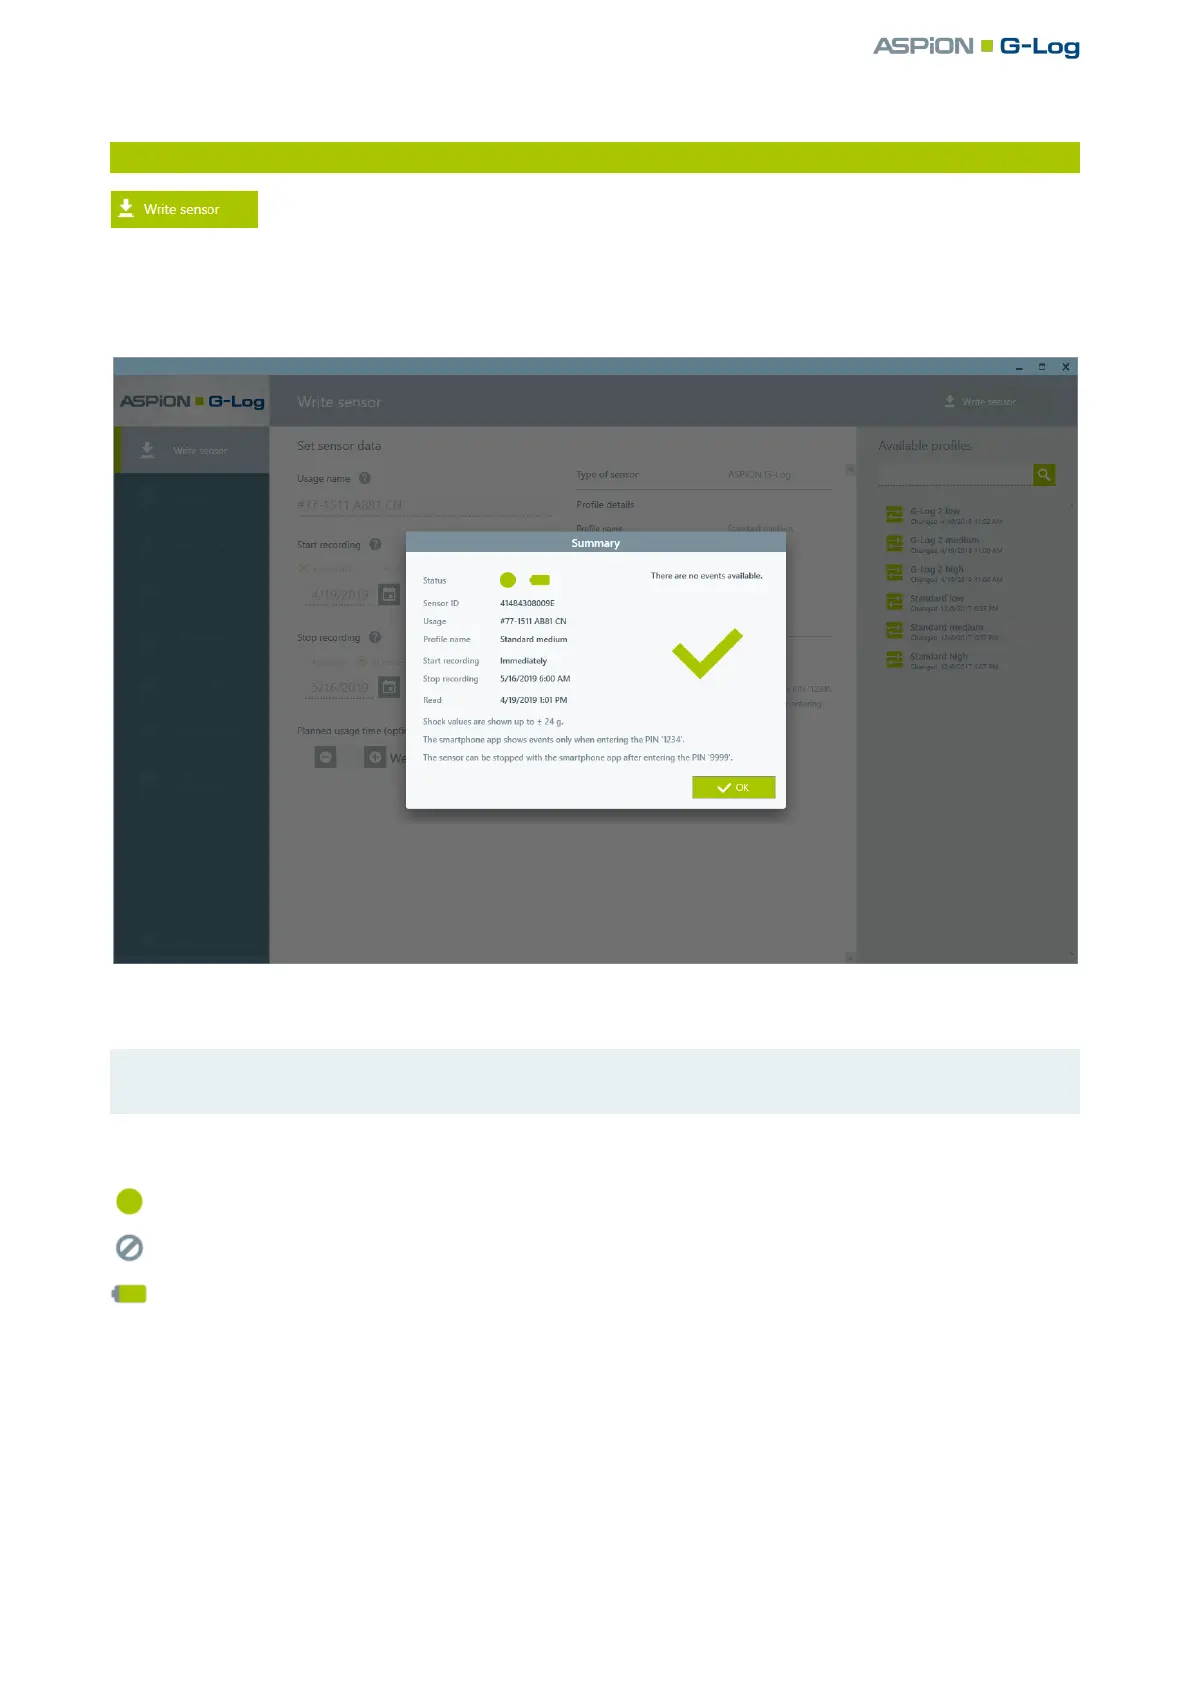
4.2 Transferring data to sensor
You transfer the selected settings by clicking the Write sensor button. Follow the
instructions of the program. Place the sensor you want to start on the card reader with
the label facing up. If you use different sensor types, make sure you select the correct sensor type,
otherwise you receive an error message. After successful writing, the sensor is read out and its current data
is displayed in the summary window.
The sensor is now ready to be mounted.
Please note: you find explanations on how to mount the sensor and a mounting template in
ASPION G-Log shock sensors, chapter 5, “Mounting“.
States
Sensor is activated and records events
Sensor is not activated and does not record any events
Current battery life in percent; display at mouse over
Errors and problem solving
Possible error messages, causes and hints for problem solving:
Please refer to ASPION G-Log Manager – PC software, chapter 10, “Errors and problem solving”.