Your PARTNER Communications System should be ready to use. However, if—
■
the system is connected to a PBX or Centrex system, you may need to change certain
system settings. See appendix A.
■
your local telephone company uses rotary lines instead of touch-tone lines, you must
change your system’s Dial Mode from touch-tone to rotary. The procedure is given below:
To change the Dial Mode:
1.
2.
3.
4.
5.
At a PARTNER phone connected to extension 10, press [
Feature
] [
0
] [
0
] .
The phone beeps once and the light next to the Speaker button is green flutter.
Press the left [
Intercom
] button twice.
The light next to the
[
Intercom
]
button is steady green.
Press [
#
] [
2
] [
0
] [
1
] .
The Message light is steady red if the current setting is touch-tone, flashing red if the current setting is rotary.
Press [
2
] to change to rotary, [
1
] to change back to touch-tone.
If you make a mistake or want to change what you entered, return to step 3.
When you are finished, press [
Feature
] [
0
] [
0
] .
Connecting Standard Single-Line Equipment
■
■
Includes rotary, touch-tone, and cordless phones (Iike you might have in your home), fax machines, an-
swering machines, modems, credit card verification terminals, and extra alerts (bells, chimes, horns,
strobes, and klaxons).
To connect standard equipment to a wall jack, use 1-pair (2-wire) telephone mounting cords. AT&T rec-
ommends D2R mounting cords (see appendix C). To connect standard equipment directly to a 206
module, use 2-pair (4-wire) telephone cords.
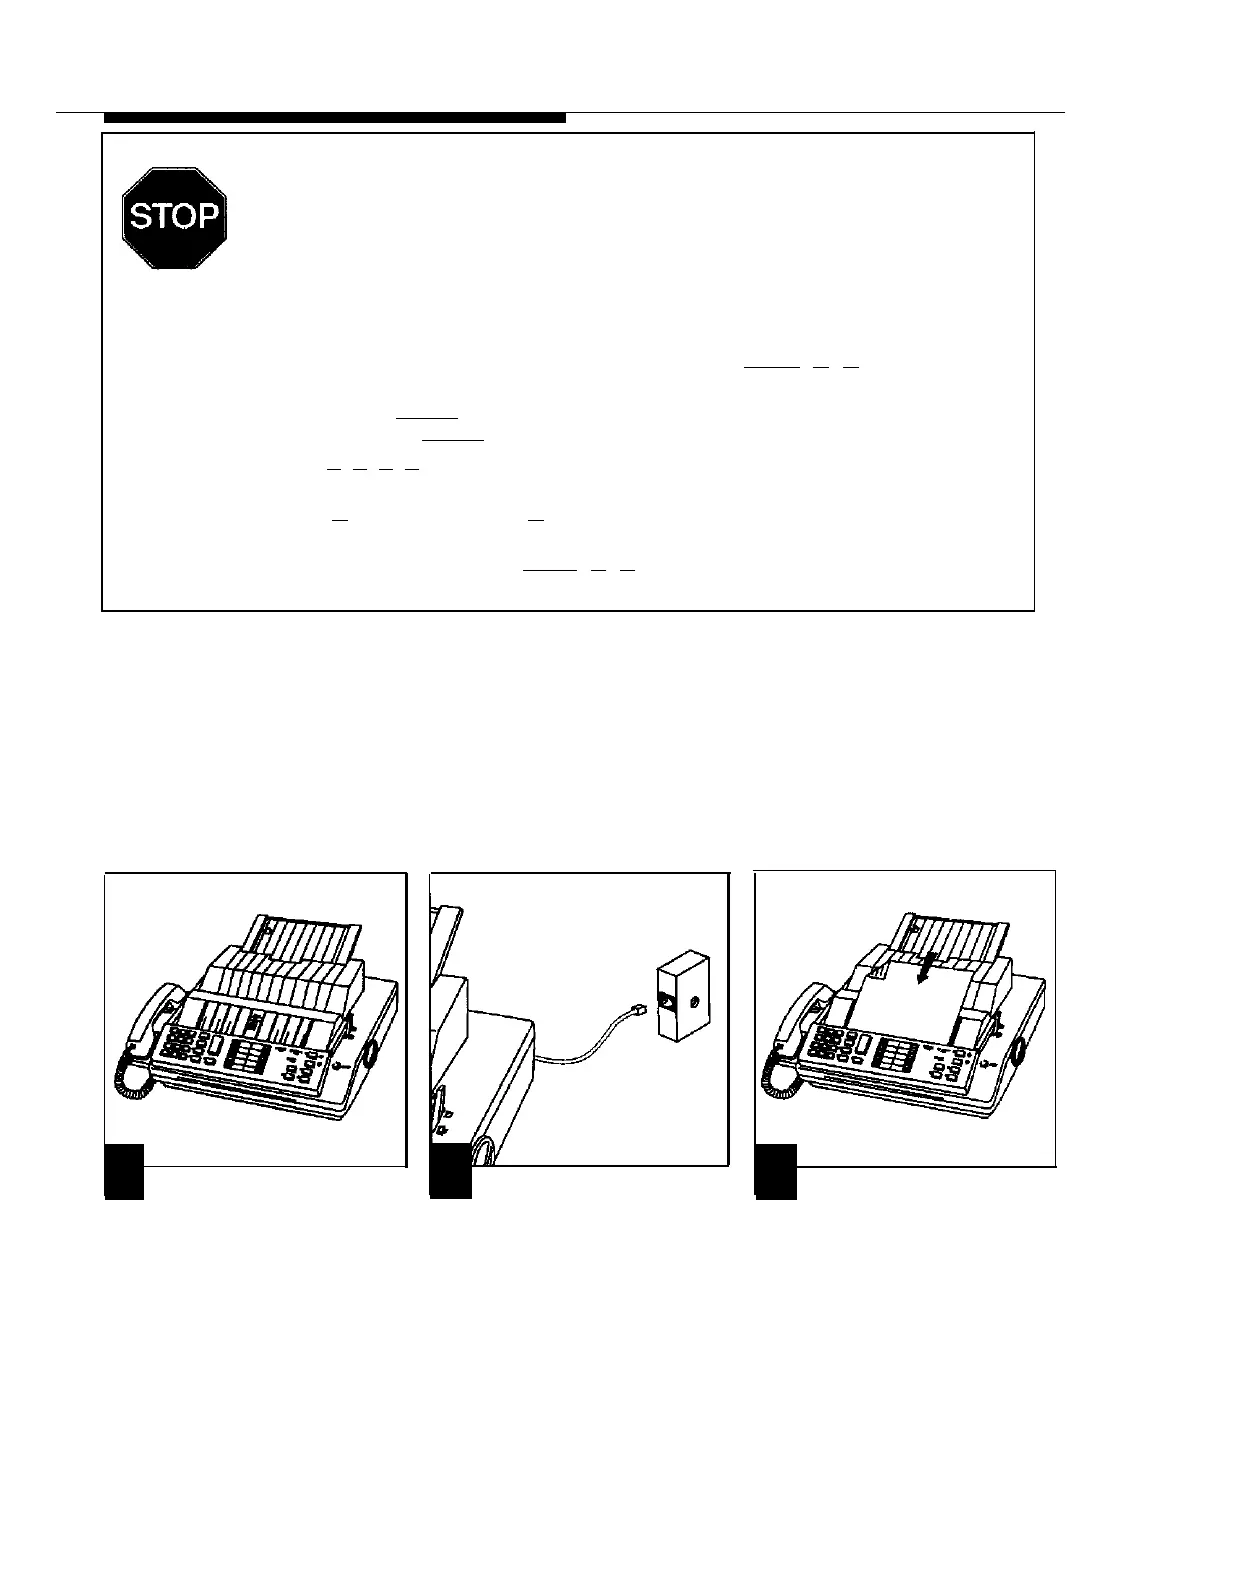
Wall Jack
3
Assemble the equipment accord-
Plug the mounting cord into the
ing to the manufacturer’s instructions.
jack on the equipment. Plug the other
end into the modular wall jack.
1
2
2-12
Installing the Hardware
Test the device appropriately.
For example, to test a fax machine,
send a fax to another machine.
If the equipment does not work
correctly, see chapter 7, “Trou-
bleshooting” or the equipment’s
manual.
 Loading...