Version 6.0 51 March 2010
Installation Manual 3. Configuring the Device
Note: At this stage, you can quit the Software Update Wizard, by clicking Cancel
, without requiring a device reset. However, once you start uploading a
cmp file, the process must be completed with a device reset.
4. Click the Browse button, navigate to the cmp file, and then click Send File; the cmp
file is loaded to the device and you're notified as to a successful loading.
5. Click one of the following buttons:
•
Reset; the device resets with the newly loaded cmp, utilizing the existing
configuration and auxiliary files.
•
Next; the 'Load an ini File' wizard page opens.
Note that as you progress by clicking Next, the relevant file name corresponding to the
applicable Wizard page is highlighted in the file list on the left.
6. In the 'Load an ini File' page, you can now choose to either:
• Click Browse, navigate to the ini file, and then click Send File; the ini file is
loaded to the device and you're notified as to a successful loading.
• Use the ini file currently used by the device, by not selecting an ini file and by
ensuring that the 'Use existing configuration' check box is marked (default).
• Return the device's configuration settings to factory defaults, by not selecting an
ini file and by clearing the 'Use existing configuration' check box.
7. You can now choose to either:
• Click Reset; the device resets, utilizing the new cmp and ini file you loaded up to
now as well as utilizing the other auxiliary files.
• Click Back; the 'Load a cmp file' page is opened again.
• Click Next; the next page opens for loading the next consecutive auxiliary file
listed in the Wizard.
8. For loading the auxiliary files, follow the same procedure as for loading the ini file (Step
6).
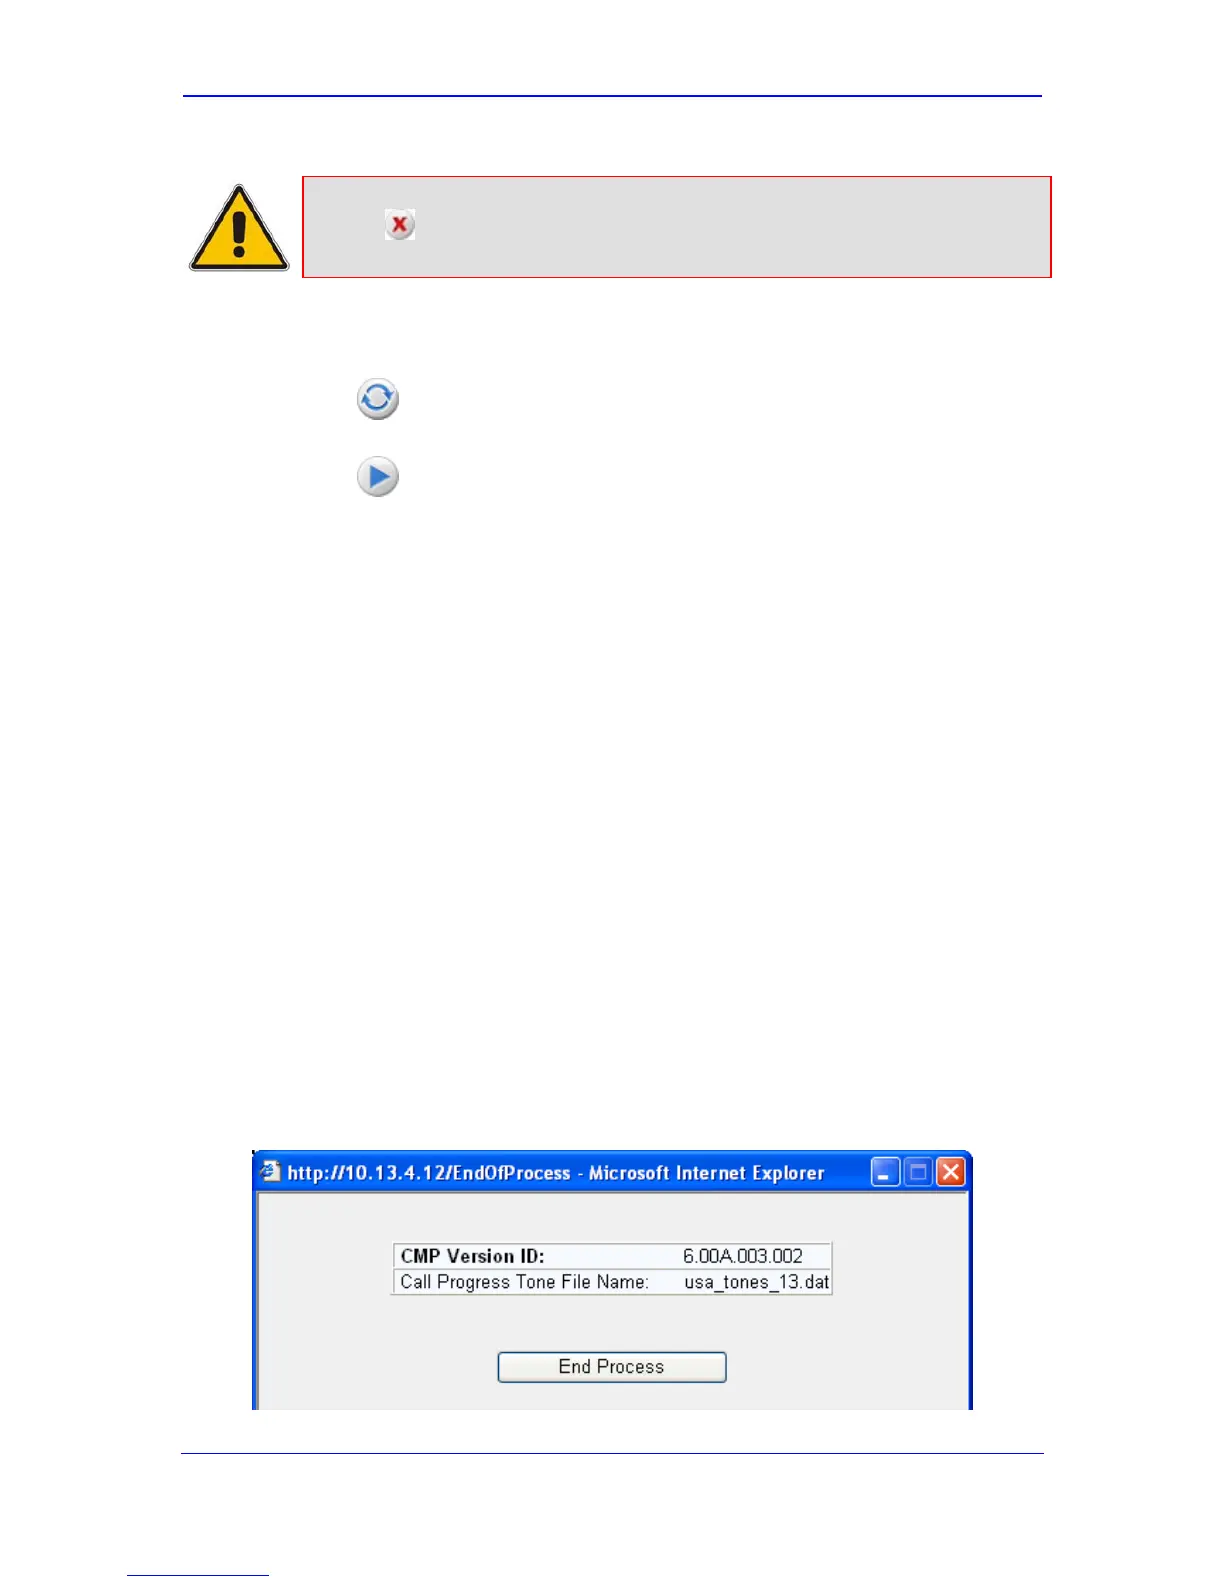
9. In the 'FINISH' page, complete the upgrade process by clicking Reset; the device
'burns' the newly loaded files to flash memory and then resets the device. After the
device resets, the 'End Process' screen appears displaying the burned configuration
files (refer to the figure below).
Figure 3-11: End Process Wizard Page