27
the Display Tablet cannot accurately locate it.
Fault(s) | #: Fault(s) indicates there is/are detected fault code(s)
present; “#” indicates the number of the detected faults.
Pass | No Fault: Indicates the system has passed the scanning
process and no fault has been detected.
Column 4 – to perform further diagnosis or testing on a specific system item,
tap the
○
>
button to the right of that item. A Function Menu screen will
display.
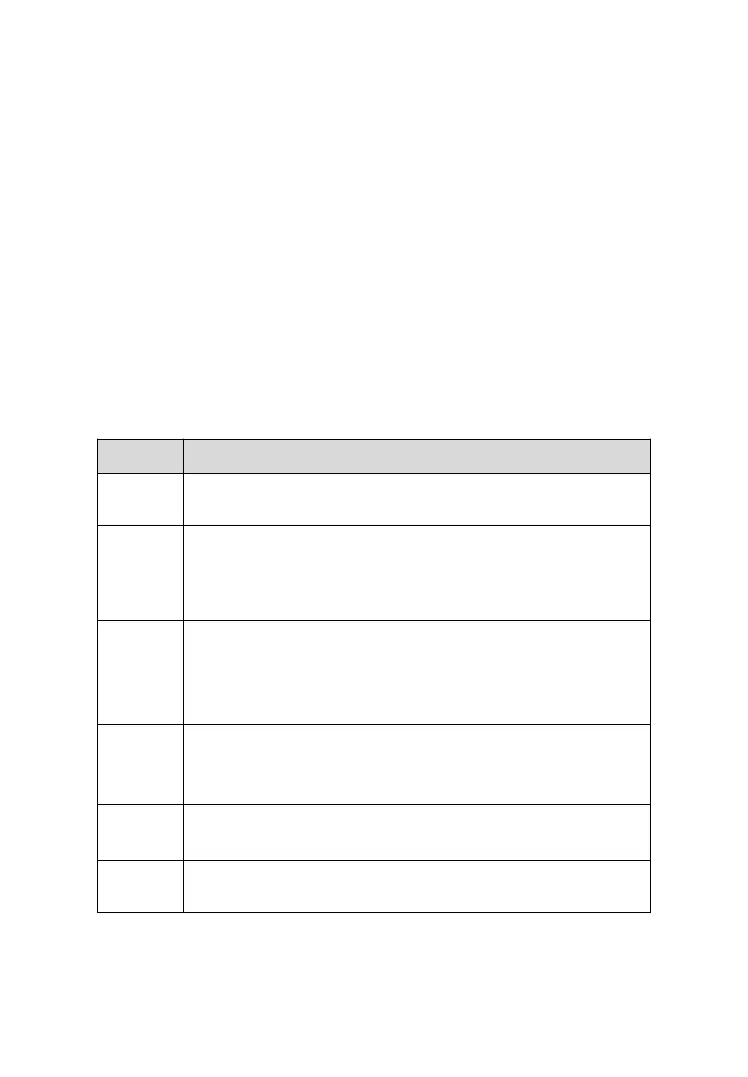
Functional Buttons
A brief description of the Auto Scan’s Functional Buttons’ operations are
displayed in the table below.
Table 4- 3 Functional Buttons in Auto Scan
Displays the diagnostic data in the report form.
Deletes codes. A warning message screen will display
to inform you of possible data loss when this function is
selected.
Confirms the test result. Continues to the system
diagnosis after required system is selected by tapping
the item in the Main Section.
Suspends scanning and it will change to Continue
button after tapping.
Saves the diagnostic session as a history record.
Returns to the previous screen or exits Auto Scan.