45
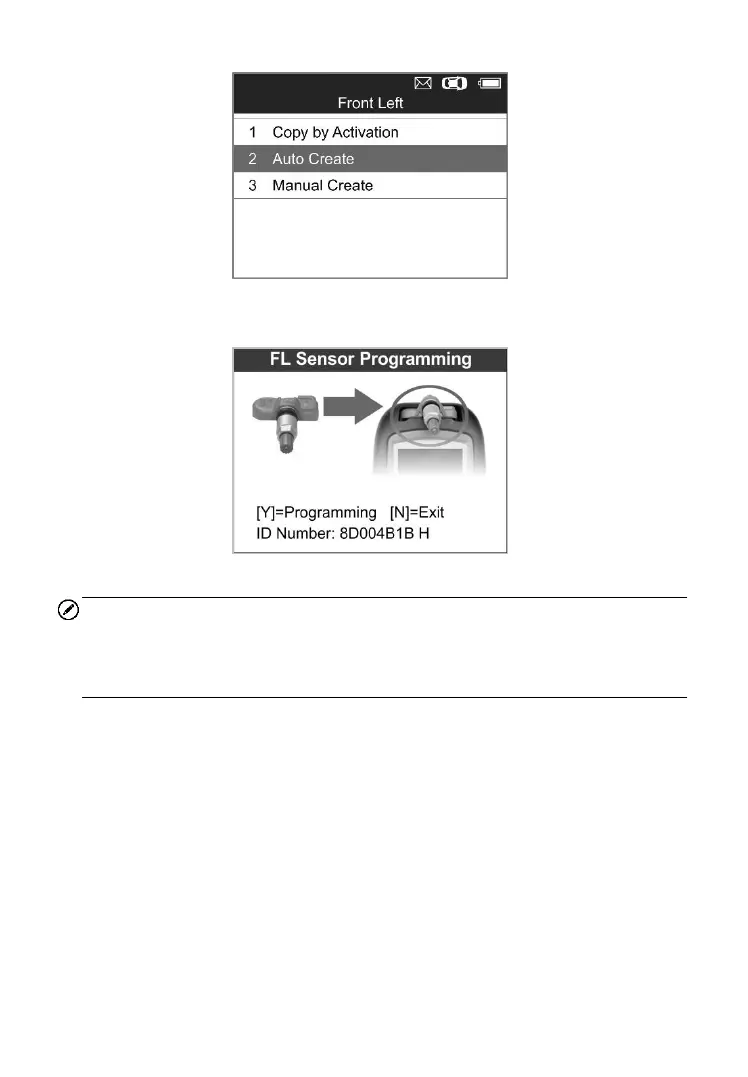
Figure 5-7
4) Insert the correct MX-Sensor into the sensor slot as displayed below:
Figure 5-8
NOTE
Please pay attention to the MX-Sensor type displayed in the screen and
insert the correct MX-Sensor. Inserting incorrect MX-Sensor will cause
programming failure.
5) Press the Y button to write in the new created sensor ID to the
MX-Sensor, and the screen will show as below (Figure 5-9), or the N
button to exit without change. If an error prompt displays as below
(Figure 5-10), please try another type of MX-Sensor, for the type of the
inserted MX-sensor may be incorrect.