26
AVer SVC OPERATION
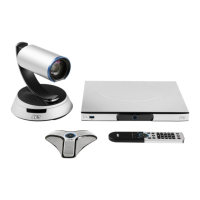
Connecting the camera, microphone, main system, display and power, press the power button to turn
on SVC. Power button starts blinking blue light, AVer logo shows up followed by an animation and
music. In 30 seconds camera image and home screen appear on screen. Aim the remote controller to
camera and start configuring AVer SVC.
Before You Begin
Basic Operation
Navigation buttons:
Use the , , and buttons to move the selection on the remote
controller.
Enter button:
Use the to confirm the selection on the remote controller.
Apply:
Make the changed value to take effect. (For SVC Application)
Save:
Accept the created value and save it to the system.
Cancel:
Cancel the changed value and exit the present screen.
Home Screen
Simply use the navigation buttons to move between selections and press to confirm the
selection. You can easily place a call and select the site contact either in
Dial, Phonebook
or
Call
History
. You can easily setup up the system in
Settings
of
General Setting
,
Video/Audio
, and
Network
. The administrator can set a security password to prevent changes made to the system
setting and WebTool access.
Configuration Icons
From left to right:
Information
,
Phonebook
,
Dial
,
Call history
, and
Settings