35146AJ
32
Diagnostics
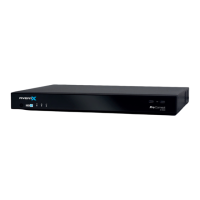
The diagnostics tab shows the operational status of various
connections, ports, and relays for your recorder. This is a helpful tool for
troubleshooting.
Network Connection – Test pings the local gateway setup on the
recorder. In some cases, this may fail if internal ICMP is disabled on the
firewall/router. In these rare cases a red X may appear, but service may
work without issue.
Internet Connection – Test pings an IP (8.8.8.8) to see if internet
connectivity is working correctly.
DNS Resolution – Check to ensure you can resolve DNS names.
80 Outbound – Check to ensure that network traffic can flow through
port 80.
443 Outbound – Check to ensure that network traffic can flow through
port 443.
Plug And Play
Plug And Play (PnP) allows you to disable automatic add and record for
PoE cameras, as well as power cycle individual ports, which will reset
the connected camera.
To disable Plug and Play:
1. Click Setup , and then click the Networking tab.
2. Click the Plug And Play tab.
3. Uncheck the Enable Plug and Play checkbox.
—OR—
Uncheck the Enable PnP checkbox for the desired camera.
To power cycle the PoE camera: Click the Power Cycle icon in the row
for the desired PoE camera.
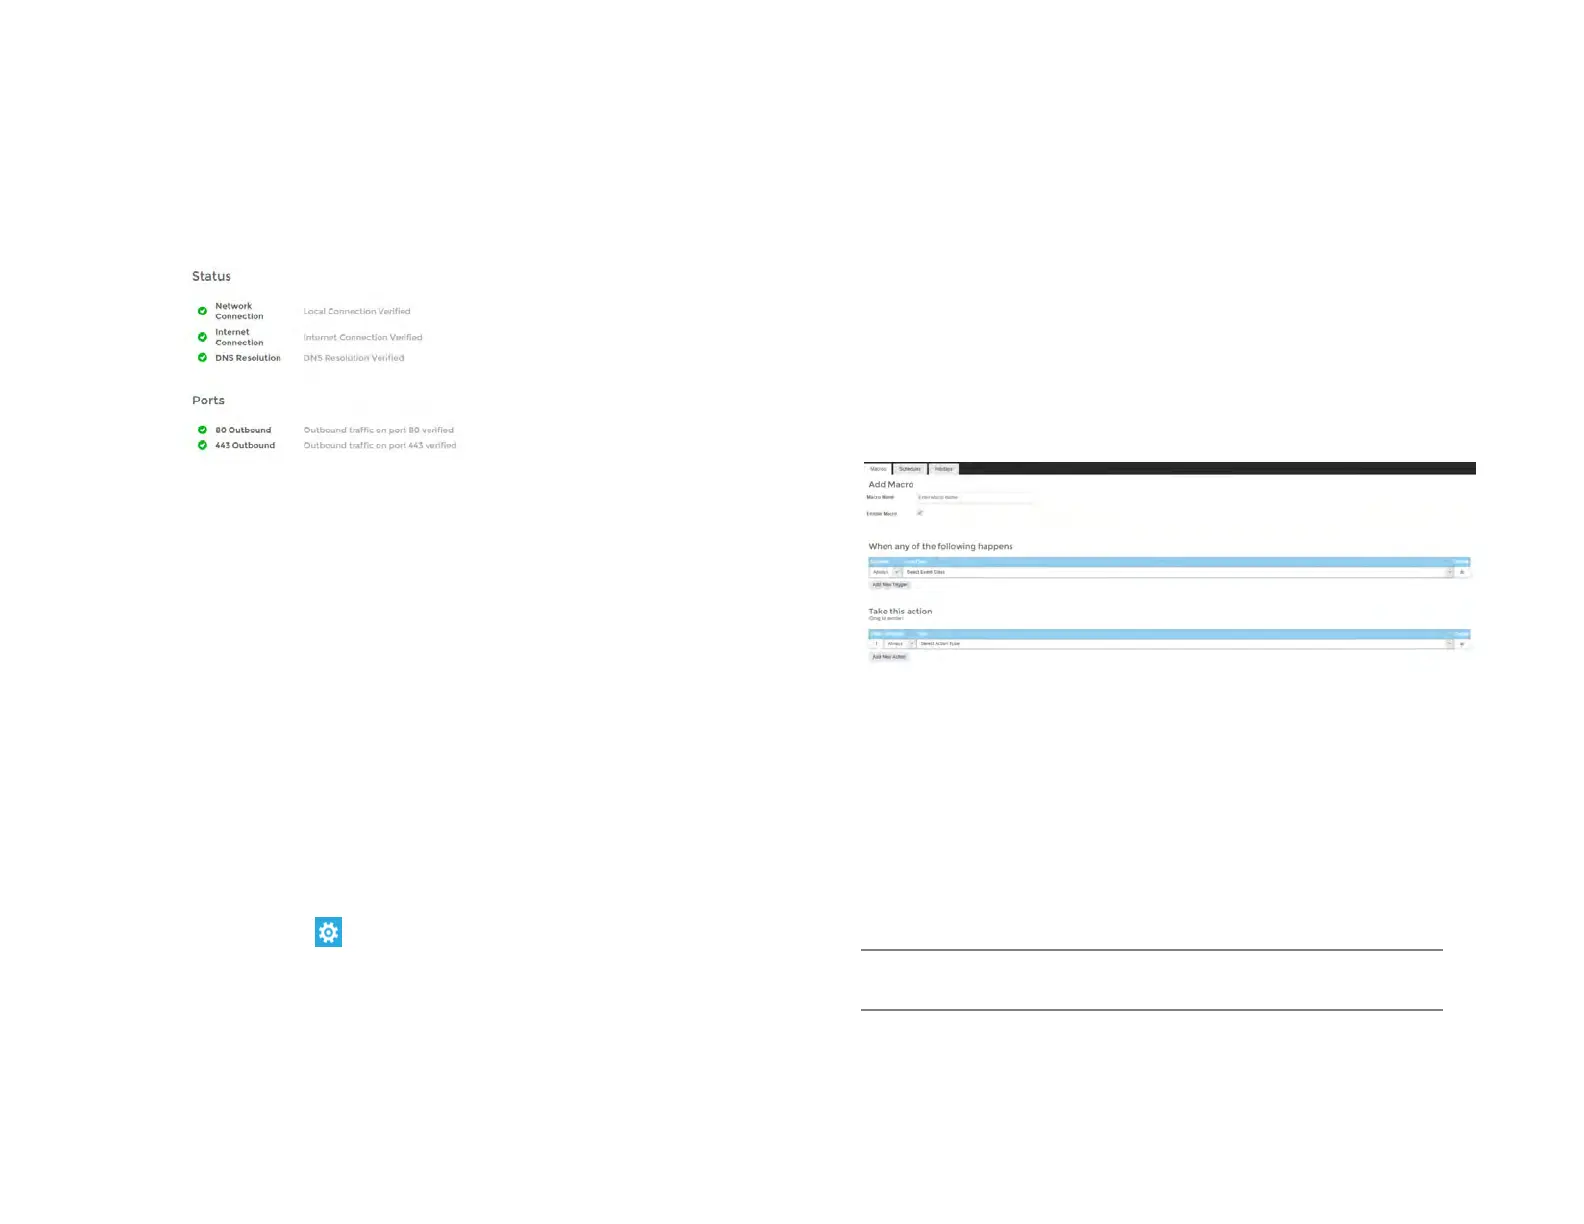
Macros
Under the macro section you can create custom actions based on
schedule’s and holidays.
Managing Macros
Create custom actions based on schedules and holidays in the macros
section.
Add a Macro
1. Click Add A Macro.
2. Enter the macro name in the Macro Name field
3. Check the Enable Macro box.
4. Select the drop down under the Schedule option to modify when a
trigger is in effect.
5. Select Analytics, Sensor or Motion under the Event Class drop
down.
6. After selecting an Event Class, select the appropriate Event Type
in the Event Type dropdown that corresponds with the desired
analytics, sensor or motion event class chosen in step 5.
7. Select the source IP device in the Source drop down list.
Note You can setup multiple triggers by clicking the Add New
Trigger button.