35146AJ
36
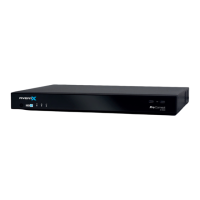
Power Options
Recorders can be powered off or restarted from the local interface;
however, the Web Interface is limited to remote restarts.
SUPPORT TOOLS (LOCAL)
Support tools are a set of utilities that allows you to complete setup or
diagnostic tasks:
Note: Support Tools can only be accessed in the ProConnect NVR
Software locally.
To Enter Support Tools:
1. Click on Settings in the Navigation Bar
2. Click on the Setting tab on the Right column
3. Type the combination Control + Alt + S, then click the “Launch
Support Tools” button.
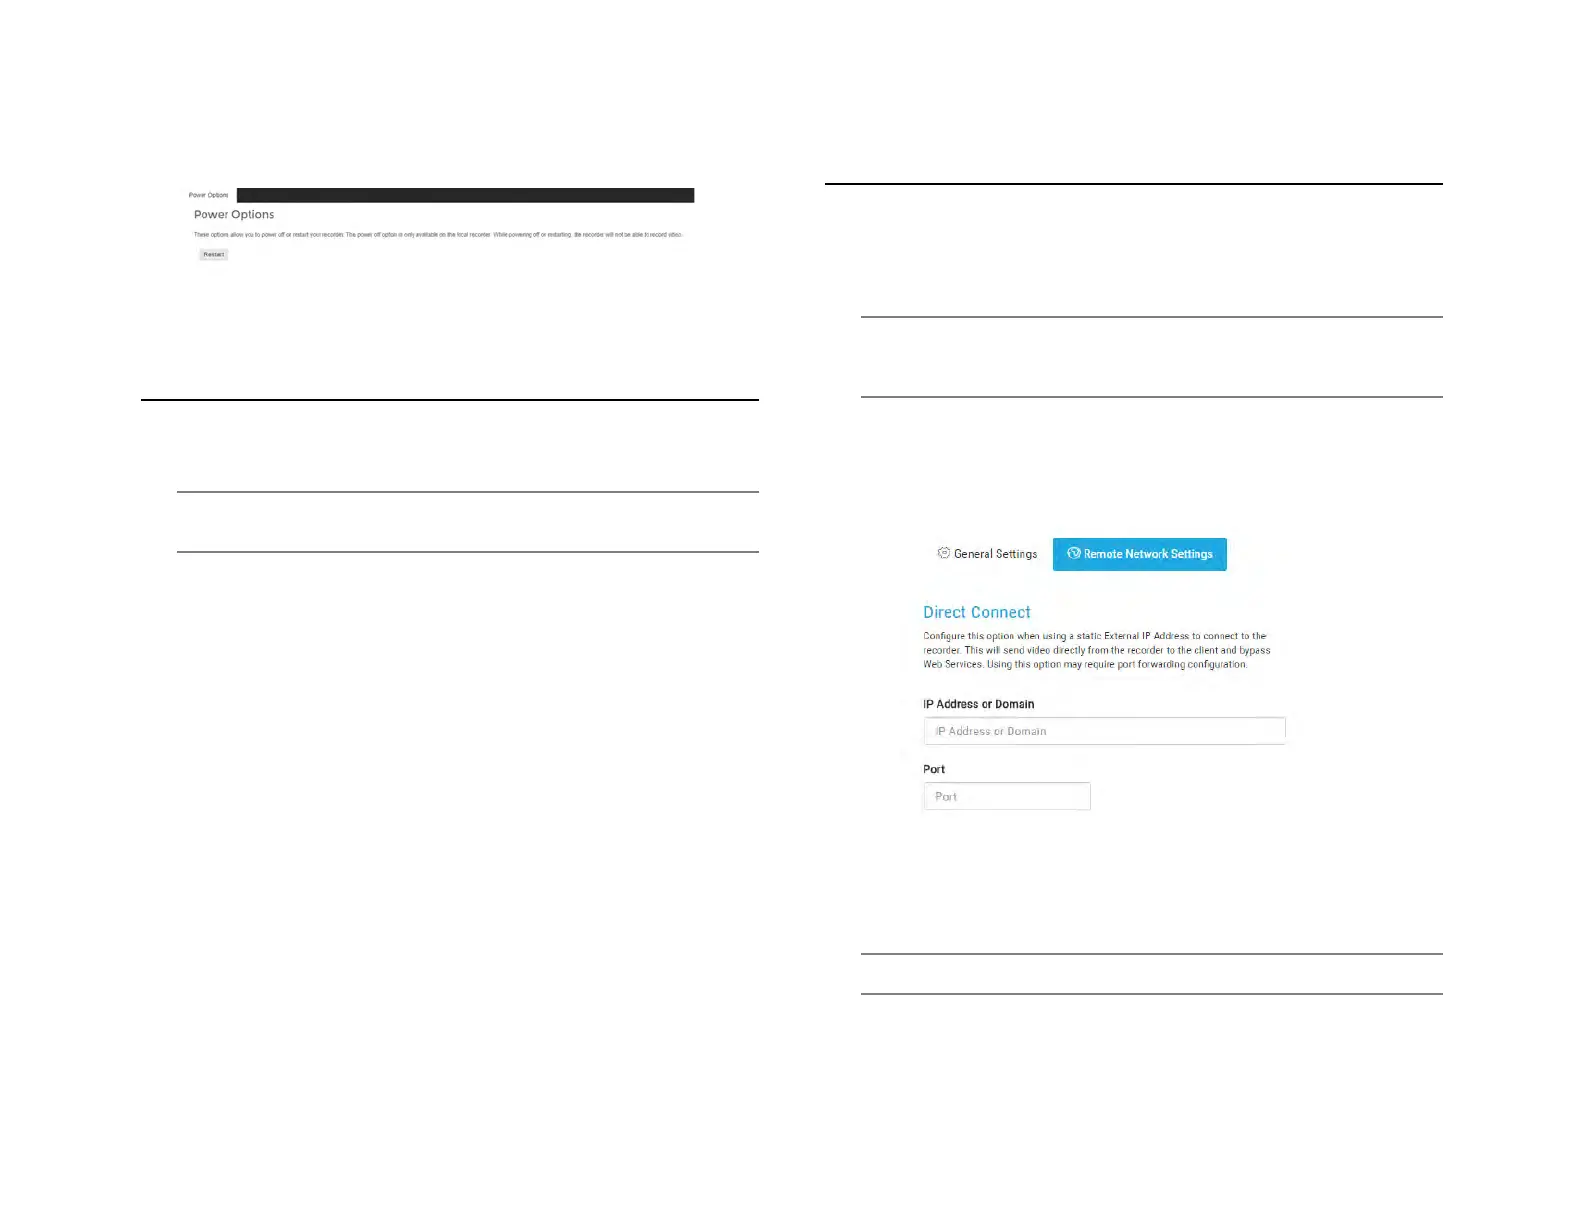
ADVANCED NETWORK MANAGEMENT
With port forwarding, traffic bypasses AvertX Connect, allowing for
optimal connection speeds. Additional setup is required, however,
because the routers need to be configured to forward traffic to the
correct recorder.
Note Visit
http://portforward.com/english/routers/port_forwarding/
for instructions on how to open ports on your particular router.
1. Complete the AvertX Connect cloud relay as instructed above in
the Register ProConnect to Your AvertX Connect Account.
2. Access the router used for internet communication and forward
TCP port 80 to the internal address of the ProConnect Software
recorder.
3. From AvertX Connect, click My Recorders, and then click the
Settings Icon next to the name of the desired recorder.
4. Click Remote Network Settings, and then enter the external IP or
DNS entry for the router in the IP Address or Domain field, and 80
in the Port field.
Note Port 80 is the default port.
5. Click Save.