35146AJ
34
Associated Camera – Allows the association of a specific camera to a
sensor.
Image Offset – The delay between the start of a sensor event and the
time an event is captured
Invert State – Inverts the state of the sensor.
Setting Up A Sensor
1. Enable a specific sensor by checking the box in the Enable
column.
2. Modify the ProConnect sensor number in the Sensor Number
column if needed.
3. To modify the sensor name, type the new name into the Sensor
Name box.
4. Set Normally Open or Normally Closed in the Default State
(NO/NC) drop down.
5. Change debounce default in milliseconds if sensor contact is likely
to break contact constantly.
6. Associate a camera to record with the sensor by selecting a
camera from the Associate Camera drop down.
7. Modify the image offset value if a delay is required when recording
a sensor event.
8. Check the box labeled Invert State if desired.
9. Click Save.
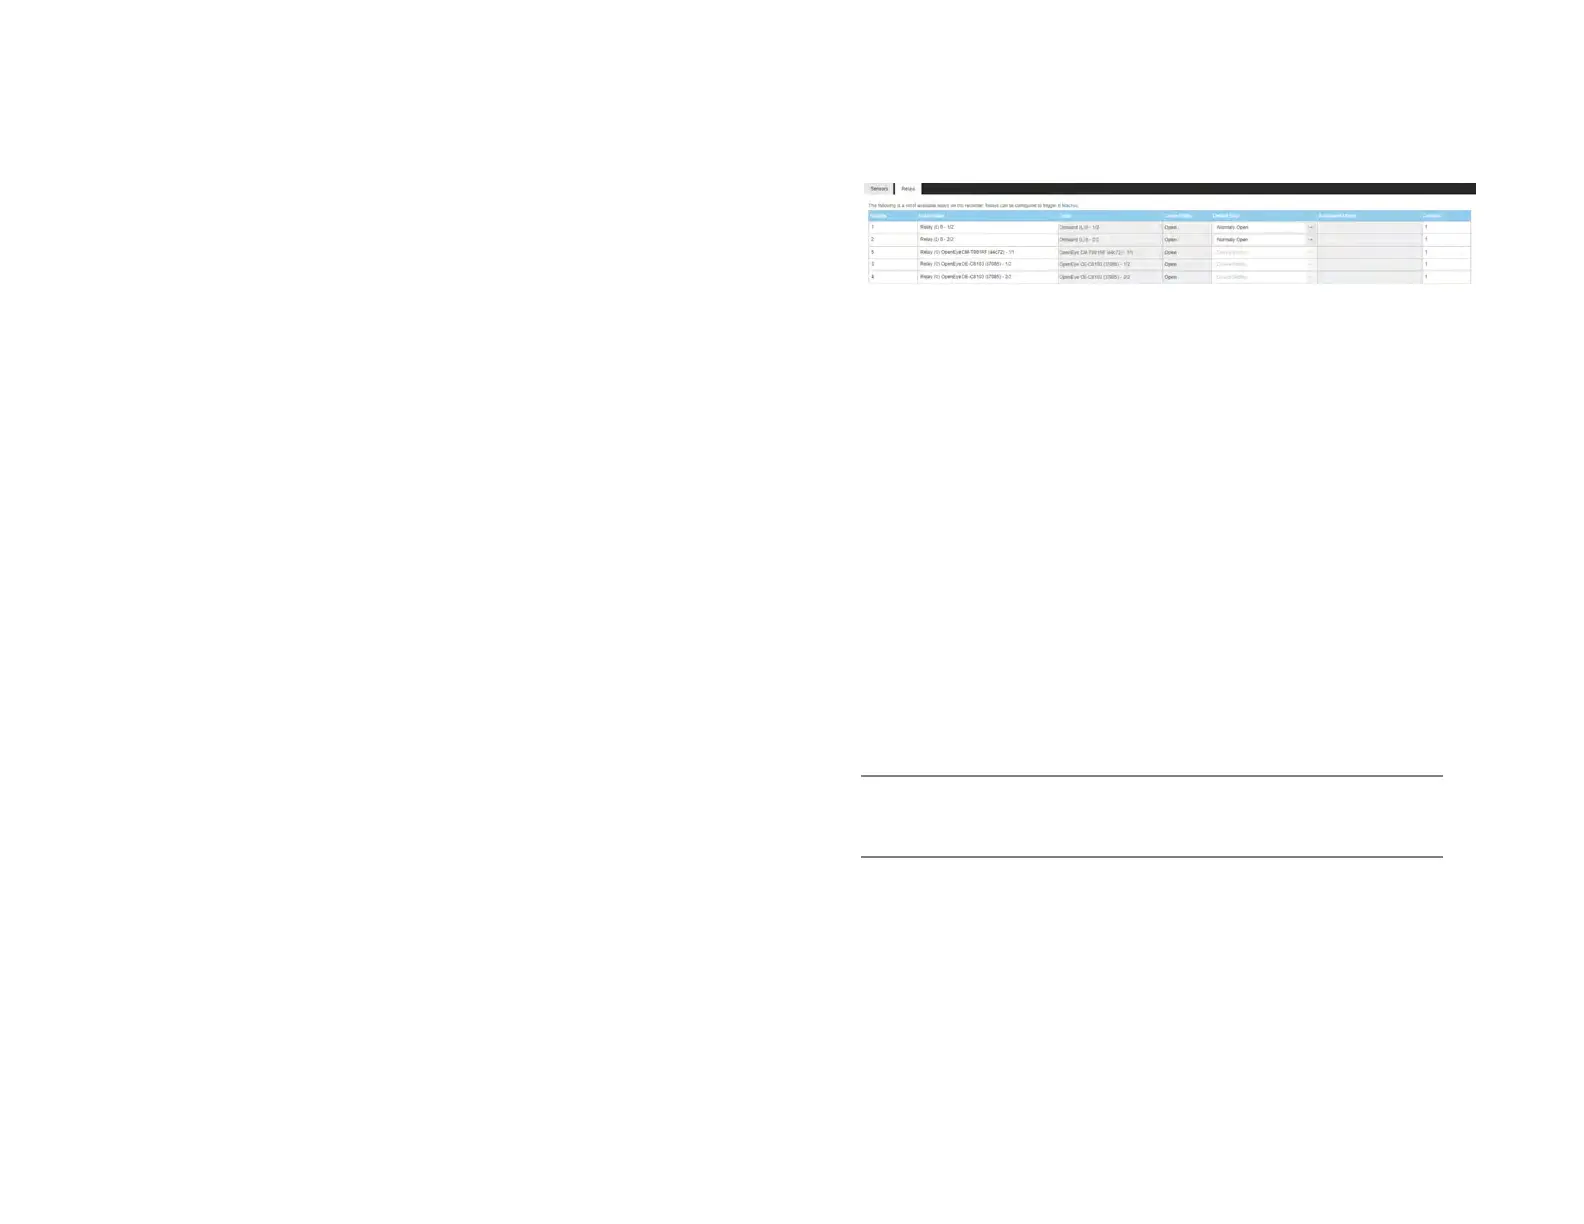
Relays
Relay Number – Relay number associated with the ProConnect
recorder.
Relay Name – Name of the relay associated with the ProConnect
recorder.
Relay Origin – Origin of the relay being used (typically internal to the
recorder).
Current State – Current state of the relay (open or closed).
Default State (NO/NC) – Normally open or normally closed relay.
Associated Macros – Shows any macros associated with a specific
relay.
Duration – The duration the relay will fire when activated.
Setting Up A Relay
1. Modify the relay number if needed by click in the Relay Number
field and hitting backspace until cleared and type in the new
number.
2. Modify the relay name by selecting Relay Name field and hitting
backspace until cleared and type in the new relay name.
3. Set Normally Open or Normally Closed in the Type (NO/NC) drop
down.
Note Refer to the hardware manual for the model of the recorder or
camera for physical installation instructions of sensors and
relays.
4. Modify the Duration if the momentary activation time needs to be
modified.
5. Click Save.