10 XR Series Installation and Technical Instructions
Installation
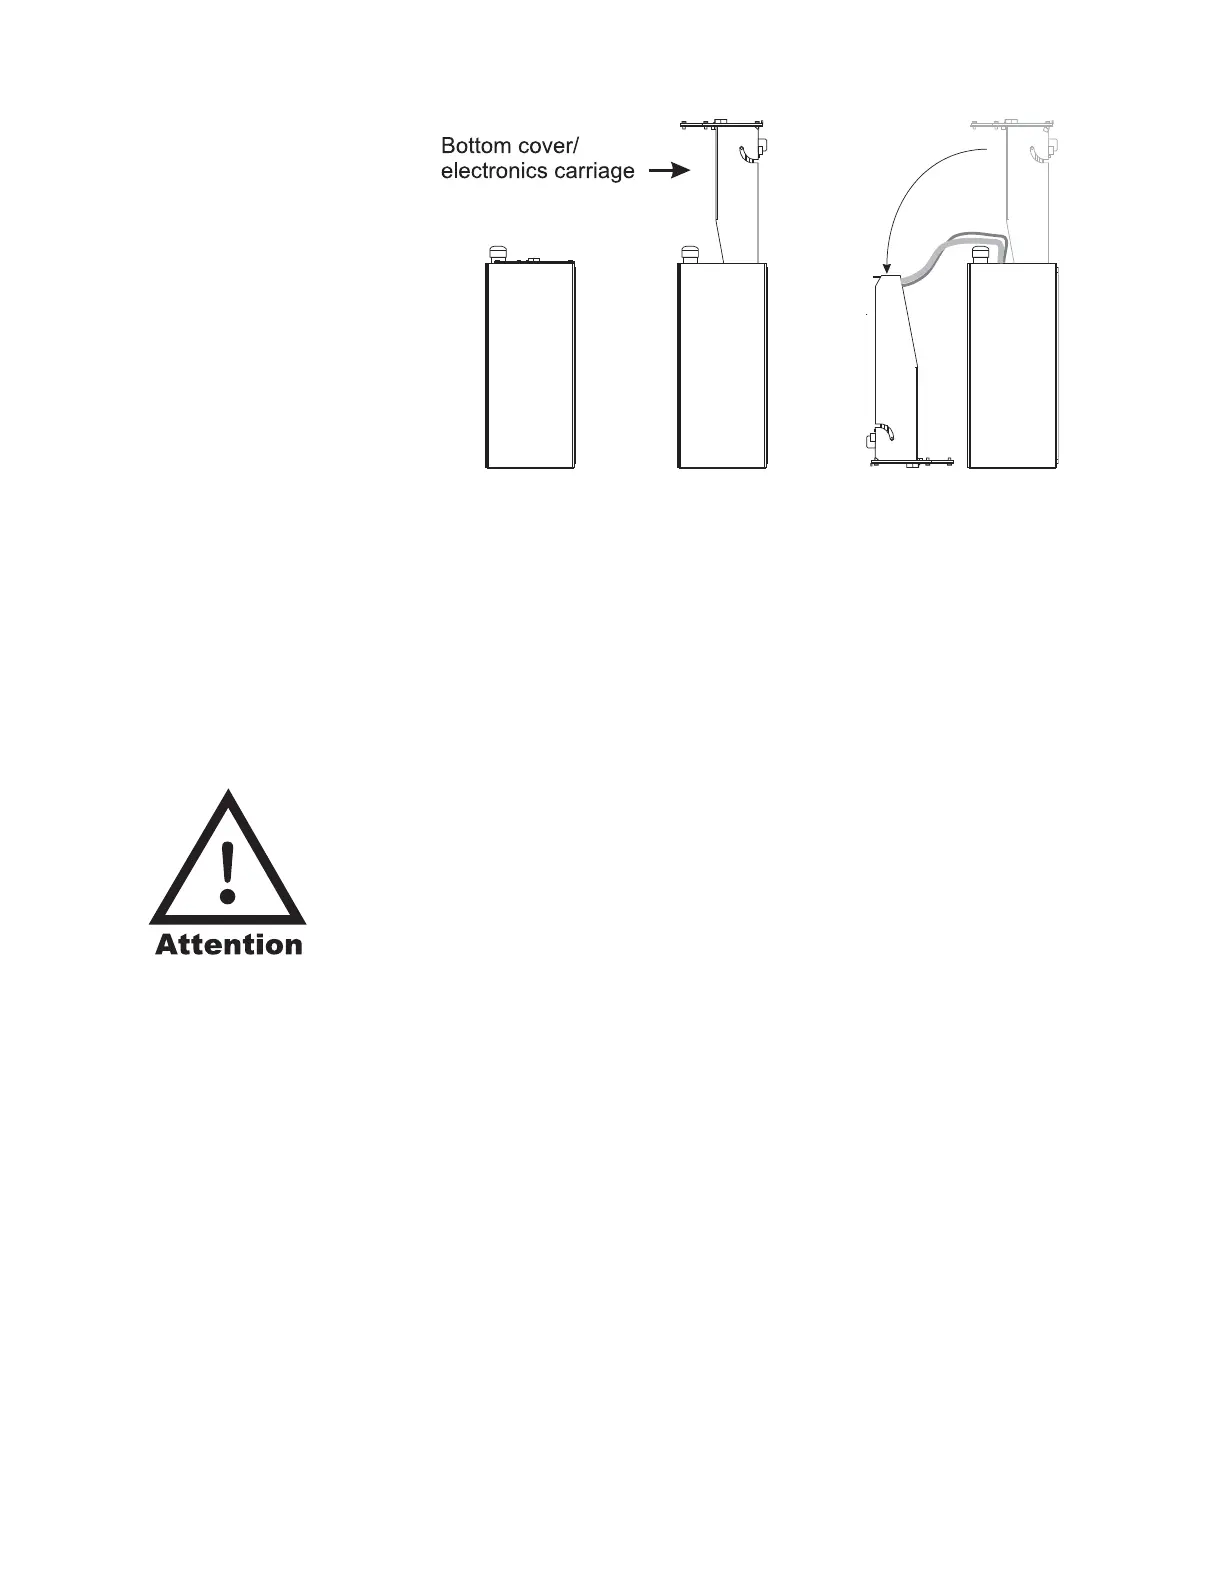
Figure 2.1 Opening the XR 4500 / 4500TL / 6500 (side view)
Removing the Electronics
Carriage
1. Once the electronics carriage has been removed from the main
enclosure, disconnect the AC power and ground connections from the
power supply board.
2. Disconnect the green ground wire from the Electronics Carriage
frame.
Mounting Instructions 1. Inspect the installation site for properly grounded power.
The electronics carriage may be
removed to reduce weight when
installing.
Mounting hole size in the case is
3/8”.
2. Ensure that mounting structures (walls, pole brackets, etc.) will bear
the weight of the display (XR 4500: 20 lbs, XR 6500 & 4500TL: 32
lbs).
3. Allow proper clearance for lowering and removing the electronics
carriage.
4. Use proper hardware, including wall anchors where necessary, when
mounting the enclosure. Secure the main enclosure to wall or pole
mounted bracket with 5/16ths bolts.
5. Run power and communication cables into the enclosure via strain
reliefs (as required).
 Loading...