Chapter 2: Pro Tools | HD I/O Overview 9
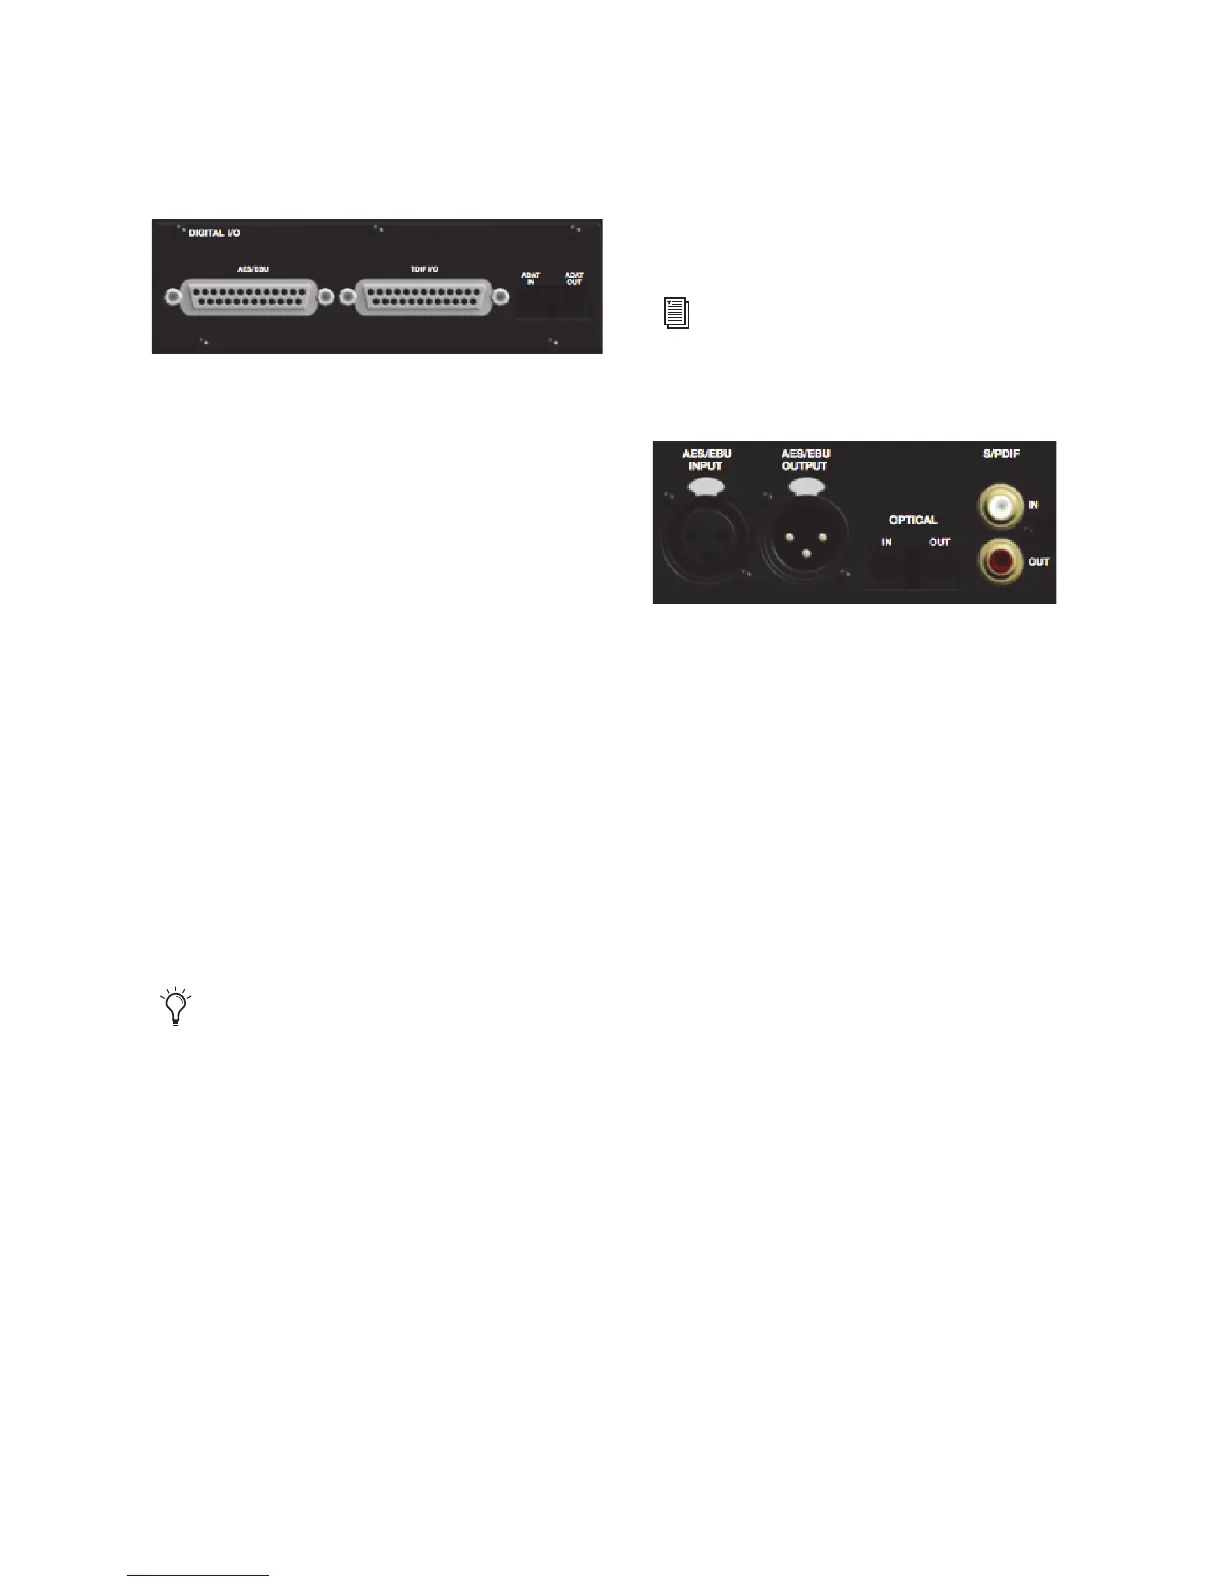
Digital I/O
The Digital I/O card contains connectors for eight
channels each of AES/EBU I/O, TDIF I/O, and
Optical (ADAT) I/O. Only one digital format can
be used at a time.
AES/EBU
DB–25 connectors for eight channels of
AES/EBU input and output. Each of the paired
channels is a balanced three-conductor signal, and
supports 192 kHz sample rates in single-wire
mode up to eight channels. Dual-wire mode uses
two HD I/O physical I/O channels of AES/EBU
I/O to carry each single stream of 176.4 kHz or
192 kHz audio. Therefore, only four simultaneous
channels of AES/EBU I/O are available at
176.4 kHz or 192 kHz.
TDIF
DB–25 connectors for eight channels of
TDIF input and output. Conforms to standard
eight-channel TDIF pinouts. For more informa-
tion, see Chapter 6, “Pinout Diagrams for the DB-
25 Connectors.”
Optical (ADAT)
Dedicated, eight-channel 24-bit
capable Optical ports (up to 48 kHz), with real-
time sample rate conversion on input (only). Note
that Optical S/PDIF is not supported with the Dig-
ital I/O card and is supported with the enclosed
Optical ports only (for more information, see “Op-
tical (ADAT) [Encl]” on page 10).
The inputs on the Digital I/O card feature real-time
sample rate conversion. For example, you can
stream audio with a sample rate of 44.1 kHz into a
96 kHz session.
Enclosure Connectors
The right half of the back panel of HD I/O features
a set of non-removable connectors that are
mounted to the enclosure.
These connectors include two channels of
AES/EBU IO, Optical I/O (for another eight chan-
nels of ADAT format, or two channels of Optical
S/PDIF), and two channels of coaxial S/PDIF I/O.
On-screen, these connectors are identified as
AES/EBU [Encl], Optical (ADAT) [Encl], Optical
(S/PDIF) [Encl], and S/PDIF [Encl].
Other connectors include Loop Sync, External
Clock, and ports for attaching the HD I/O to HDX,
HD Native, or Pro Tools|HD cards, or to other
Avid HD audio interfaces.
We recommend using Avid DB-25 TDIF
cables for optimum compatibility.
For more information, see“Hardware Setup”
on page 21.