Chapter 5: Adding or Removing I/O Cards 31
Chapter 5: Adding or Removing I/O Cards
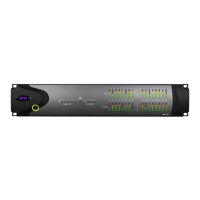
Pro Tools | HD I/O has four Expansion I/O bays
on the back of the unit. Depending on which ver-
sion of HD I/O you purchased, one, two, or none of
these bays may be empty and available for addi-
tional I/O cards:
• 8 x 8 x 8: three bays are used and the fourth bay
is empty
• 16 x 16 Analog: all four bays are used
• 16 x 16 Digital: two bays are used and two are
empty
The Expansion I/O bays let you configure HD I/O
with any of the following Expansion I/O cards
(each sold separately) to increase the amount of
available I/O on the unit:
• HD I/O AD Expansion card
• HD I/O DA Expansion card
• HD I/O Digital Expansion card
The factory-installed cards can be removed, if
needed, for servicing, or to swap out cards for dif-
ferent studio setups. If you remove any of the cards
from the HD I/O, the unit will continue to function
as long as at least one card is installed (albeit with
reduced I/O capabilities).
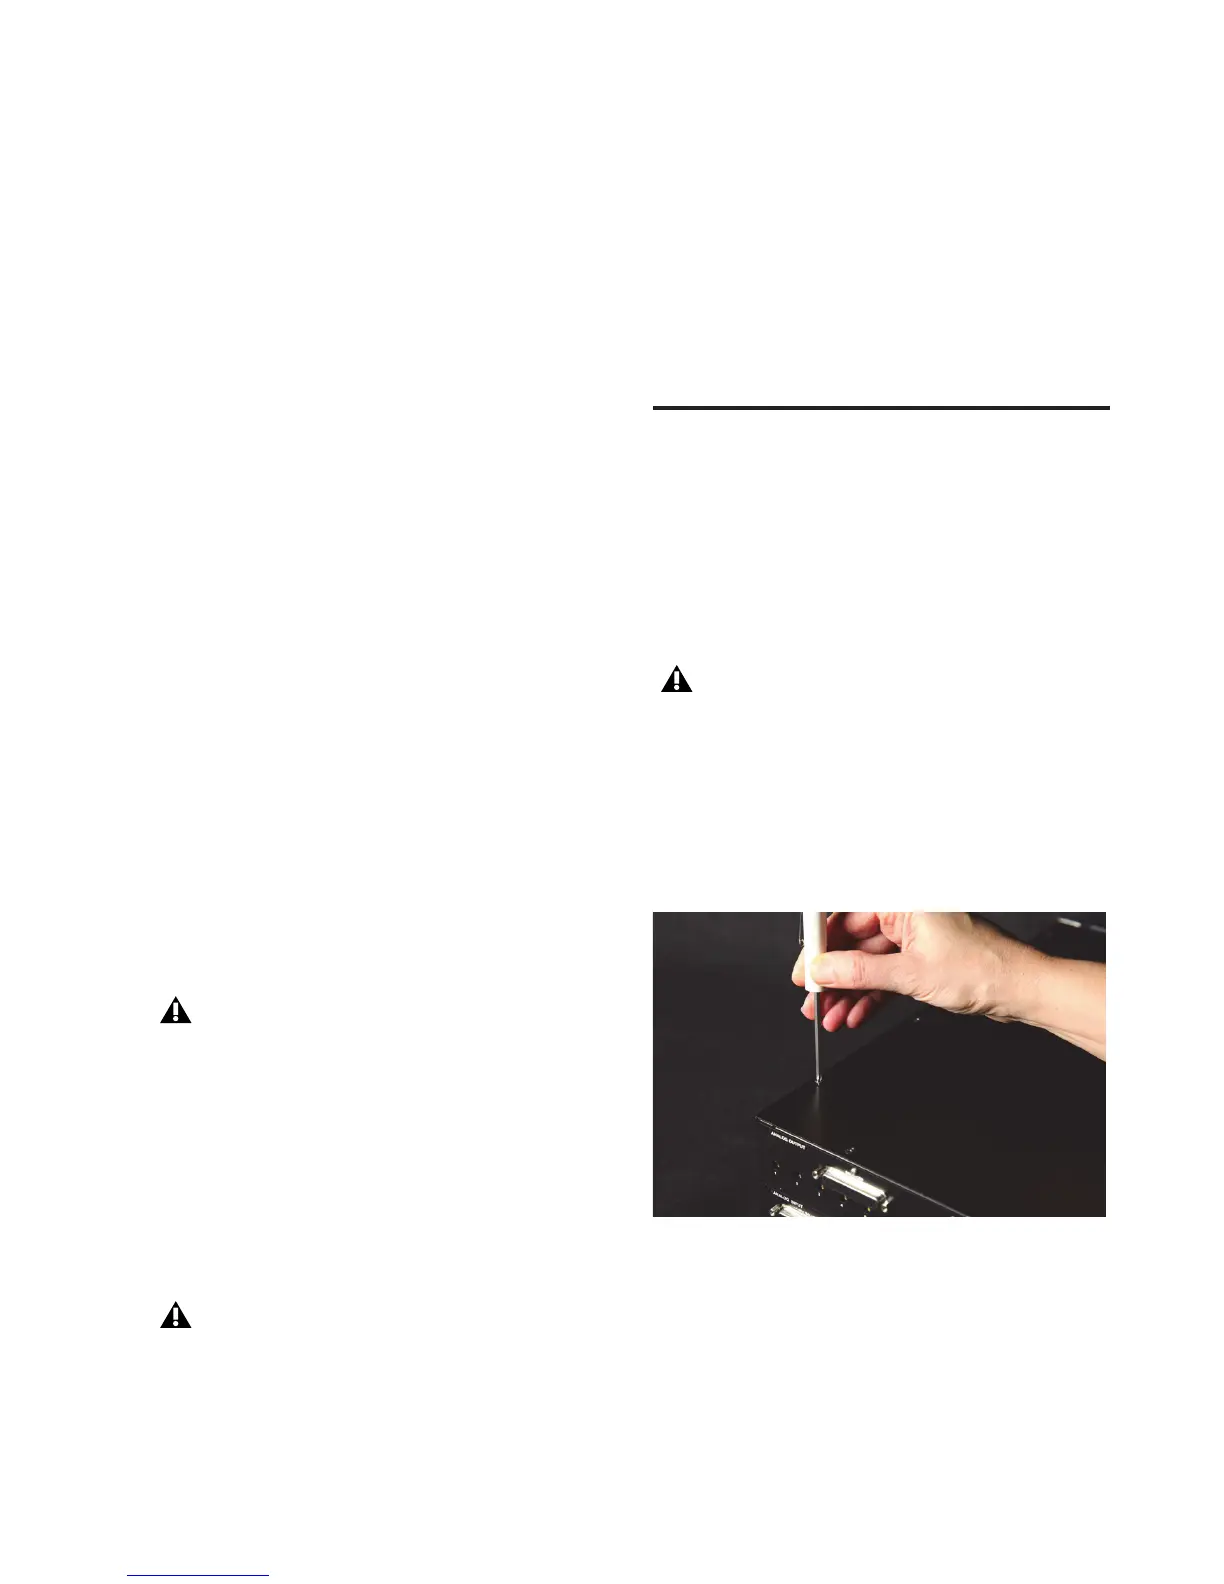
Removing an I/O Card
To remove an Expansion I/O card:
1
Power off and disconnect the HD I/O from your
system.
2
Make sure that the equipment is properly
grounded.
3
Remove all of the small Phillips-head screws
around the edges of the top cover. Put the
screws in a safe place.
4
Lift off the top panel of the HD I/O and set it
aside.
It is important that you follow the guidelines in
this chapter to avoid damaging your HD I/O
or any of your I/O Expansion cards.
Legacy 192 I/O AD, DA, and Digital Option
cards are not supported with HD I/O. Any
attempt to install legacy 192 I/O cards will
void the warranty for your HD I/O.
Before handling any of the cards or internal
components of HD I/O, discharge any static
electricity by touching the outer casing of the
power supply.
Removing the top cover screws