Pro Tools | HD I/O Guide32
5
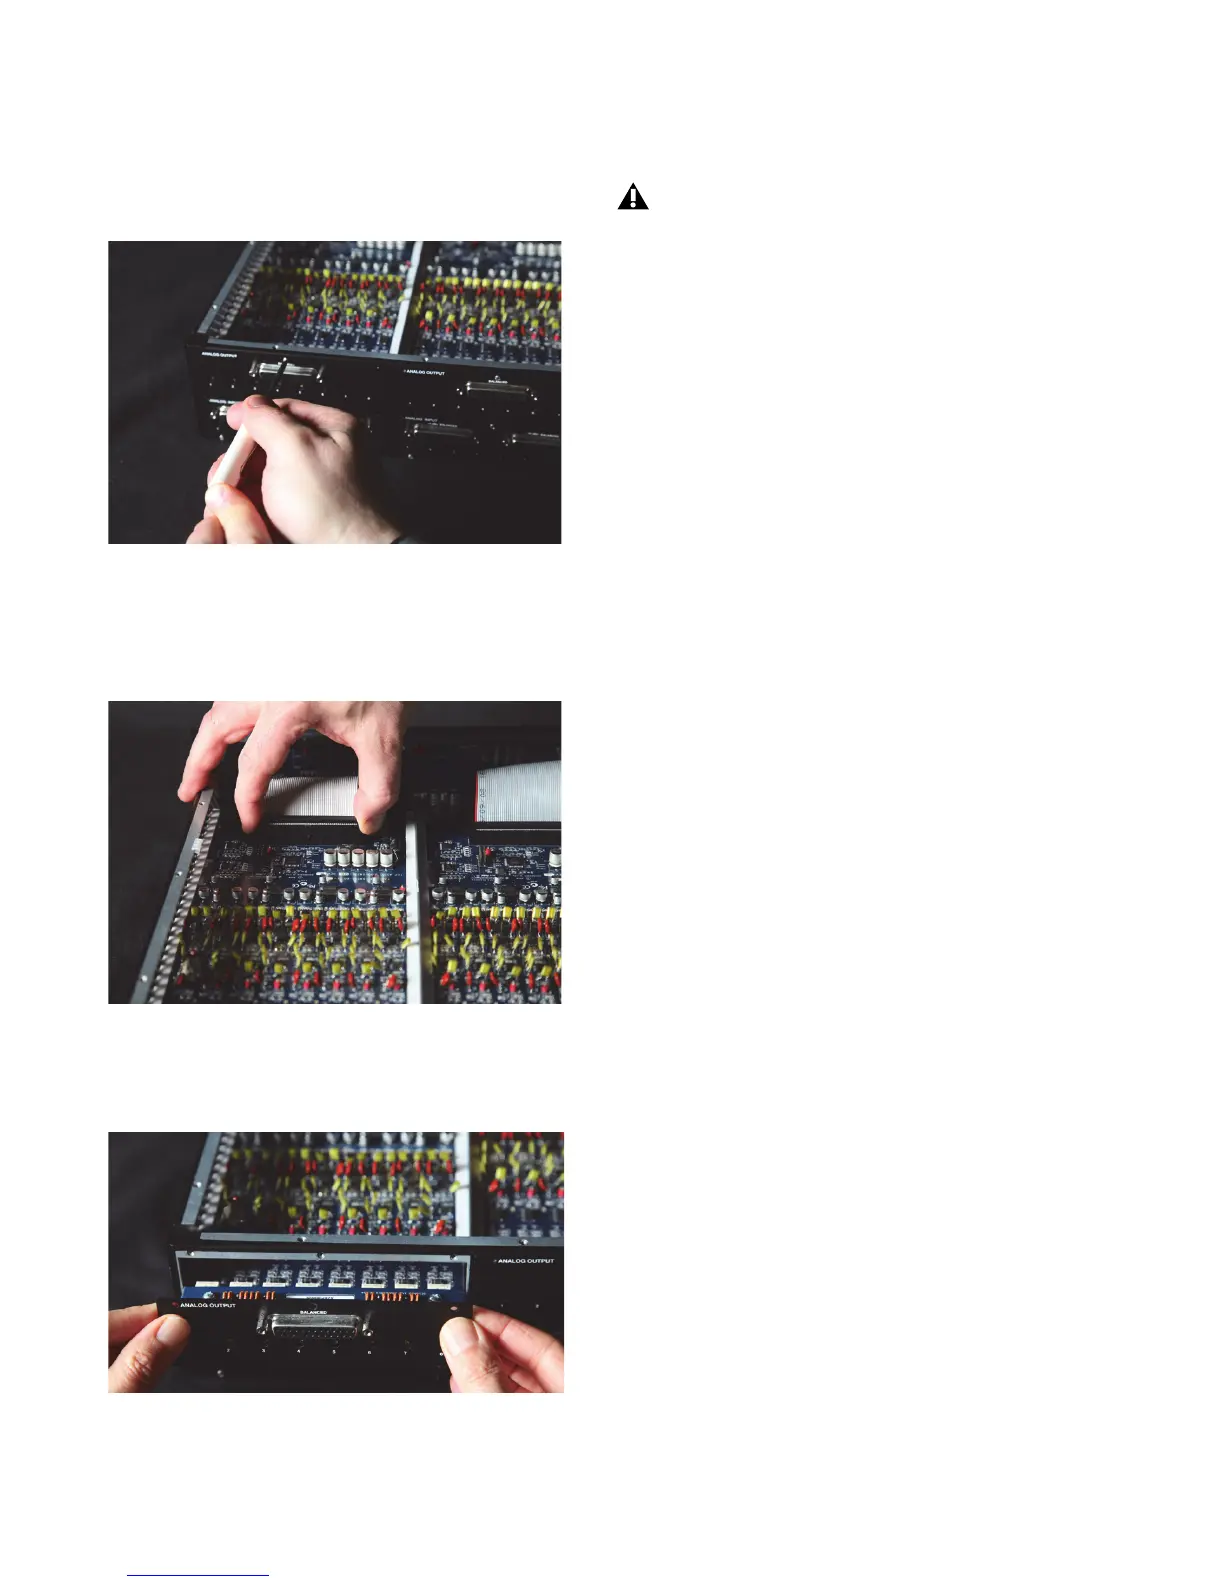
Remove the screws on the back panel for the
I/O card you want to remove.
6
Holding the 50-pin cable which connects the
card to the HD I/O chassis firmly, gently pull
the cable connector from the card’s connector.
7
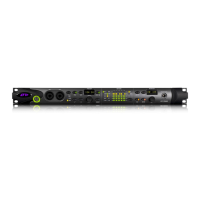
Gently remove the card, pulling it straight out
from the chassis.
8
Place the card in a static-free bag and keep it in
a safe place (if you are not sending it to Avid for
service).
9
Firmly grasp the 50-pin cable connector to the
HD I/O chassis and gently pull to remove it (be
sure to keep the cable in a safe place).
10
If you have a cover for the empty expansion
bay, secure the cover over the empty bay with
the screws you removed from the I/O card.
11
Replace the top cover on the HD I/O.
12
Replace the original screws.
Hardware Setup Changes After
Removing a Card
In this case, the Hardware Setup dialog will reflect
the change to the installed I/O cards. The remain-
ing inputs and outputs will function normally.
For example, if you remove the Analog Input card,
the Analog Input tab will disappear from the Hard-
ware Setup dialog.
You will lose the configuration of any pairs of in-
puts or outputs that were assigned to the card being
removed.
Removing the screws securing an I/O card
Removing the 50-pin cable connector from an I/O card
Removing an I/O card from the HD I/O chassis
When you pull a card out, pay particular at-
tention to keeping components on the sur-
faces of the card from bumping into any of
the internal components or the back panel
faceplate on the HD I/O.