1. Attach the cameras to a 2-wire twisted pair bus (maximum length 1200m) that is terminated at both
ends with a 120Ω-impedance resistor.
2. Ensure that the maximum distance from the bus to the back of the camera or controller is 5m. If you
use only ONE camera, the impedance resistor is not needed.
Figure 14: RS-485 Network Connection Diagram
If you use an RS-485 cable for medical purposes, it is important to note that the maximum cable length must
NOT exceed 1200 meters.
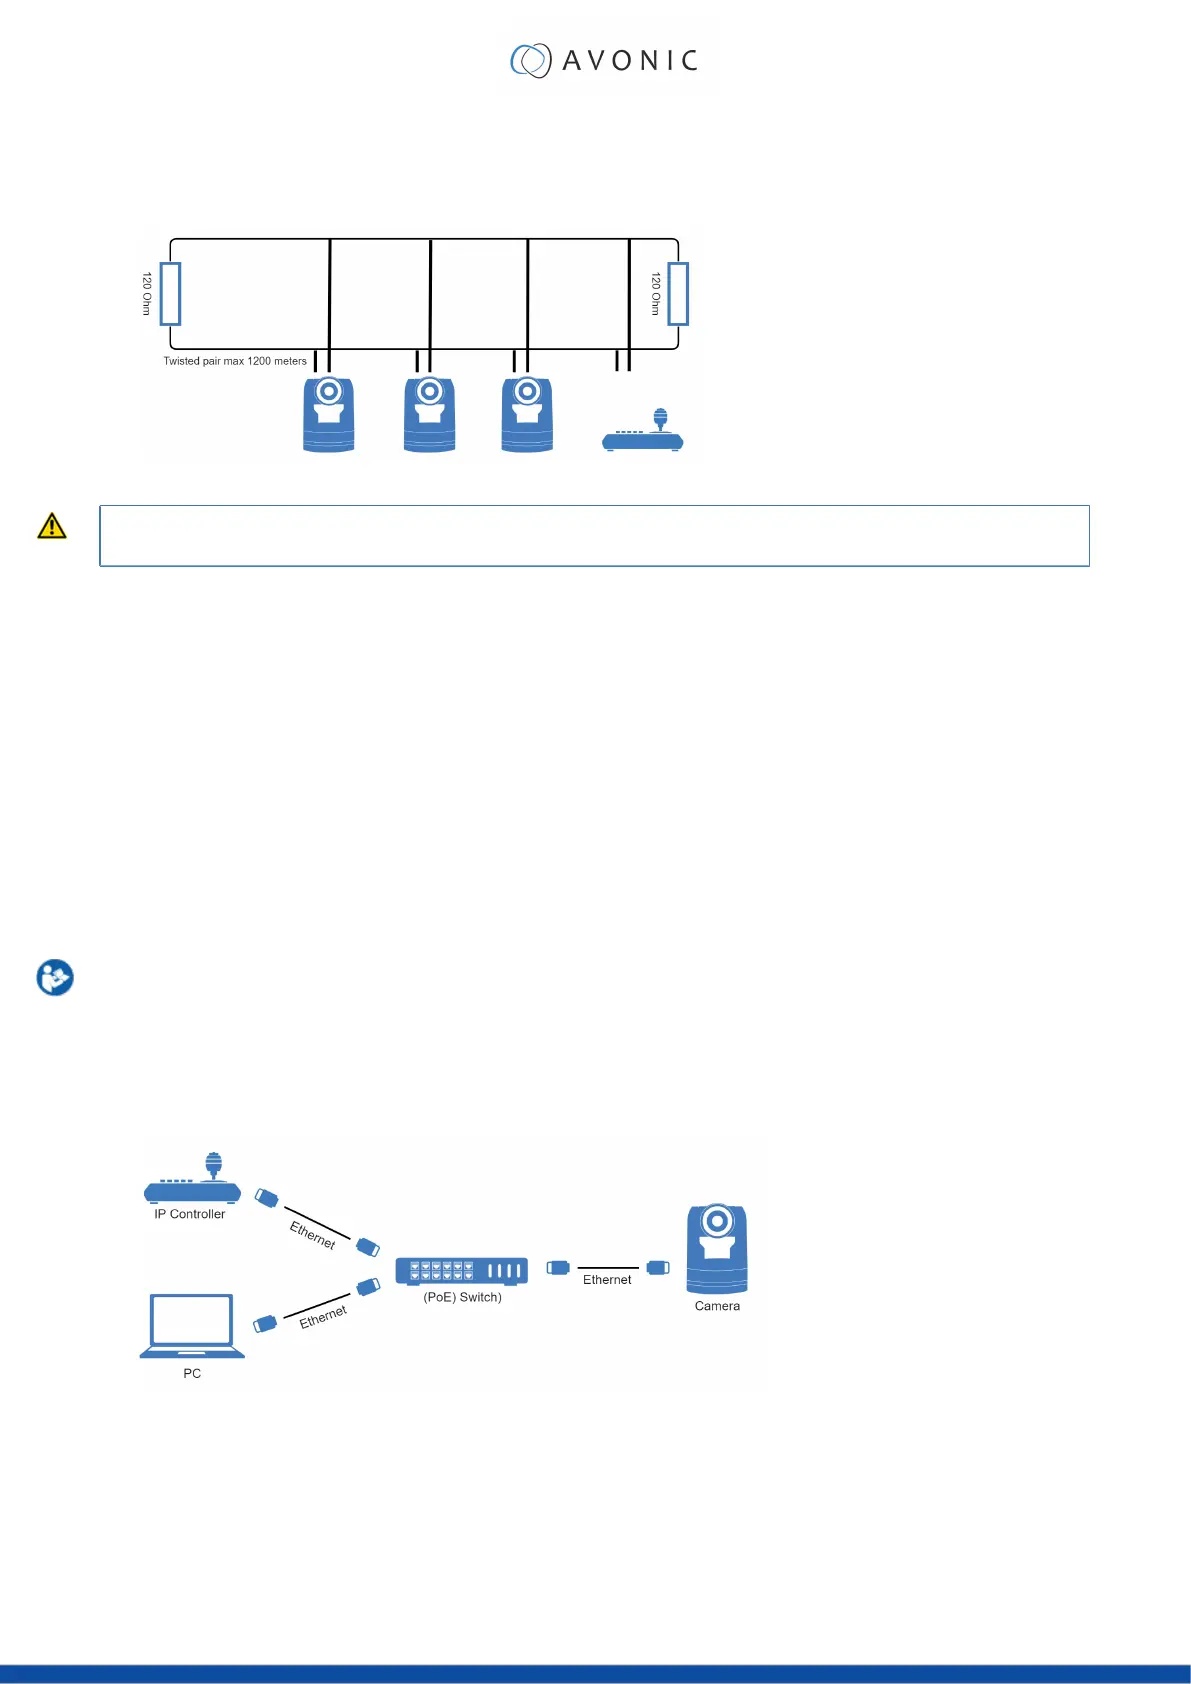
Connecting via LAN
Avonic IP cameras can be controlled by any device using the Visca over IP protocol (see the command list in
Appendix A - VISCA Settings and Command List).
Settings
By default, the IP address of the camera is "192.168.5.163" with "admin" for both the username and password.
The control parameters for the cameras are as follows:
• IP Address: 192.168.5.163
• Username: admin
• Password: admin
• TCP or UDP port: 1259
IP (Network) Connection
Execute the following steps an Avonic PoE camera to a LAN:
1. Use a standard (PoE) switch. If the unit is simultaneously connected to both PoE and its own power
supply, the power supply will take priority. If the power supply is disconnected when PoE is present, the
camera will remain operational without interruption.
2. Ensure that addressing is done via IP. When using VISCA over IP, the 'x' in all the '8x' addresses is always
'1', where the Visca address in a Visca over IP environment is always 1. (See Appendix A - VISCA
Settings and Command List for more information.)
Figure 15: IP Network Connection Diagram
19
 Loading...