Page 10 AXIS HOV Housing VT
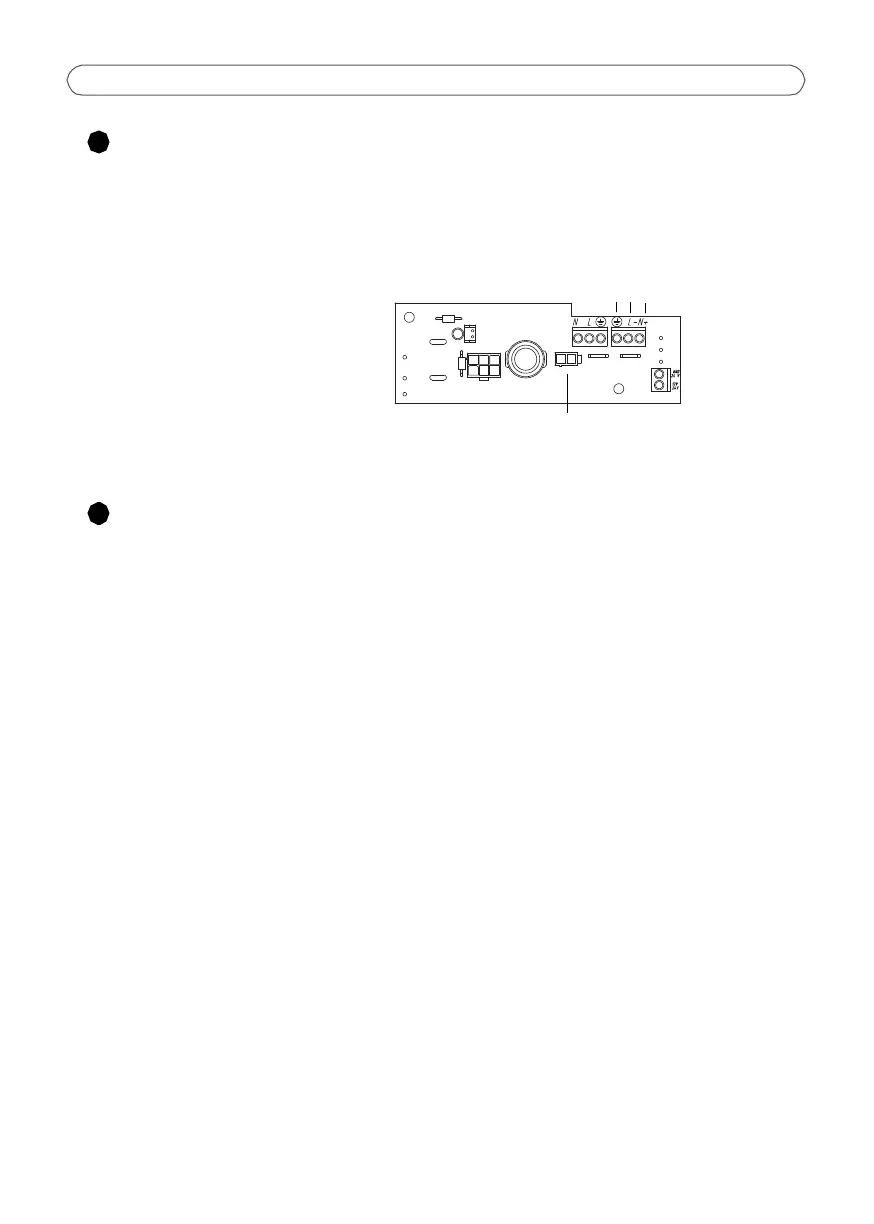
Connect the 100-240V AC power cable to the housing
Warning! High voltage - the electrical connection should be made by an authorized electrician.
Please observe relevant national and local regulations for the installation.
1. Using the small flathead screw
driver, loosen the screws in the
Power in connector on the
connector board (fig.7).
2. Insert the (+) (-) and GND wires in
the connector and tighten the
screws to secure the wires.
3. Do not apply power until the
installation is complete and all wires and cables have been connected.
Complete the installation
1. Check that all cables and wires in the housing are properly connected.
2. Connect the AC mains power cable and check that the LEDs on the camera light up
according to the description in the Installation Guide.
3. Follow the instructions in the Installation Guide to install the camera on the network.
4. Once the installation is complete and the camera focus has been set, close the lid and
tighten the screws to lock the housing using the supplied hexagonal key.
5. The installation is now complete.
Note: The Axis network camera installation guide is shipped with the camera or available
from the Axis web site at www.axis.com
Power in (100-240V AC)
GND - +
Heater connector
FIG.7