AXIS P1347 Network Camera
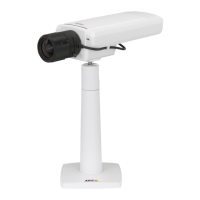
Hardware overview
Green
Normal oper ation.
Power
Amber
Flashes green/amber during firmware upgrade.
Note
• The Status LED can be configured to b e unlit during normal op eration. To configure, go to Setup > System Options >Ports
& Devices >LED. See the online help for more infor mation.
• The Status LED can be configured to flash while an event is active.
• The Status LED can be configured to flash for identifying the unit. This can be done under Setup > System Options >
Maintenance.
Status LED when using Focus Assistant
Status Color
Indication
Green
Focus Assistant is enabled
The lens is optimally adjusted
Amber The camera has been moved, o r an object has been inserted in front of the lens. Exit and
restart the Focus Assistant.
The le n s is less optimally ad jus ted
Red The camera has been moved, o r an object has been inserted in front of the lens. Exit and
restart the Focus Assistant.
The lens is poorly adjusted
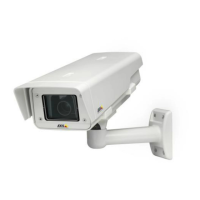
Replacing the lens
It is possible to u se optional lenses for the Axis product.
To replace the lens:
1. Disconnect the iris cable.
2. Unscrew the standard lens.
3. Attach and screw on the new lens.
Note
There is no need to restart the A xis product after changing the lens. However, the product must be restarted if you are
interchanging between a P-iris, DC-Iris or fixed/manual iris lens. In order to set the focus and position the lens, the Axis
product must be connected to the network.
To change the iris configuration:
1. Go to Setup > Video and Audio > Camera Settings. Iris configuration shows the current configured iris type.
2. Click Edit.
3. Select the installed iris lens from the d rop-down list and click OK.
8