Scheduling Valve Position Change
OTE:N Scheduling a valve to open can only be set for the next communication.
1. On the Monitor page in BEACON, locate the desired
account. You can use the lters on the left side of the screen,
enter the Account ID, Name, or Meter ID into the Search
eld, or scroll to nd the desired account meter card.
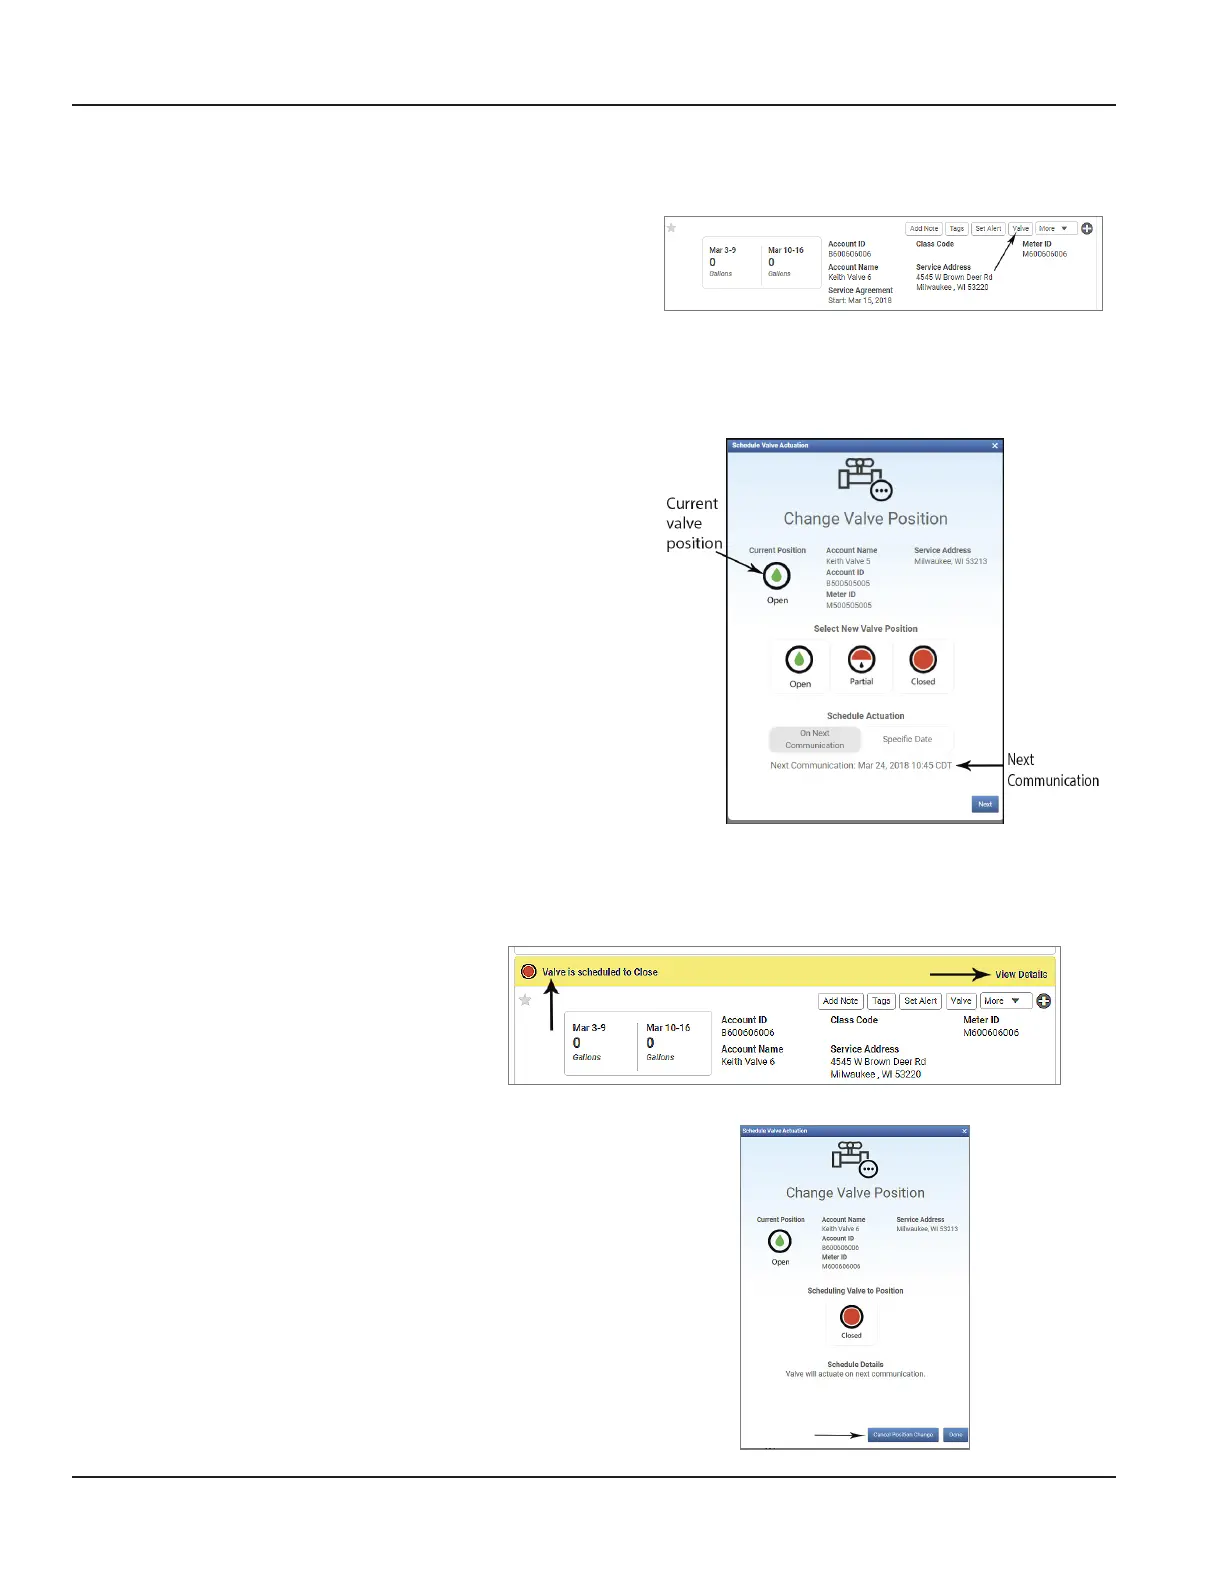
2. On the account meter card, click the Valve button
(Figure 14) to open the Schedule Valve Actuation popup
window (Figure 15).
Figure 14: Valve button on meter card
3. Schedule valve position change.
To schedule actuation for the next communication:
a. Click to select the desired valve position.
b. Click On Next Communication. Then click Next.
c. On the conrmation window that opens, click Conrm.
The valve will move at the next communication time which is
shown at the bottom of the popup window.
To schedule actuation for a specific date:
OTE:N This option only applies to closing a valve.
a. Click to select the desired valve position.
b. Click Specic Date and click the date eld. Choose the
desired weekday from the calendar that displays. Then
click Next.
c. On the conrmation window that opens, click Conrm.
The valve will move on the date shown at the bottom of the
window, during the rst congurable time slot as dened in
BEACON Utility Settings. The alert bar on the meter card
(Figure 16) shows the scheduled valve actuation message.
Figure 15: Schedule Valve Actuation popup
Canceling Scheduled Valve Position Change
1. On the Monitor page in BEACON,
click View Details in the meter
card alert bar for the valve that is
scheduled to change (Figure 16).
Figure 16: Meter card alert bar
2. In the popup window that opens (Figure 17) click
Cancel Position Change.
3. The change is canceled and the message is removed
from the alert bar on the meter card.
Figure 17: Cancel scheduled change
Actuating the Integrated Valve In BEACON
Page 14 August 2020ESM-UM-02156-EN-02

 Loading...